Many people want to have more control over their spending, but don’t necessarily find it easy to keep track of all the things they buy. Apps like ReceiptiX aim to help with that. This app lets you upload or add receipts as you purchase things, tracking all your expenditure and generating easy-to-read reports that show where you’re spending the most.
This guide shows how to use ReceiptiX, step by step.
How to Use ReceiptiX
Working with ReceiptiX is very simple, which is one of the main selling points of the app. It’s quick and easy to set up, and you have numerous ways to add a new receipt to the app whenever you make a purchase. Here’s a full look at how it works, one step at a time:
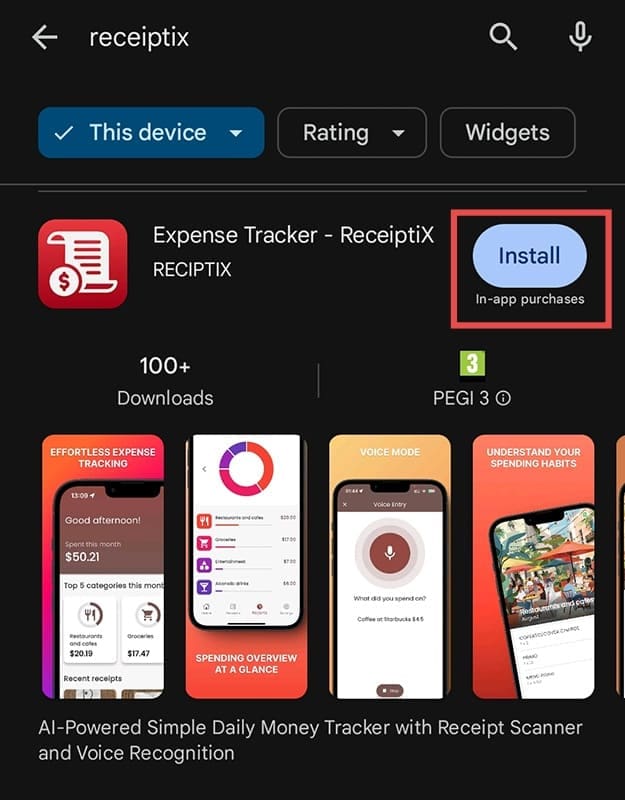
Step 1. Find and download the app on either the Google Play Store for Android devices or the App Store if you’re on an iPhone or iPad. Search for “ReceiptiX” using the search tool, then click the “Install” button.
Step 2. Open the app to initiate setup. You’ll be asked to pick a currency (you can always change this later). Use the drop-down menu to choose, then press “Continue.”

Step 3. You’ll be asked to enable voice mode on your device if you want to add receipts using your voice. Choose whether you want to do this, then press “Continue” on the next setup pages until the app is ready to go.

Step 4. You’ll arrive on the dashboard of ReceiptiX. This is where your latest receipts will appear as you add them and where you can view your biggest spending areas of the month. At the beginning, this will be blank.

Step 5. Tap the “+” icon to add a receipt. You have multiple options here. You can either upload the receipt in the form of a file, take a photo of your receipt, upload a picture from your gallery, or just use your voice and say what you bought and how much it cost.

Step 6. As you add receipts, they will start appearing on your “Home” tab. The tab will also display your top five spending categories, e.g., grocery shopping or eating out at restaurants and cafes. Tap any receipt to view it.

Step 7. While viewing a receipt, you can press the three dots icon in the top right corner to open a small menu of options. From there, you can tap to share the receipt, delete it, or edit it either with your voice or your device’s keyboard.

Step 8. You can also tap on the “Reports” tab at any time to view reports of your spending so far. It displays the total amount you’ve spent for the month, a pie chart breaking down spending in different categories, and exact amounts spent per category.

Related Posts
 How to Recover Deleted App Data on iPhone
 How to Get App Lab on the
 How to Change the Game Language on the EA App
 What is Kodi? Everything You NEED to Know about The TV Streaming App
 What Is DiscordPal – Explaining the Discord-Based AI Friend App
 MemeGen – How to Use This AI App to Create Memes in Discord
 Cash App Weekly Limit Reset – A Guide
 Cash App: How to Verify Your Identity and Bitcoin
Disclaimer: Some pages on this site may include an affiliate link. This does not effect our editorial in any way.

