Google Photos is not only a convenient place to store and organize photos, but it is also a way to share and interact with other users.
Sometimes you may come across an unwanted image that will remain in your history. When that happens, it’s best to remove it to prevent any unpleasant situation from developing, like explaining why you have a certain image in Google Photos history.
In this case, it’s best to clear the history and remove the photo from your activity log. This article will explain how to do it.
Delete All Google Activity
The easiest and most secure way to delete your Google Photos search history is to delete your Google account’s activity for a certain period. However, this method will remove everything that you’ve done on any Google product.
This means that all videos that you’ve searched on YouTube, all Google Images, Google Maps locations, and various other things that are currently logged to your Google account will disappear.
Therefore, make sure you back up everything that you need before proceeding. Or pick a short time that won’t impact too much on your other activities. For example, choosing to clear just one hour of history (where you’ve interacted with that certain Google image) will likely save the majority of important data.
To delete all your Google account activity, follow these steps:
- Go to Google’s My Activity page from your browser.
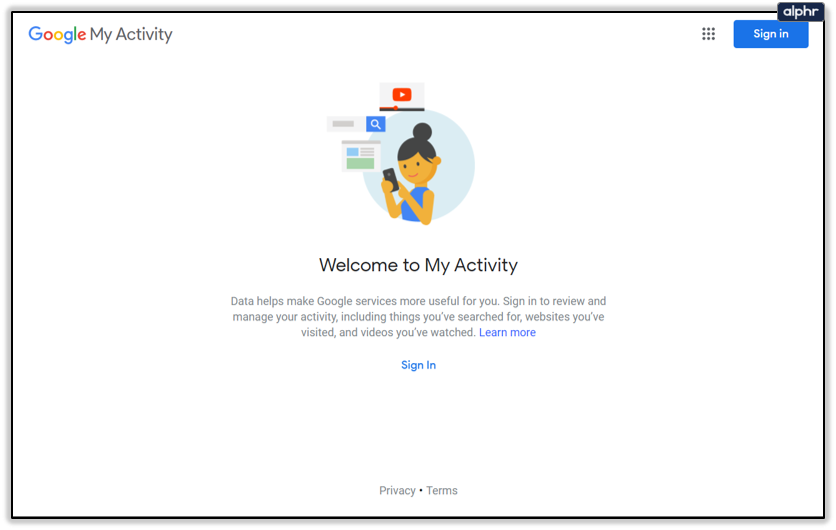
- Sign in with your account’s credentials. Make sure to use the Google account from which you’ve interacted with the picture.

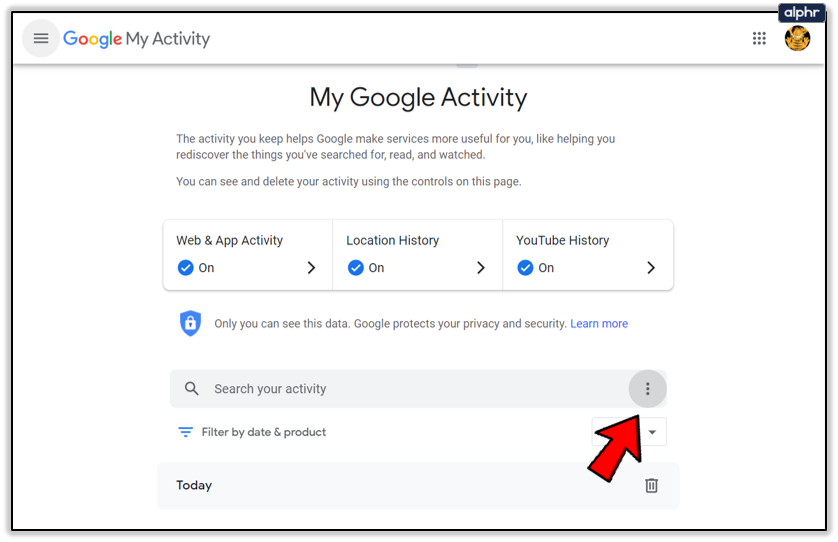
- Click the More icon (three vertical dots) next to the search bar.
- Select Delete activity by from the drop-down menu.
- Choose the desired period from the options to the left.
- Choosing the All time option will erase all items that you’ve ever interacted with via apps connected with your Google account.
- It’s safer to choose either Last hour if you’ve interacted with the photo during that time, or a Custom range period. However, this option will only allow you to choose a period of days. You can’t choose an hourly period.


Once you choose a period, just confirm your choice and the image will disappear from history.
Deleting Individual Activity
If you know the exact moment of your interaction with the unwanted Google image, you may delete this interaction from your activity log.
- To do this, you need only go to Google’s My Activity page and find that item from the feed on the home screen. Also, you can search the item by typing a keyword or date.
- Once you do, just click the More icon (three horizontal dots) next to that interaction and click Delete.

Clear Cache and Storage from Android App
If you have an Android, you can clear the storage and cache from the app’s settings. This will remove the history of the app. To do this, you need to follow these steps:
- Go to the Settings app of your device.
- Open the Apps menu, it can also be listed as Application Information or Applications.
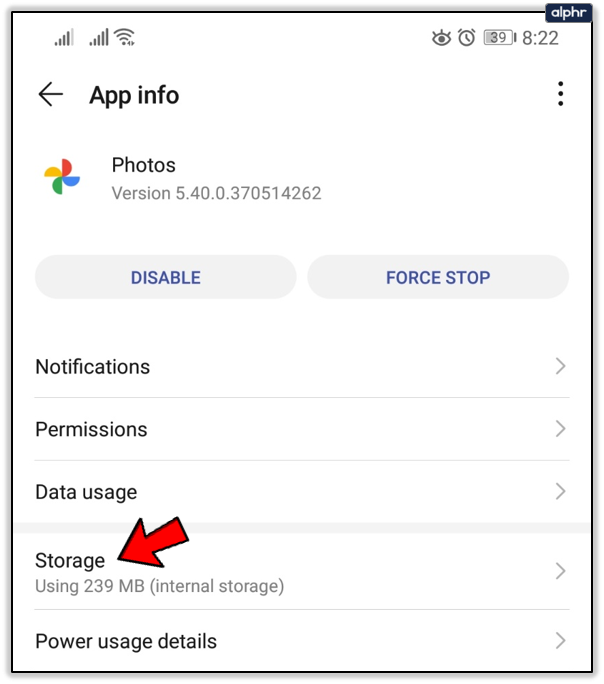
- Scroll the list and tap on Photos.
- Choose the Storage menu under the Usage section.
- Tap Clear Data or Manage Space to clear the data.
- Tap Clear Cache, too.


This will delete the entire history of your app.
Note: you’ll have to sign in to the Photos app again after you perform this method. Therefore, make sure that you have all your credentials to hand before you proceed.
What’s good about this method is that you’ll only clear the history of the Photos app. Unlike the aforementioned method, all other Google activity will remain intact. On the other hand, it will remove the entire app history from the phone, and there’s no way to limit it only to a certain time period.
Disable the App (Factory Reset)
In some cases, the app won’t allow you to clear cache or history. There’s a way to get around this, but it requires you to perform a factory reset of the app.
To do this, you should:
- Follow the first four steps of the section above, until you access the Photos app information screen.
- Tap the Disable button at the top of the screen. A dialog box will appear prompting you about the decision.
- Choose Disable App. Once you perform this command, the app will forget all the data and interactions that you had with it. This will completely remove your search history.
- Press the Enable button, it should be at the same place where Disable previously was. If you don’t do this, the app will remain disabled, and you won’t be able to use it.
- Once you do this, you’ll need to sign in to your account once again. All further activity will again remain in the storage of the app until you decide to remove the history again.


Keep Your History to Yourself
Deleting your Google activity should always be a last resort. If you’re using a shared account then it’s always good to remove all traces that may interfere with your privacy, which usually include google search, videos, and google photos.
However, if you use a private account, it would be better to keep it protected and secured, instead of clearing your activity log and risking data loss in the process.
Which method do you prefer to clear your Google Photos activity? Why? Share your experiences in the comments section below.

Disclaimer: Some pages on this site may include an affiliate link. This does not effect our editorial in any way.