When you sync your Google account with your Android or iOS device, it automatically uploads your photos to Google Photos.
This way, you don’t have to waste time on manual uploads, while all your data is getting backed up. When you open the Google Photos app on your phone, all the images and videos will be there, ready for you to organize them.
However, sometimes there’s a bug, and the service doesn’t work. Your photos are not uploading. Here are a couple of simple fixes you can do to try.

Update the App
Your photos might have stopped uploading to Google Photos because it needs to be updated. Follow these steps to make sure your app is updated:
- Visit the Google Play Store or App Store

- Search for Google Photos to make sure there are no pending updates for you to download.

Check the Backup Status and Enable Syncing
The reason why your photos aren’t uploading might be the disabled Syncing option. Here’s how to check if you’ve enabled syncing.
- Open the Google Photos app on your smartphone.

- Tap on your Profile icon at the top of the screen.

- Choose Photos settings from the list.

- Take a look at the Back up & sync option. If it’s On, that’s how it should be. If it’s Off, tap to open it and move the toggle to the right. It will become blue, and more options will appear now that Back up is enabled.

Here you can choose the upload size, folders other than your camera that you wish to back up, whether you want to proceed with the backup when using mobile data or when in roaming.
If you’re going to check the sync status without making any changes, open the Google Photos app and tap on your profile picture in the top right corner. You’ll see it below your name and email address. It can be one of the following:
Complete: All your images and videos have been uploaded.
Off: You need to turn it on to upload items to Google Photos.
Backing up: Your items are currently uploading.
Preparing backup/Getting ready to back up: The upload is about to start.
Waiting for connection/Waiting for Wi-Fi: Your phone is offline, and the upload will start as soon as you connect to Wi-Fi or turn on mobile data.

Check the Size and Type of the Files
If your photos are larger than 100 megapixels or 75 MB, you can’t upload them. The same goes for videos over 10GB.
Make Sure You’re Connected
If you’re checking your backup settings, you might see that the backup is waiting to go online. That means you’ve disconnected from a network. Follow these steps to make sure you’re connected:
- Go to your settings

- Find your network settings and make sure your phone has access to the internet.

- If no networks are available, turn on your mobile data to finish the backup.

Don’t forget that your photos and videos may be large, and you could likely end up using large amounts of data.
Make Sure There’s Enough Space
When you’re storing images and videos in Google Photos, you have two options. Option one is to upload an almost unlimited number of low-quality photos and video clips. The other one is to keep the pictures and videos in their original form, though you might quickly reach the 15 GB limit.

In case you picked the second option, you may have run out of space, so nothing else can upload until you reorganize you remove some items or upgrade your storage.
Clear the Cache and App Data
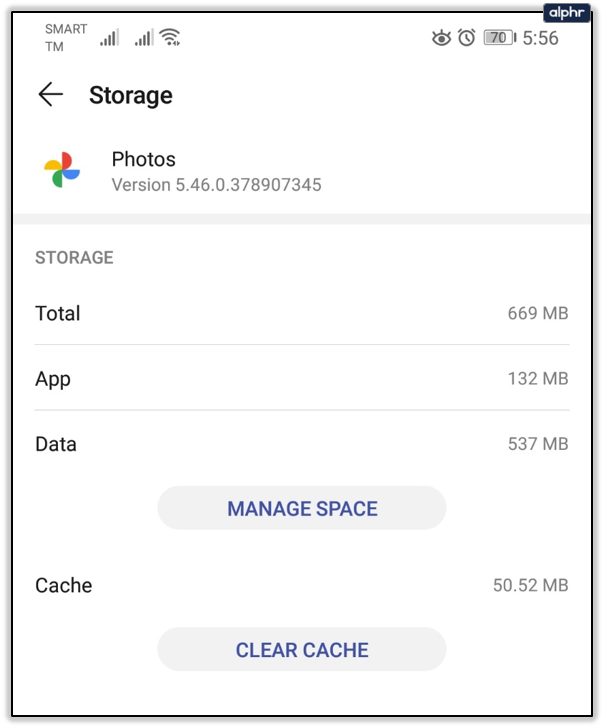
Another fix for photos not uploading is clearing your app data and cache. To do this, follow these steps:
- Go to your phone’s Settings.

- Tap Apps and find the Google Photos app.

- Tap on Storage to view Data and Cache.

- Clear the data first, and, after that, the cache.

Or:
- Open the Settings app and scroll to Apps.

- Find Google Photos and tap to open.

- Select Disable and wait for a few seconds.

- Enable the app again and open it.

- Log in.

- Tap on your Profile icon to open the menu.

- Choose Settings, and then Back up & sync settings.

- Tap Back up & sync and enable it.

Note that the steps may differ a bit depending on the model and make of your smartphone.
Restart Your Device and Reinstall the App
If nothing else works, you can try restarting your device because a temporary bug can cause your photos not to upload correctly. You can also try removing the app and installing it again.
Easy Fixes for Your Memories
There are plenty of potential reasons why your pictures and videos got stuck on their way to Google Photos. Some of these fixes may seem trivial, but we sometimes forget to check the basic stuff before we start looking for more complicated solutions.
Do you regularly back up your images and videos to Google Photos? If you know another way to fix the uploading issues with Google Photos, share it in the comments section below.
Disclaimer: Some pages on this site may include an affiliate link. This does not effect our editorial in any way.


