Merging two completely different faces from photographs is always a great way to have fun. Blending two separate images to create a brand-new look has become a piece of cake, thanks to a great variety of photo editing apps.
While you can do this in just a few clicks if you use the face mashup tools like FaceApp, if you want a more precise way to merge faces in photos, or even merge photos into one collection according to the subject, you may choose to use advanced editing programs like the ones listed below.
Here are step-by-step walkthroughs on how to merge two different faces into a brand new one using different programs.
How to Merge Two Faces in Blender
Blender is a powerful open-source tool for creating 3D computer graphics. It’s a jack-of-all-trades program allowing users to edit, model, render, animate, sculpt, and more in a solid workspace. Working in Blender is like sculpting, using geometrical shapes to create models.
Creating 3D models, particularly when editing and playing with humanoid-like features, can be challenging. Making 3D portraits in Blender obviously requires some knowledge about the program, but still, it’s not quantum physics. If you want to merge two different faces into one, you must learn how to join the basic shapes that build them.
To blend one portrait into another, you will need to select multiple elements from one model, transfer them to another model, and merge them. This way, you will achieve a smooth look for your model. Most importantly, your new, blended 3D portrait will not look like you simply copied and pasted the features.
While there are a few ways to do this, here is how to perform some hacks.
Multiple Selections
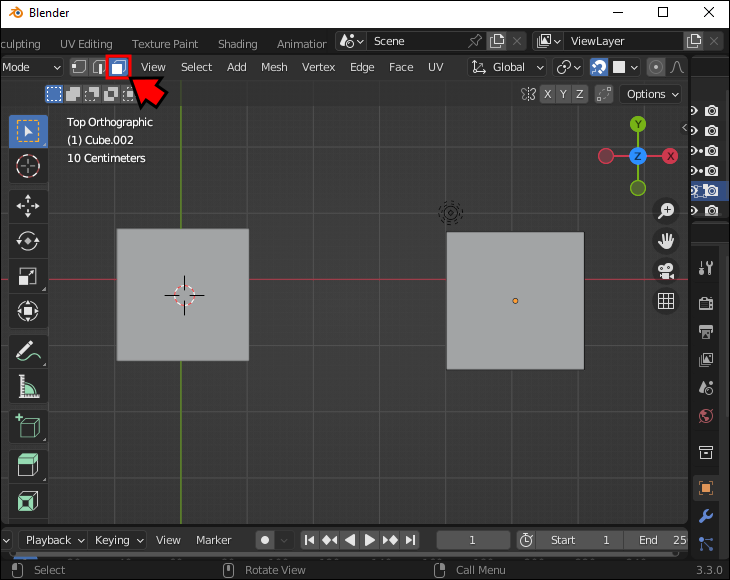
For Blender 2.9 or higher versions, you can join the images in the midpoint between the two faces, then select them both simultaneously using the box select tool. Here is how to use it.
- Go to Face select mode.
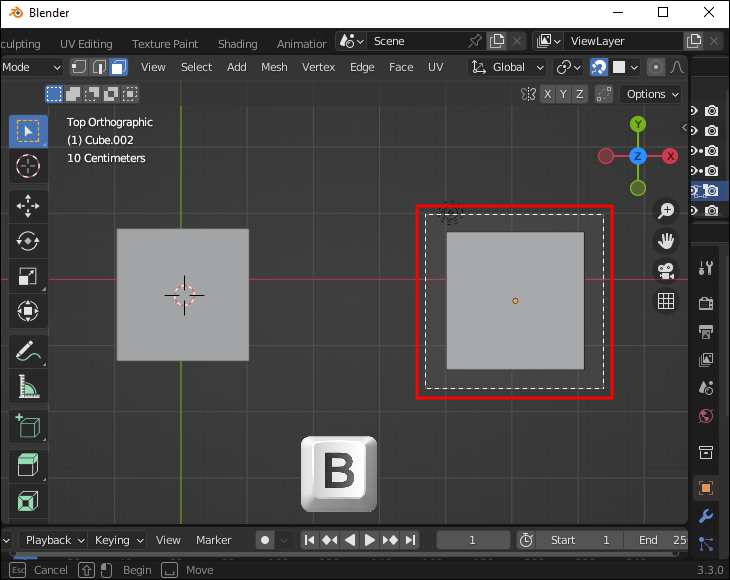
- Press the B key for the Box select tool and drag a rectangle around all the elements you wish to select.

- Alternatively, you can use the Circle selection tool by pressing C and drawing a circle around the selection.
Mesh Tool
To blend portraits into one another, you will need the merging tool. Using this requires making a vertex, edge, or face selection. You can blend shapes in Blender 2.8 by going through the following steps.
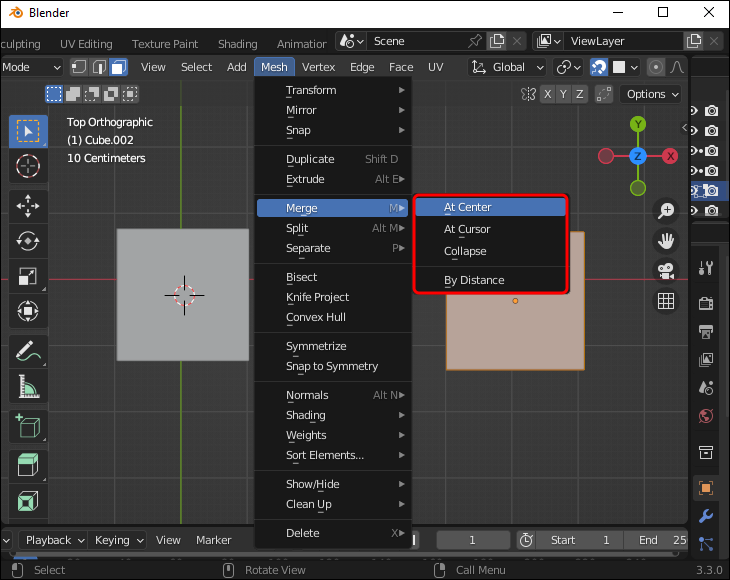
- Go to the Mesh menu.
- In the menu, click on Merge (press the “M” key, alternatively.)
- The Merge menu will pop up. When it appears, select how you want to merge your selection (At First, At Last, At Center, At Cursor, or Collapse)


Note that in older versions of Blender 2.8. you can merge the selected elements through the Vertex menu. Once there, you should choose “Merge verticles.” An alternative way to access this option is to press the “alt+M” keys.
Here is how to dissolve multiple faces into a single image.
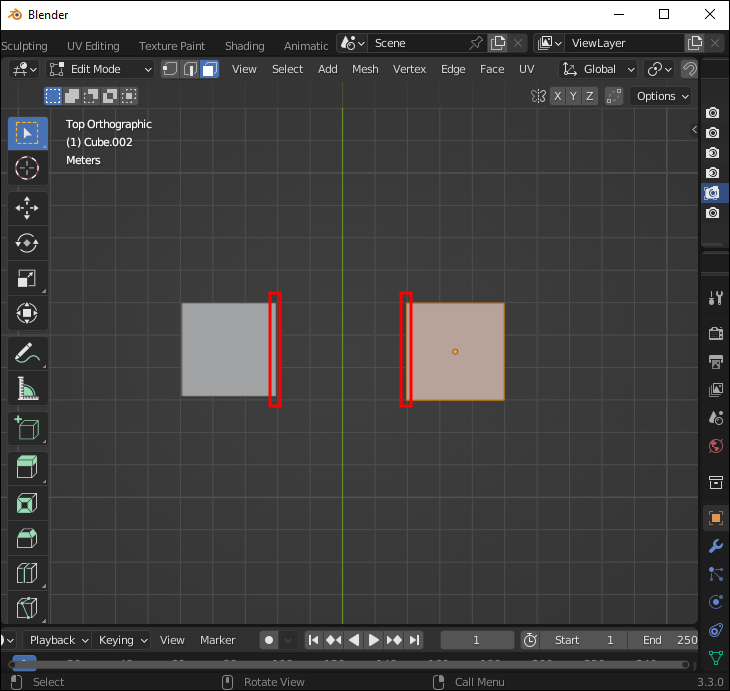
- Go to Edit mode (Ctrl+Tab.)
- Select the middle edge between the two faces.
- Press the X key, then click on Dissolve faces.

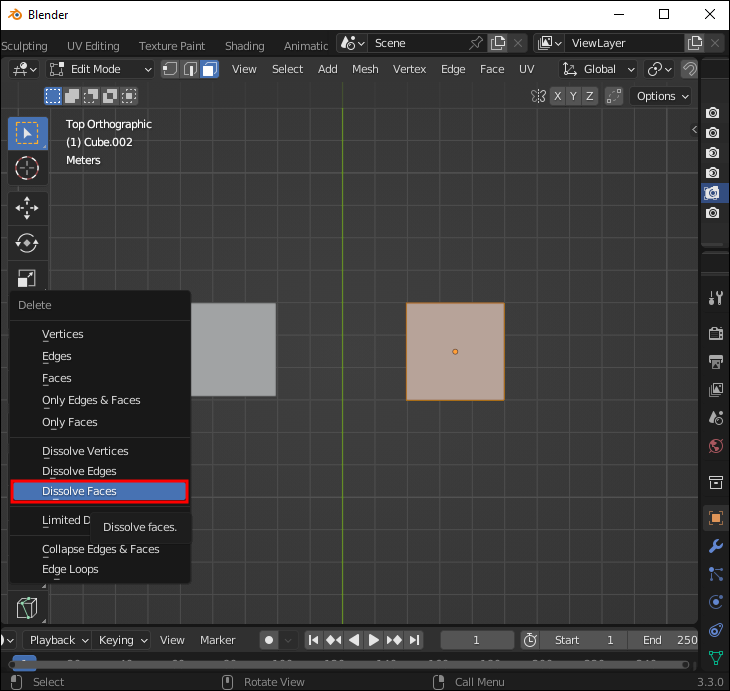
You can apply the same steps to dissolving faces, edges, and verticles by selecting the corresponding options in the menu.
How to Merge Two Faces in Photoshop
Adobe Photoshop is the most popular tool for editing photos or any other non-video content. It is also a necessary skill for both professional and personal use, and knowing its basics is something most people interested in photo editing should know.
Photoshop allows you to play with the editing process. Knowing how to use essential tools and work with layers can help you do wonders if you are creative enough. You can put a person’s face onto the head of another person or blend the features of two different people into an original image.
You will need both the photos of the two people to be in high resolution and, if possible, with similarly positioned heads, as that will make the result look more realistic. Once you have the photos, open them in Photoshop and do the following.
- Copy the first image and paste it into a new layer. There you have the first layer.
- Use the lasso tool to select the face you want to paste onto the head of another person.
- Go to Select, then Modify, and choose Feather. Set the Feather Radius to 20 pixels.
- Press Ctrl/Cmd+J to put the cutout into its layer.
- Delete the original layer of the face you just cut.
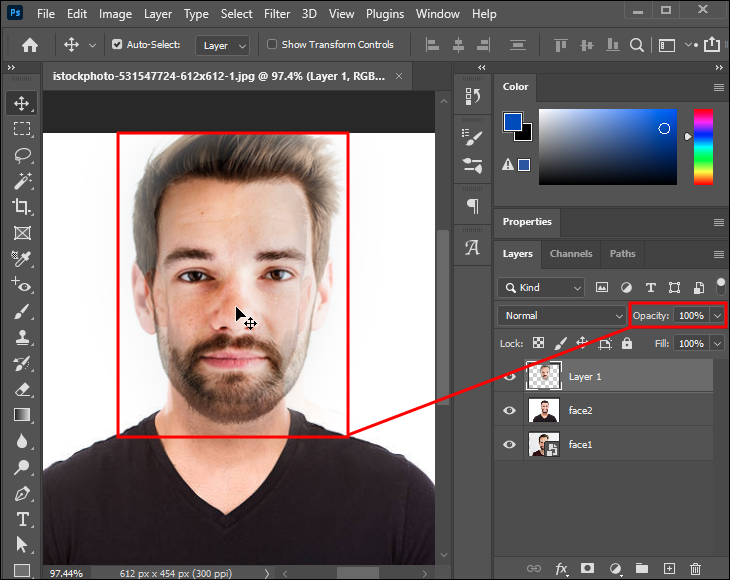
- Go to the cutout layer and lower the Opacity until you can see the face below it just enough.
- Align and transform the top face with the one from the bottom layer to fit together. Once you do this, put the Opacity of the whole image back to 100%.
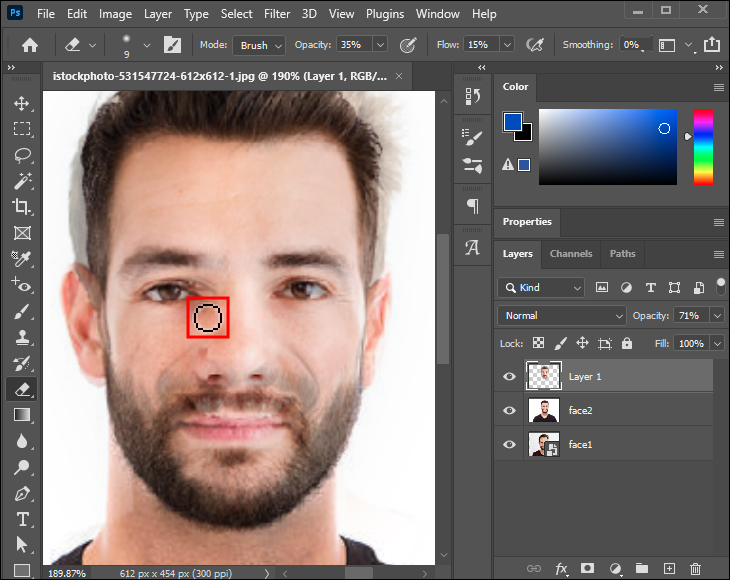
- Use the eraser tool (best is a soft brush) to fine-tune around the eyes, nose, and mouth. Make sure it shows a preferred number of features from the bottom layer.
- Go to Levels and adjust the settings to your preference, matching both layers’ hue, saturation, and color balance.


How to Merge Two Faces on FaceApp
FaceApp is pure fun. FaceApp creations have become a viral trend, are incredibly easy to create, and the app offers many features for a fun experience. The mobile app provides various morphing tools, letting you put your face onto a celebrity’s head or merge the faces of your friends.
FaceApp allows you to merge two faces to create an image of your hypothetical future child. You can do this by accessing the “Our Kids” effect.
Here’s how to do this on FaceApp.
- Open the FaceApp on your device.
- Go to Gallery and select Photo.
- Go to the Face Swap tab at the bottom of the screen.
- Go to the Face Swap effect.
- Choose a celebrity picture or a photo from your gallery.
- Press the Use button and morph the selected faces.
- Select Our Daughter or Our Son by preference.


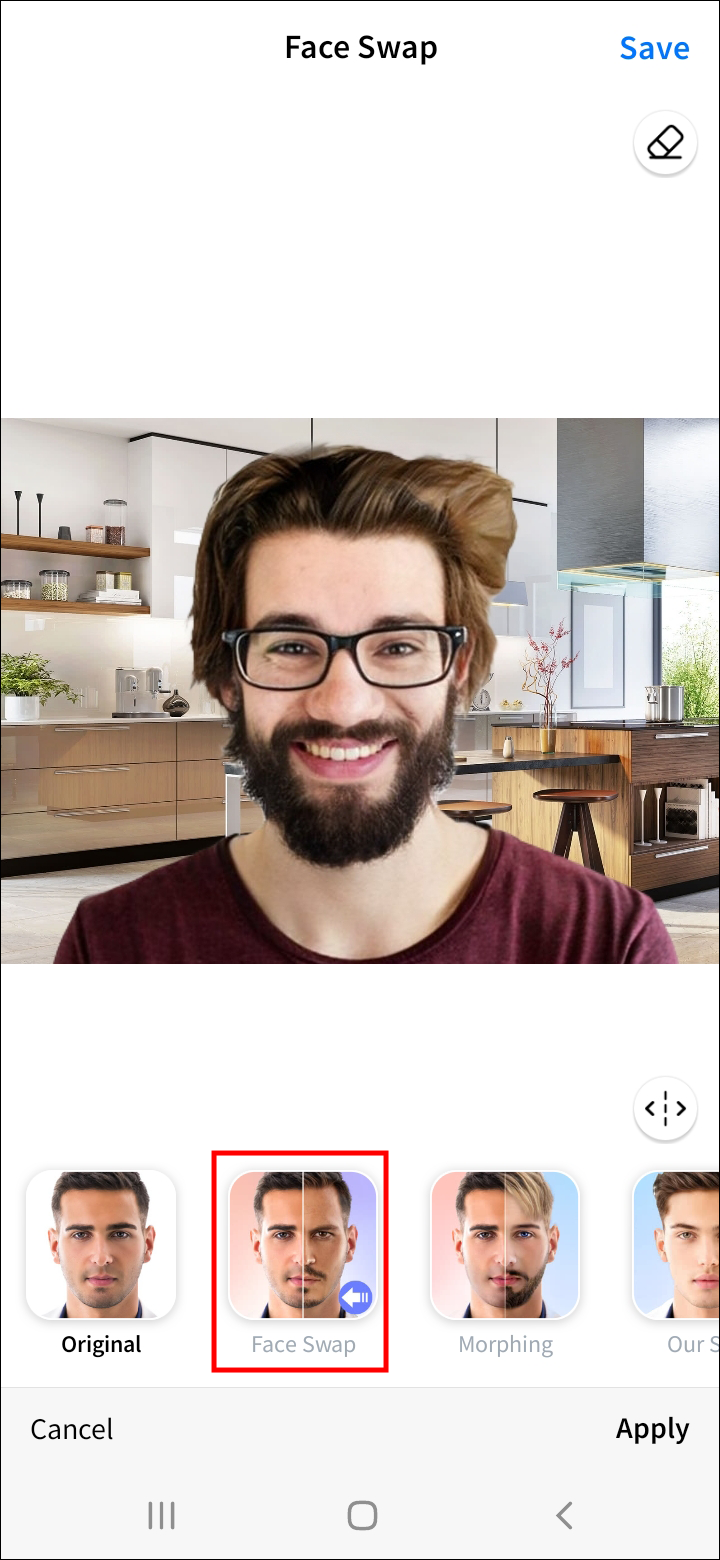


Now you’ll get an idea of what your future children look like – the faces will be blended into a new one.
How to Merge Two Faces in Google Photos
Google Photos has an automatic face recognition feature that comes in helpful when you want to group, or merge, photos of an individual into one collection. However, many people have a problem with Google Photos and its tendency to create multiple templates for the same person.
Here’s how to merge, or group, different photos of the same person into one collection in Google Photos.
- Go to Google Photos on the web, then go to your account.
- Open your albums and open the People tab.
- Select the people/collections you want to merge under one name.
- Click Same.


It’s Morphing Time!
Merging two faces on a photo can be done for various reasons, but the most common one is for fun. Sometimes, if you share a close bond with a friend, merging your faces in a photo is a funny way to express this closeness. Or you would like to have your visage on the head of a celebrity you admire.
As many face-morphing tools emerge on the app market today, this has never been easier and faster to perform. Choose what tool fits your needs best and get creative!
What tools do you use for merging the faces in images? Tell us in the comments section below!


Disclaimer: Some pages on this site may include an affiliate link. This does not effect our editorial in any way.