Have you ever attended an important Zoom meeting that had a lot of speakers? Maybe you were only interested in what one of them had to say, and for you, the rest were simply background noise. Fortunately, you can record only one person in Zoom.
In this article, we’ll cover exactly how that’s accomplished. It’s easier than you might think.
How to Record Only One Person in Zoom
Zoom offers many different options for recording. You can record the entire meeting with all of the participants, a few, or even just one person. However, if you’re a participant, you’ll need to ask the host for permission to record. If you’re the host though, you can record without any permissions.
To do so, follow the steps below:
- Before you enter the meeting, open your Zoom app.

- From the “Home” tab, click on the “Gear Icon” located in the upper right-hand corner of the screen.

- Click on “Recording” and then select the location of where you’d like the recording to be saved.
- Contact the host of the Zoom meeting and request permission to record. The host will make appropriate changes on their end. Only the host can grant permission to record.
- Once permission is granted, click the “Record” button at the bottom of the screen.
- Once recording has started, you’ll notice the word “Recording” in the upper left-hand corner of the screen. At any time during the meeting, you can pause or stop recording.
- Next, you’ll need to pin the one person that you want to record. Go to the “Zoom Room Controller” and click “Manage Participants.”
- Select the participant that you want to record and click “Pin.”


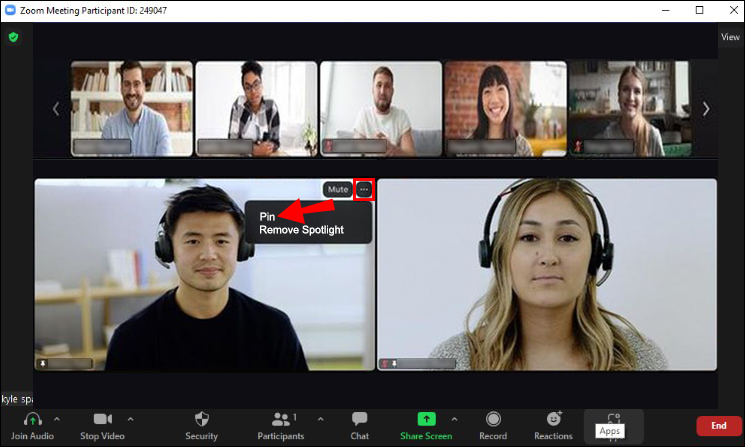
You’re now only recording one person.
Additional FAQs
What’s the difference between a local recording and a cloud recording?
A local recording is available to all Zoom users. The file is stored on your computer’s hard drive. Cloud recording is only available to those with paid accounts. The advantage is that the file is stored on the Zoom Cloud where it can be viewed, downloaded, and even shared. Another advantage of a cloud recording is that the file won’t take up any of your computer’s storage space.
What format are Zoom recordings saved as?
Zoom recordings are saved as high-quality MP4 files. This applies to both local and cloud recordings.
Only Recording One Person on Zoom Is a Snap
Recording only one person on Zoom doesn’t require a lot of time or effort and can be easily accomplished with a few steps. There’s no need to record every speaker in a Zoom conference – you have the power to choose.
Have you ever attended a Zoom conference and selected only one person to record? Did you follow the steps outlined in this article? Let us know in the comments section below.


Disclaimer: Some pages on this site may include an affiliate link. This does not effect our editorial in any way.