Zoom changed the office culture in so many ways. For instance, many of us would never have imagined having a meeting with the boss while wearing pajama bottoms. While it can sometimes suck for your home to also be your workplace, Zoom has allowed us to perform tasks in ways we couldn’t before. With the platform’s account management feature, you can be in two meetings simultaneously. Department heads can also drop in on ongoing team discussions to determine if everyone is on the same page. If you are wondering how to set up your Zoom account so that you can harness these superpowers, we’ve got you covered. This guide will show you how to join two zoom meetings at once.
How to Join Two Zoom Meetings at Once
Zoom allows users to join more than one meeting at the same time. However, you will have to have an Enterprise, Business, or Education account. If you try to join a second meeting from a free account, the platform will ask you to first leave the current session. Here’s how to join two meetings simultaneously.
Team members will now be able to join two meetings at the same time.
Enable in Groups
As an administrator, you can grant a specific group permission to access multiple Zoom meetings at the same time. Take a look at how to do that:
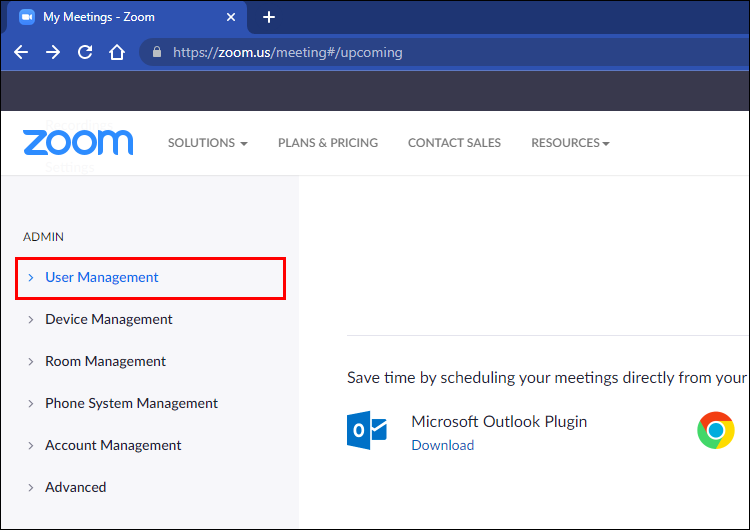
- Go to Zoom and sign in with your credentials.

- Find the navigation panel and tap “User Management.”

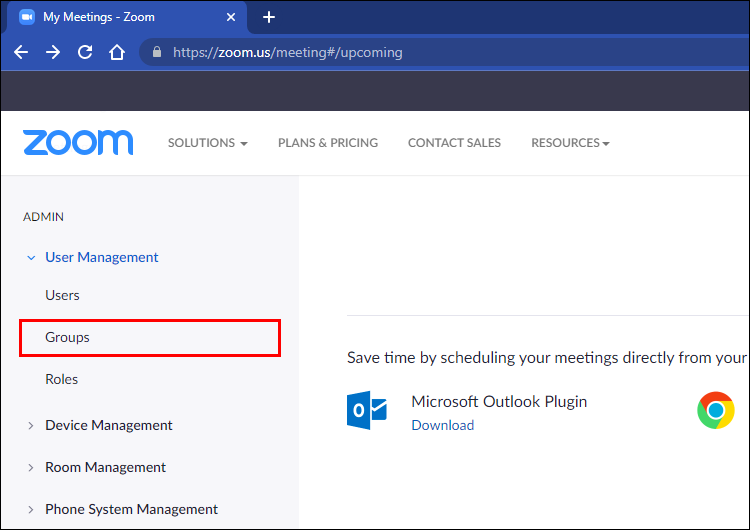
- Press “Groups” and select the group that you want to give access to.
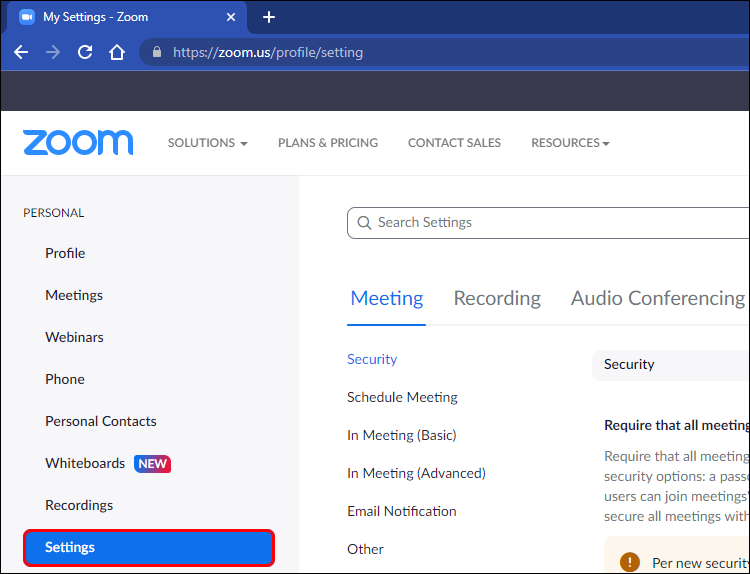
- Click “Settings.”
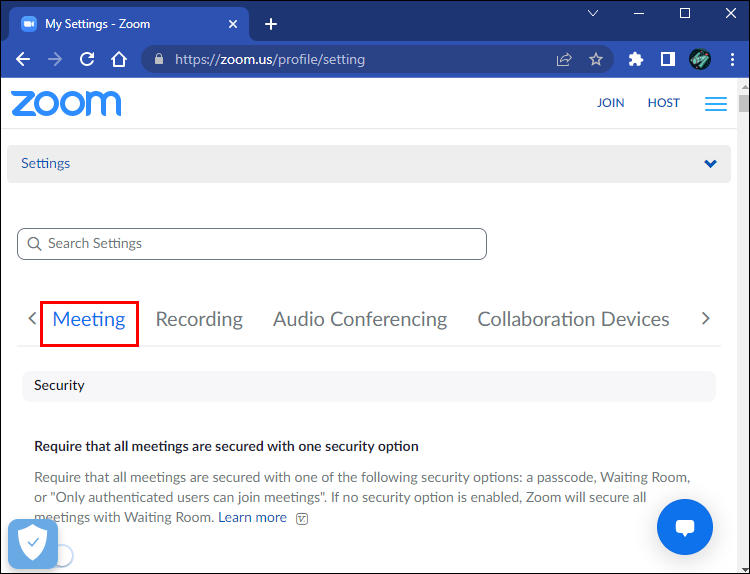
- Then select “Meeting.”
- Scroll to the “In Meeting (Basic)” section.
- Check the “Join different meetings simultaneously.”
- Toggle the switch to turn it on.
Group members will now be able to join multiple Zoom meetings at the same time.
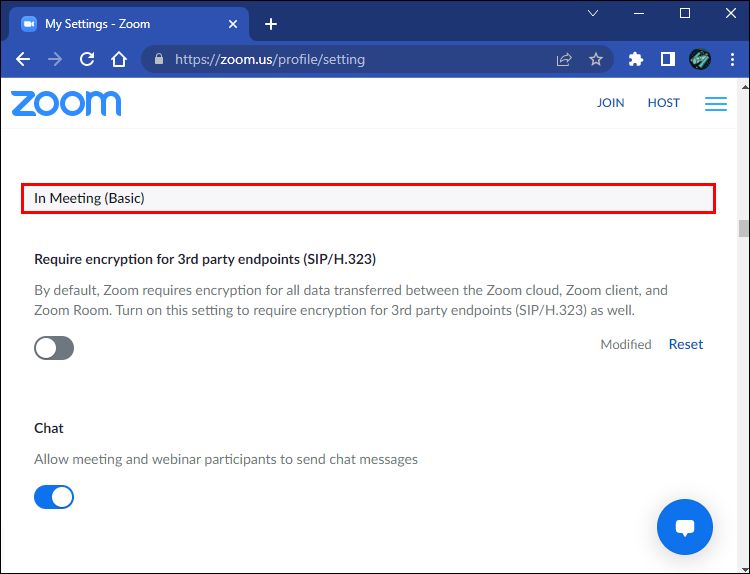
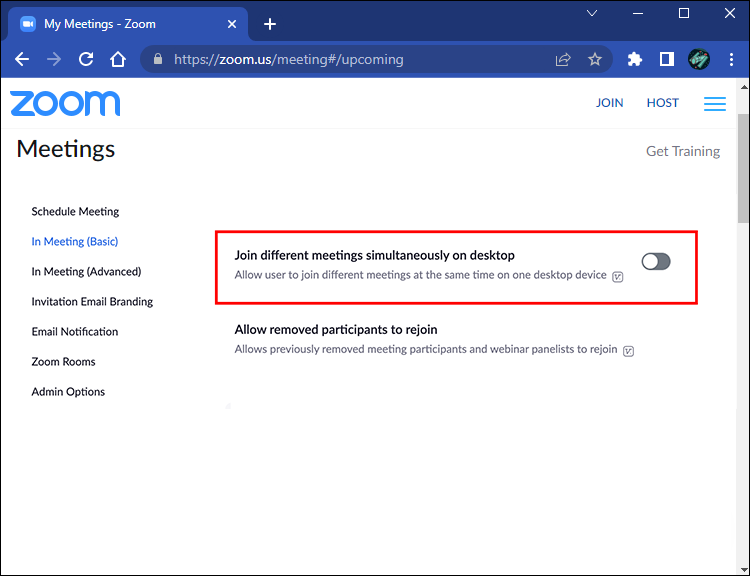
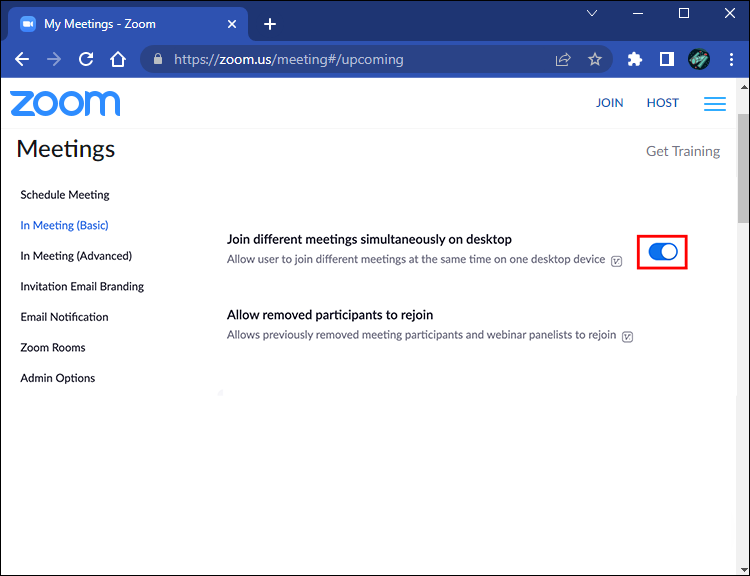
Enable in User Settings
You can make it possible to join more than one Zoom meeting from your user settings. This is how to do that:
- Open your Zoom account in browser.
- Head to the navigation panel and tap “Settings.”
- Press “Meeting.”
- Go to the “In Meeting (Basic)” section.
- Look for “Join different meetings simultaneously”.
- Toggle on the switch to enable the setting.
You are now able to join concurrent Zoom meetings.
Join Two Zoom Meetings Simultaneously
With your permissions set up, you can now go ahead and join multiple Zoom calls. These steps will show you how to do that:
- Open Zoom and select “Join.”
- Enter the ID of the meeting.
- Click “Join” to join this meeting.


You are now on two Zoom calls simultaneously.
How to Join Two Zoom Meetings at Once on a Free Account
Zoom only allows those with premium accounts to join multiple Zoom calls. However, you can use a few hacks to do the same from a free account. Check out how to do that.
Join Using a Browser Tab
Zoom allows you to use the platform even when you don’t have a registered account. You can therefore use a browser to join a meeting. Follow the method below to do that:
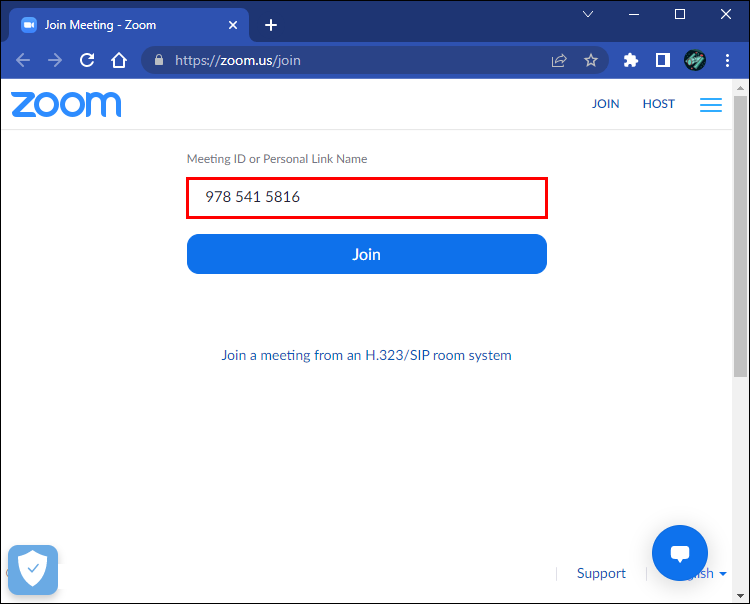
- Open Zoom on your browser.
- Navigate to the browser and paste the first meeting link into the address bar.
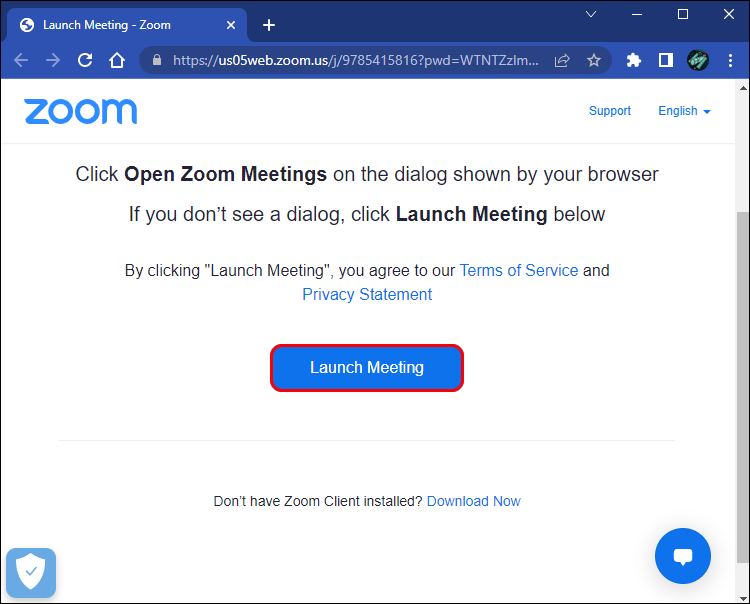
- Click “Launch Meeting.”
- Press “Join from your browser” in the dialogue box that appears.
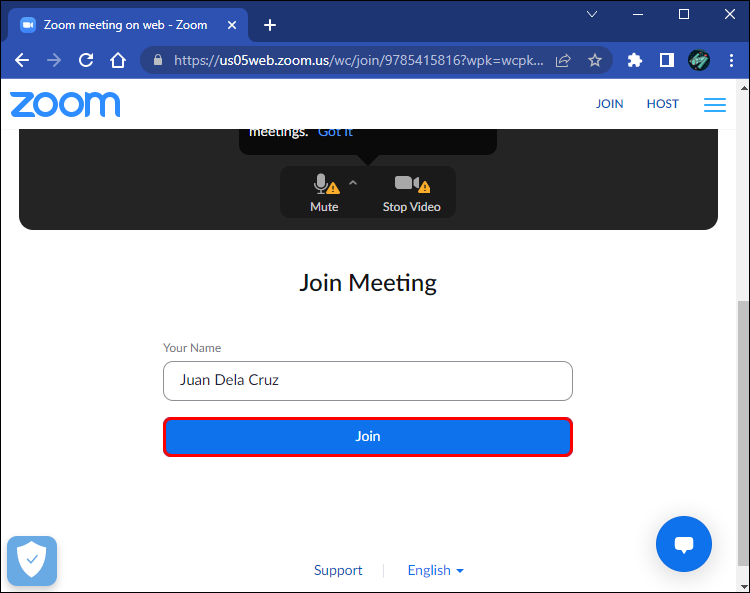
- Input your name.
- Tap “Join.”
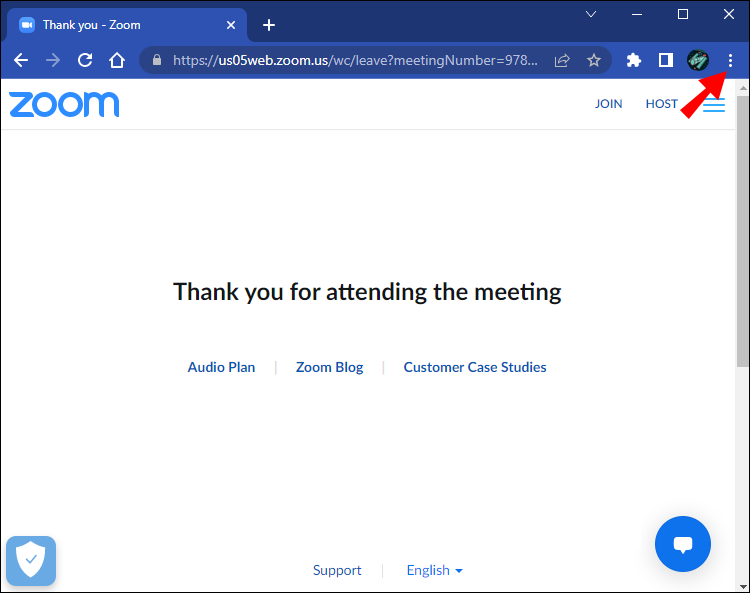
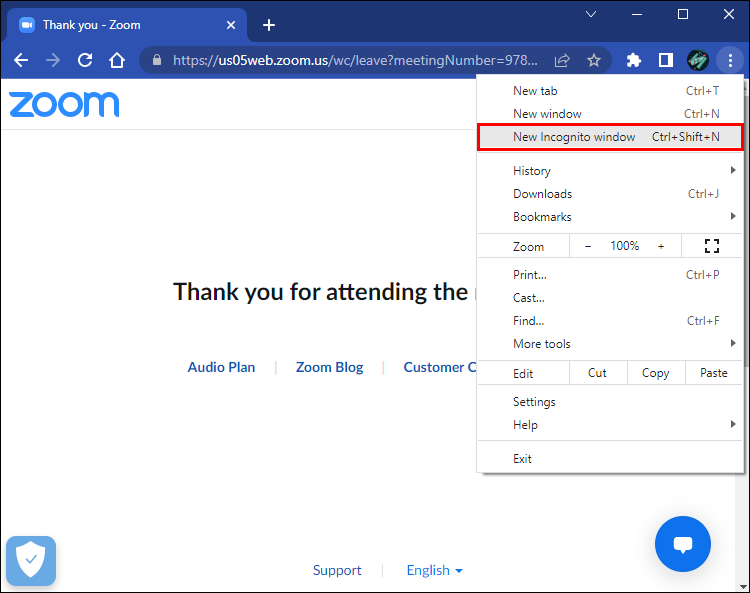
- If you would like to join a second meeting, you can open an incognito tab and join the meeting from that browser by clicking on the “Three dots” on the upper-right corner.
- Select “New incognito window.”


You can now join multiple Zoom meetings using a free account.
Join Using Different Devices
You can open several accounts on Zoom, allowing you to sign in to the platform from different devices. To join two meetings simultaneously, open Zoom on separate computers and log in using different email addresses. It’s a more cumbersome way of doing it, but it still gets the job done.
Navigating Concurrent Zoom Meetings
Joining multiple Zoom calls is possible whether you are using a premium or free account. The advantage here is that you get to be in two places at once—something you can’t do with in-person meetings. The guide above walks you through the process, allowing you to manage your obligations concurrently.
Have you joined two Zoom meetings at once? What method did you use? Let us know in the comments below.


Disclaimer: Some pages on this site may include an affiliate link. This does not effect our editorial in any way.