Google Apps is free for consumers, though the business version, called G Suite, comes with email hosting and other features that organizations need. G Suite has a monthly fee and several service tiers. Google Calendar comes bundled with Google Apps and is a simple but effective calendar app that you automatically have if you use Gmail. If you like to mix and match your applications or work somewhere that uses G Suite or Microsoft Office, you may want to sync Google Calendar with Outlook or vice-versa.
Outlook also has a built-in calendar that is a slightly more involved calendar app. Thankfully, Google Calendar and Outlook Calendar play pretty well together, and you can sync one calendar with the other, so you never miss a meeting again. Similarly, both calendars allow you to look into other calendars and show reminders, which is excellent for work and home and has much potential for helping you stay organized.
In this tutorial, we’ll show you how to sync Google Calendar and Outlook to ensure you’re always aware of what must be done when managing your busy schedule.
How to Sync Google Calendar with Outlook

To sync your calendars together, you’ll need another third-party tool. Although you can add your Google Calendar to Outlook and vice versa, you cannot edit both on one platform.
There is a wide variety of valuable tools available on the web. Some have free options, but to get an optimized experience, you’ll likely need to pay a monthly or yearly fee to use services like automatic syncing.
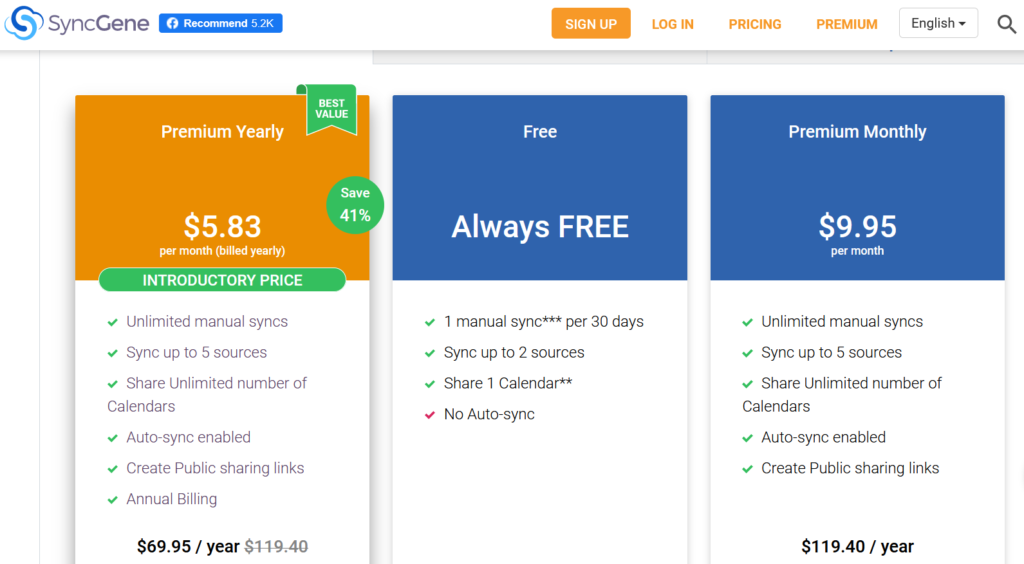
SyncGene – This service offers a free version that allows you to sync your calendars, but unfortunately, the two will not update automatically. It may be worth the cost if you’re especially interested in having everything in one place while keeping you organized.
CalendarBridge – CalendarBridge offers the same functionality as SyncGene but has no free option. Fortunately, the paid options are slightly more affordable and include automatic syncing. 
If you’re thinking this is beginning to sound a little more complicated than it should be, don’t worry. You aren’t alone. Fortunately, we have some options for connecting your calendars below without external services. However, this won’t include the same seamless functionality as the options we’ve listed above, but there are simple steps to get you moving forward.
How to Make Google Calendar Appear in Outlook
As the title says, the word here is “appear,” not sync. It is very straightforward to connect your Google Calendar with Outlook and should only take a minute or two:
- Go to your Google Calendar. Hover over the calendar you’d like to view and tap on the three vertical dots on the lower left-hand side.

- Next, click on the option Settings and sharing.
- A new page will open. Scroll down to Integrate Calendar and copy the link found under Secret address in iCal format. We like this link because your Google Calendar will stay private.
- Now, let’s head over to Outlook. Keep in mind this works best with the desktop client. We experienced some issues with the web version. In Outlook, click on File.
- Click on Account Settings > Account Settings.
- In the new window, click Internet Calendars > New, paste the link from Google into the URL box, and then click Add.
- Now, follow the steps to finish the process. Open the Calendar tab in Microsoft Outlook to see all your Gmail calendar reminders added perfectly with Microsoft Outlook.


Your Outlook calendar should now be populated with your Google Calendar entries. Outlook uses the exact refresh mechanisms to download new emails and calendar updates, so your calendar should remain up-to-date. You may be unable to edit Google Calendar entries in Outlook, but it still syncs any changes you make on the other platform. If you need to add multiple calendars, repeat this process for each one.
If you run into problems and want to clear your Google Calendar and start over, you’ll want to remove all the events from your Google Calendar.
Sync Outlook with Google Calendar
If you want to keep both calendars up to date rather than just syncing one with the other, you can do that too. The same as you can sync Google Calendar changes with Outlook, you can do it the other way around, and sync Outlook changes with Google Calendar. The only drawback is that Google adds the calendar to the “Other Calendars” category, which only updates every 24 hours or later.
We’ll start with the steps for Outlook installed on your machine from within the Office suite as an example, and then we’ll cover how to do this for Office 365 after.
- Open Outlook and select your calendar.
- Select Publish this Calendar from the ribbon tools.
- Outlook Web Access will open in your browser, then log in.
- Select a calendar from the OWA page that opens. Make the calendar Public so you can share it.
- Select Save to keep your settings.
- Copy the link in the next window. You should see two, an HTML one and an ICS one. Copy the ICS link.
- Log into Google Calendar through your browser.
- Select My Calendars from the left and select the + icon next to Add a friend’s calendar.
- Select From URL and paste your copied URL into URL of calendar.
- Select Add calendar.


Your Google Calendar should now populate with your Outlook calendar entries. If you always want the latest changes, remove the Outlook URL and add it again. As you have subscribed to the calendar, it should be regularly polled for changes, but not for 48 hours or later.
For Outlook within Office 365, the process is pretty much the same for the Google part but different for the Outlook part:
- Select the Gear icon (Settings) from your Office 365 dashboard.
- Select Share.
- Enter your Gmail address in Share with and select Send.
- Open the mail and copy the URL ending in reachcalendar.ics.
- Log into your Google Calendar through your browser.
- Select My Calendars from the left and select the + icon next to Add a friend’s calendar.
- Select “From URL” and paste the URL where it says “URL of calendar.”
- Select “Add calendar.”
Like Outlook, Google Calendar should poll your Office 365 calendar regularly but does so less frequently. Depending on how your Office 365 installation is set up, you may need to modify permissions for Google Calendar to be able to read your Office calendar.
To do that, select My Calendars within Office and then Permissions. Select your chosen sharing options and then Save.
If you’re a home user, you should be able to do this without issues. You may not have permission to modify sharing or any Office setting if you’re at work. If so, you must follow up with your IT team.
Syncing Google Calendar with Outlook and vice-versa is a simple way to use multiple applications to manage your work-life balance and stay organized.
Outlook to Google Calendar FAQs
Does Outlook have a calendar app?
Not exactly. Whether you have the Outlook app on your mobile device or your computer, you can access the calendar from there.
1. Open the Outlook app on your device and select the small calendar icon in the lower right-hand corner.
2. From here, the calendar will take up the whole app interface (acting much like its own application). You can schedule meetings, create alerts, and invite people from the Outlook app.
How do I make my account private again?
After following some steps above, you may be concerned about account privacy.
1. To change your account to private, follow the steps above and uncheck the Public option.
Can I add other email accounts to sync all of my calendars?
Yes, you can add any email server to Outlook. Assuming the service provider offers a calendar option, they should sync automatically. You may need a Port number or other information to complete the merger, depending on your email client.
Particularly for ISP email clients, you can visit the email help page to get the information and instructions to add your email address to your Outlook app.
Calendars Synced
As you’ve seen, syncing your Google Calendar with Outlook is pretty simple, requiring a few clicks and copying and pasting.
If you have other ways of doing this, please tell us in the comments below!


Disclaimer: Some pages on this site may include an affiliate link. This does not effect our editorial in any way.