Graphic cards (also called graphic processing units or GPUs) are necessary hardware units that support our displays when we run complex programs. But when the PC fails to read them, the software will have less support, and you may even encounter a black screen. Luckily, there are several ways to make sure your GPU is compatible with other computer components.
This guide will discuss how to repair GPU detection using several programs to ensure that your display never fails you.
GPU Not Detected in BIOS
Tweaking your BIOS settings should enable the PC to detect the graphics card. Alternatively, you can update the BIOS settings to remove any existing errors. This should repair the computer’s graphics card identification process.
Modify BIOS Settings
Entering and modifying the BIOS is a relatively straightforward process. Here’s how it works:
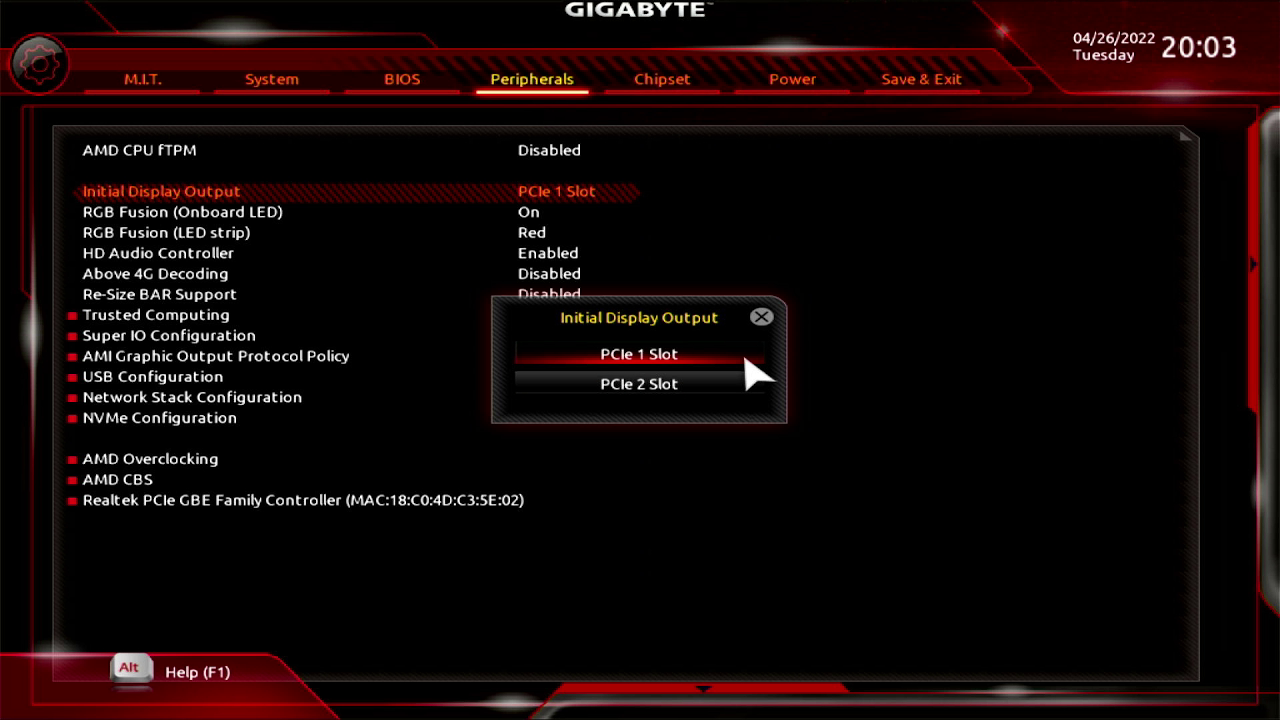
Enabling PCIe Setting in BIOS Gigabyte:
- Restart your PC.

- As the system’s rebooting, Press “Del” on your keyboard to enter the BIOS setting.

- Once you are in on your “BIOS Menu,” click “Peripherals” and press “Enter.”
- Find the “Initial Display Output” and press “Enter.”
- Select your “PCI” slot where your GPU installed.
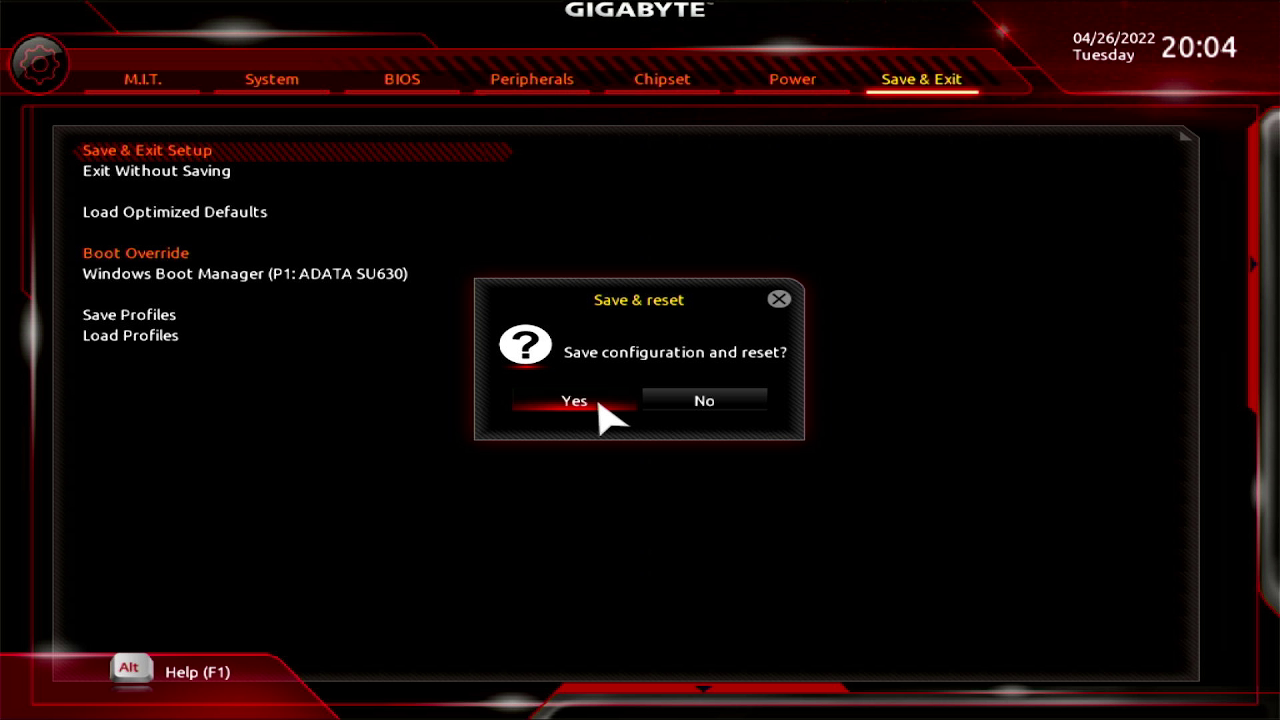
- Save your changes and exit the BIOS.


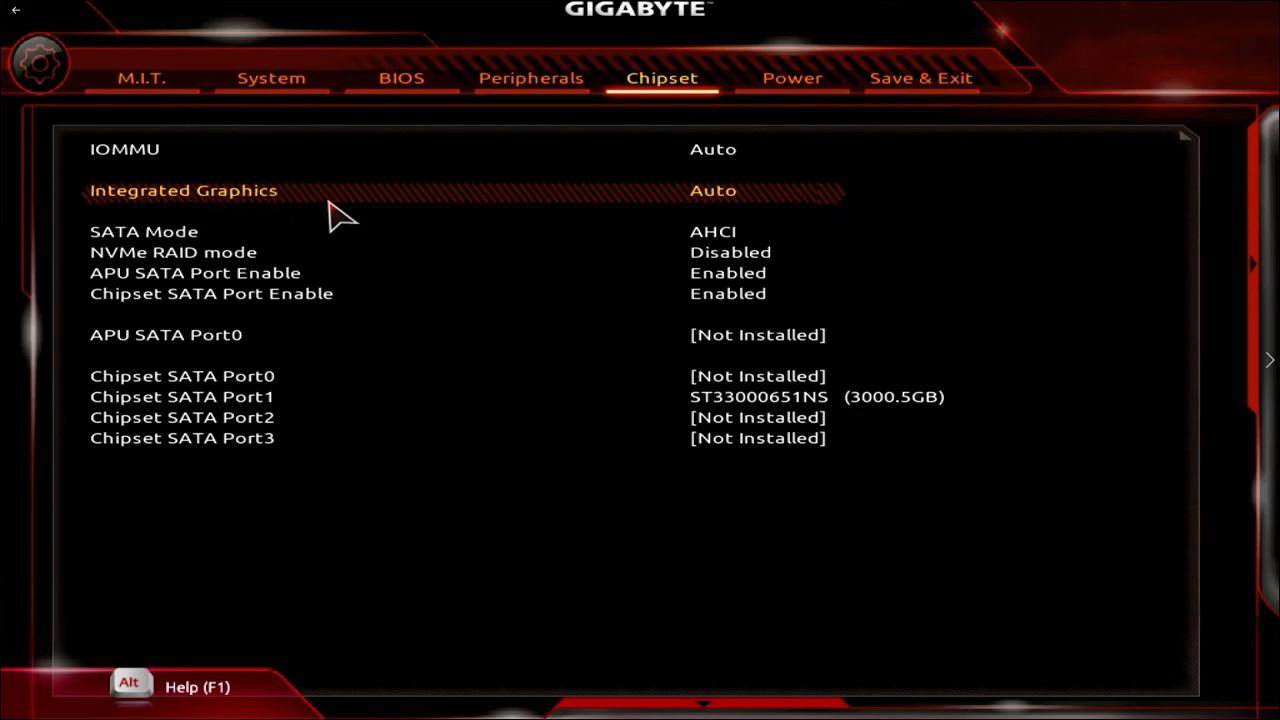
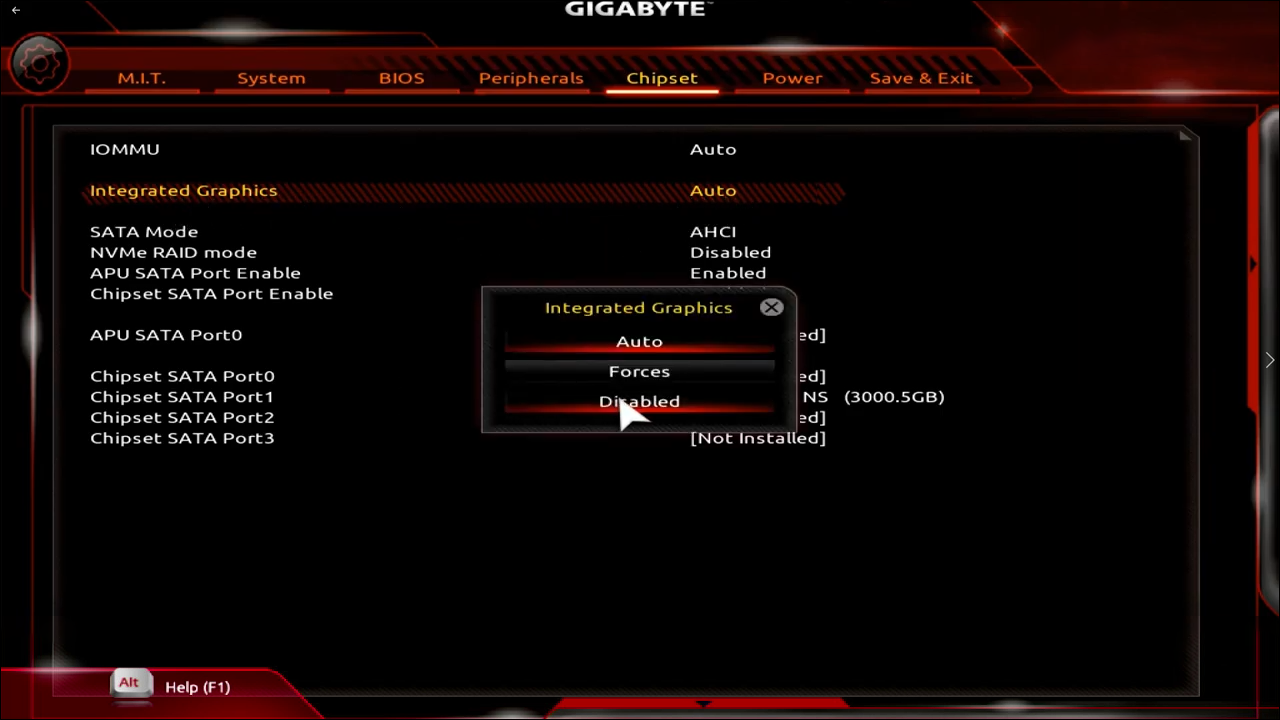
Another option is disabling your integrated graphics cards. To do so:
- Restart the system and hold “F2 + Delete” to enter the BIOS.
- Navigate to “Chipset Configuration” using the on-screen arrow keys.
- Choose “Integrated Graphics” from the options menu.
- Then, there will be a pop-up dialog box and select “Disabled.”
- Save the settings and close the BIOS.

Update the BIOS
If none of the previous methods have been effective, updating the BIOS will wipe all issues. The card will then be compatible with the new BIOS version. To perform an update:
- Power on your PC.
- Hold “Windows + R” to launch the run dialog.
- Type “
msinfo32” in the Run text field and click “Enter.” - Check which BIOS version you are using in the pop-up window.
- Go to the manufacturer’s website to see if any upgrades are available.
- Download and install the latest version.
- Once the installation is completed, restart your PC.


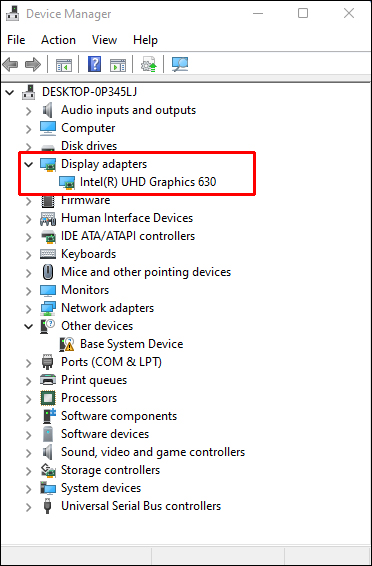
GPU Not Detected in Device Manager
Another helpful method is using Device Manager. It allows you to uninstall the graphics driver and run the Command Prompt to repair the PC’s graphics card detection.
Uninstall the Graphics Driver
Uninstalling and reinstalling the driver takes care of compatibility issues. To do so:
- Tap the “Windows” key and type “
Device Manager” in the search field. Hit “Enter.” - Navigate to the “Display Adapters” tab and right-click on the driver you’ve installed on your PC.
- Select “Properties” from the list of available options.
- Now, go to “Driver” tab then click “Uninstall”.
- Repeat this process for all installed drivers.
- Restart the PC when you’ve uninstalled all the drivers. Make sure you stop the PC from automatically installing them.
- Visit the graphics card manufacturer’s website and save the drivers to your PC.
- Hover the cursor over the downloaded file and right-click.
- Select the “Properties” option.
- Choose the “Compatibility” section and tap “Run this program in Compatibility mode.”
- Click on the name of your operating system in the pop-down menu to begin reinstallation.


Use the Command Prompt
The Command Prompt enables users to view hardware that hasn’t been properly connected to the PC. To use the Command Prompt to reconnect the graphics card driver:
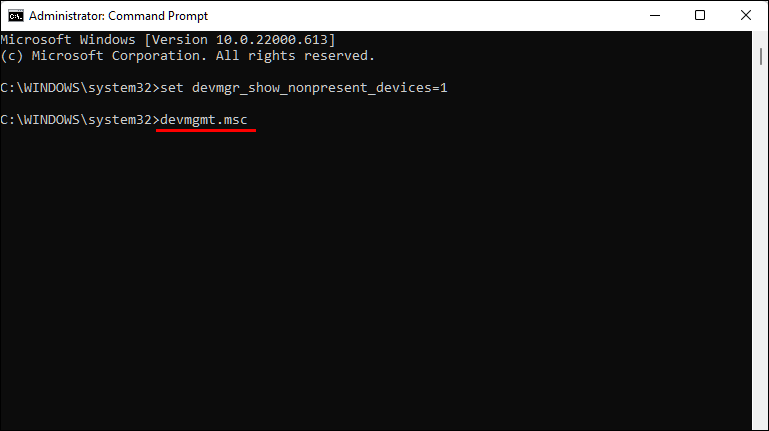
- Run the “Command Prompt” as the system administrator.
- In the Command Prompt window, paste the following code – “
set devmgr_show_nonpresent_devices=1” – and press “Enter.” - Paste “start devmgmt.msc” in the same window and tap “Enter.”
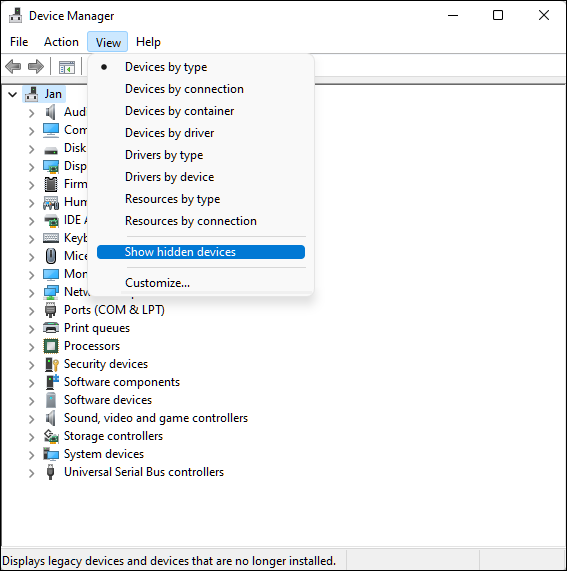
- When the pop-up menu appears, press “View” and select the “Show hidden devices” option. The PC will now detect all devices that haven’t been connected to it, including the graphics card.
- Uninstall the graphics card entries and any unknown devices. You’ll find the unknown device entries under the “Other devices” tab. Note that the PC may not list the graphics card under its name. However, the card will have a yellow checkmark next to it.
- Restart your PC. The operating system will reinstall the graphics card driver automatically.


Update Graphics Card Driver
If the Command Prompt doesn’t fix the issue, try updating your graphics card driver. The latest version should be glitch-free and work well with your PC’s components.
Manual Reinstallation
To update the driver manually:
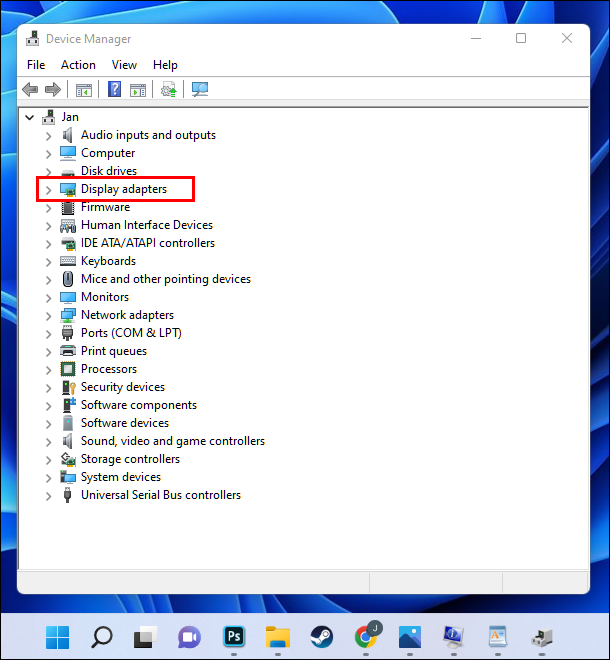
- Hold “Windows + X” and select the “Device Manager.”
- Enlarge the “Display adapter” menu.
- Navigate to your graphics driver and right-click.
- Choose the “Update Driver” option.


Third-Party Installation
You can also visit the official website of the card manufacturer to check for available updates. Since installing the new version may take some time, you can also use third-party software to complete the task. Programs like Driver Easy are user-friendly and take the hassle out of the update process. You can go for the free or Pro version, as both offer driver update services. To use the software:
- Download and launch Driver Easy.
- Run the program and tap the “Scan Now” option.
- Press “Update” beside the identified driver. Choosing “Update All” will reinstall the latest versions for all the drivers on your PC.


Restore Default BIOS Settings
When the BIOS operates on its default settings, it removes faulty upgrades. To revert to the default standard:
- Restart the PC.
- Select the setup key when you see the startup screen.
- Press the “Del” and “F2” keys several times to go to setup. Depending on your PC model, you might need to tap the “F8,” “F10,” “Esc,” or “Tab” keys.
- You’ll now see the BIOS menu. Navigate to the “Setups Default” tab. It can also be called “Factory Default” or “Reset to Default.”
- Choose “Load Setup Defaults” and click “Enter.” The BIOS will reset automatically.
- Save the changes and exit the BIOS.

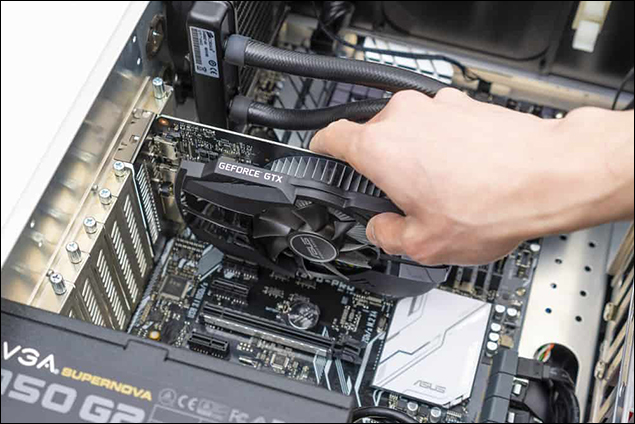
GPU Not Detected by Motherboard
Your motherboard will fail to read drivers when the cold slots are damaged, or the driver is incompatible.
Inspect Card Slot
Dust accumulates within the computer and can potentially damage the hardware. Putting the card into a functioning slot will allow the motherboard to detect that a card has been inserted. To do so:
- Remove the back cover of the computer.
- Check the motherboard and the card slots.
- Power on the PC. The graphics card slot might be the problem if the fan isn’t running.
- Turn off the PC and remove your graphics card.
- Place it in a different slot.


Reinstall Driver
If you’re using an outdated driver, upgrading to a newer version will fix the problem. Here’s how it works:
- Uninstall the current version.
- Download the latest driver update from the manufacturer’s website.
- Unzip the downloaded driver.
- Double-tap the unzipped file.
- Press “Yes” if prompted by the system.
- The on-screen instructions will guide you through the reinstallation process.
- Once you’re finished, click “OK.”
- Tap “Next” to reboot the computer.
GPU Not Detected but Fan Spinning
If your system can’t detect an inserted card, but the fan keeps spinning, the cold slots could be clogged. Your card driver could also be outdated and cause trouble.
Clean the Graphics Card
Cleaning the dust buildup on the insertion slots will allow the PC to determine if a new piece of hardware has been connected. To clean the slots:
- Power off the PC.
- Remove the graphics card from the PC. Don’t jerk or tug hard at the card because some of the hardware components can easily be damaged.
- Wipe the cold contact spots with a pencil eraser.
- Reconnect the graphics card to the computer.

Update the Graphics Card Manually
Sometimes, the driver version is not designed to support your hardware. Performing an update will optimize the driver to work well with the other components. To perform a manual update:
- Click “Windows + X” and tap the “Device Manager.”
- Enlarge “Display adapters” from the options menu.
- Go to the “Graphics Driver” option and right-click.
- Press “Update Driver.”


GPU Not Detected in Task Manager
Windows 10 has a built-in feature that tracks your PC’s GPU performance. However, the computer will only detect WWDM2 cards. If the Task Manager is not displaying your card, you might be using an earlier version like WWDM1.
You can go to the card provider’s official website and see if there are any WWDM2 options. Once you download the supported version, install it manually. To do so:
- Uninstall your current driver.
- Unzip the driver from the zip file.
- Double-tap the unzipped file.
- Click the “Yes” button in the pop-up permission box.
- Follow the on-screen installation steps.
- Tap “OK” to finish the process once you’ve installed the driver.
- Press “Next” to restart the PC and implement the modifications.
To check whether you’ve successfully installed the latest driver version:
- Go to “Device Manager” and choose the “Display Adapters” option.
- Double-tap “Display Adapter.”
- Select the “Driver” section.
- Ensure the “Driver Version” and “Driver Date” fields match your graphics driver’s information.

Make Sure the GPU Is Always Detected
Without a GPU, you won’t be able to access programs that pull a lot of resources from the PC. If the issue is not addressed, the display will fail and you’ll be left with a black screen. However, several methods can offer a solution. You can use the BIOS, Task Manager, or Device Manager to help your PC identify and read the graphics card.
Has your PC ever failed to detect the graphics card? Which of the above methods helped you? Let us know in the comment section below.
Related Posts


Disclaimer: Some pages on this site may include an affiliate link. This does not effect our editorial in any way.