Steam is easily the most popular gaming app on the planet. So few things hit harder than the “could not connect to Steam network” error when you have a couple of hours of free time. Steam has the nasty policy of requiring an internet connection for users to play games.
Thus, unless you have some single-player offline games on your computer, you will need to connect to the Steam server network to play your favorite titles. Check out some of the fixes you can try when encountering this issue.
Check the Server Status
One of the most common reasons you may get the “could not connect to steam network” error is a server problem. Before going through a list of potential fixes, determine if the problem is on their end.
Check the Steam Status website and find out if everything is working fine. If you see server outages, there might be nothing wrong with your connection. However, if the Steam server status is in excellent shape, you can start implementing some fixes.
Restart the Connection
The network connection error can appear after an incomplete or incompatible update. It can also come up when reconnecting to the internet after a modem issue or a power outage. But sometimes, you may have to force your machine to reconnect to the Steam network manually.
- Launch Steam.

- Select the “Go Online” option.

- Navigate to “Connect to the Internet.”
- Select “Restart Steam.”
Alternatively, you may want to launch Steam in “Offline Mode.” This will allow you to load the interface and change the connection or network settings before going online.
Restart the PC or Mobile Device
It may seem like an antique move from the days of Windows 98/XP blue screen errors, but a PC or mobile device restart can fix many issues, including connection errors. It’s no different when launching Steam or any other app.
Reboot your device, let your background apps and services load, and then try to log into your Steam account again. It may fix a frozen application or some driver issues that cause the “could not connect to Steam network” error.
Check Your Background Apps
Steam has a tricky app with many weird policies and incompatibilities with third-party software. It may surprise you that it won’t always work with anti-malware and antivirus software running in the background.
Granted, this shouldn’t happen when using reputable software. But you don’t always know what incompatibilities new updates and drivers can cause.
Therefore, you may want to disable some background apps before logging into your Steam account. Here are some types of apps you could disable:
- VPNs
- Firewalls
- Antivirus
- Antimalware
- Antispyware
- Peer-to-peer apps
- Torrent apps
Naturally, you can test out different applications. But if Steam isn’t loading because of a firewall or antivirus, you should find a piece of software that won’t interfere with your favorite gaming service. It’s not worth using Steam at the expense of your online security.
Update the Client
Usually, Steam automatically downloads and installs updates. The app should also notify users to restart the client after installing a new update. But sometimes, you can miss an update, or something can go wrong during it, causing connection issues.
In that case, you can perform a manual update.
- Launch Steam.

- Click the “Steam” button on the toolbar.

- Select the “Check for Steam Client Updates” option.

- Install the update if the app finds one.
- Restart Steam to see if you get the same connection error.
Switch Between Ethernet and Wireless
If your internet connection is slow, you may not be able to connect to the Steam server network with a wireless connection. It may happen even if you can browse the internet and access websites or launch other online apps.
Try using your Ethernet connection instead. If you have trouble while using an Ethernet connection, your cable or motherboard could be experiencing problems. Log in to Steam using your Wi-Fi instead.
Run It in Admin Mode
Just because you’re using a login account with complete privileges doesn’t mean all your apps will run flawlessly. Sometimes you still need to start apps like a computer administrator. And it’s a lot easier than you think.
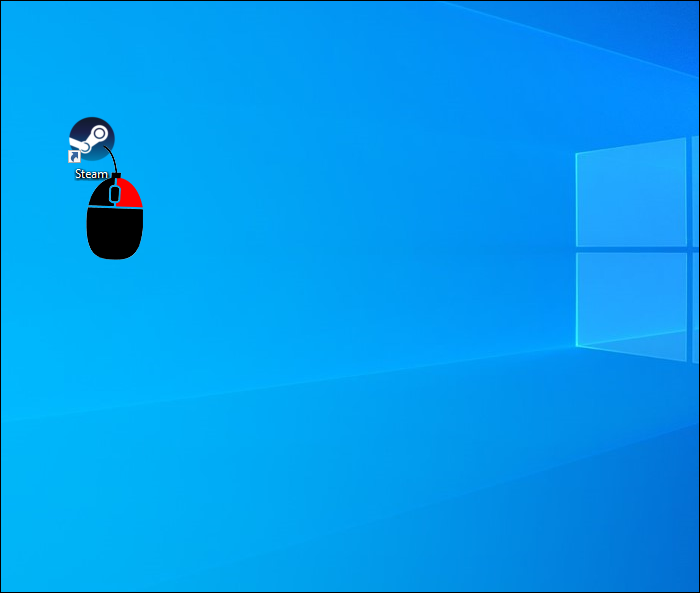
- Right-click the Steam shortcut.

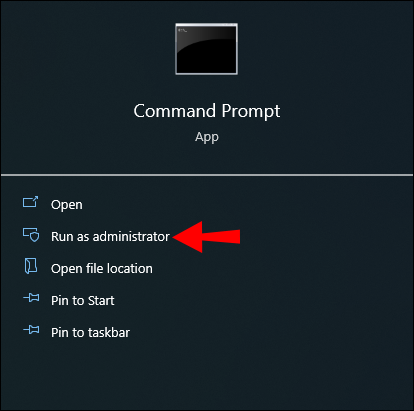
- Select “Run as administrator.”

- Confirm by clicking “Ok.”
If this doesn’t fix your network error, there are more solutions you can test.
Update the Network Driver
Unlike GPU drivers, network drivers aren’t always automatically updated. Some people may use the same version of the network driver they installed along with their operating system. So it doesn’t hurt to check if your driver is up to date.
- Type “msinfo32” in the Windows search bar and press “Enter.”

- Scroll down in the window’s right pane until you see the “BaseBoard Product” line.

- Search for the motherboard model online.

- Go to the manufacturer’s website and download the latest network driver.

- Install the driver and reboot your computer.
- Try to log into your Steam account again.
Switch the Protocol
The Steam launcher uses a UDP protocol to connect to the Steam network. But protocol issues can also cause the connection failure error. To troubleshoot this problem, simply change the protocol.
- Right-click the Steam launcher icon.

- Go to “Properties.”

- Locate the “Target” field.

- Go to the end of the path and type “-tcp”.

- Apply the new configuration and restart the app.

Although a TCP connection may cause lag, it should resolve protocol-induced connection errors.
Reset Your IP
Many variables can cause the “could not connect to Steam network” error, including IP-related issues. Renewing the IP address could help you reconnect to the network and enjoy your favorite games.
Fortunately, you can quickly do this by typing a few commands in Command Prompt.
- Type “Command Prompt” in the Windows search bar.

- Right-click the app and run it with administrator privileges.

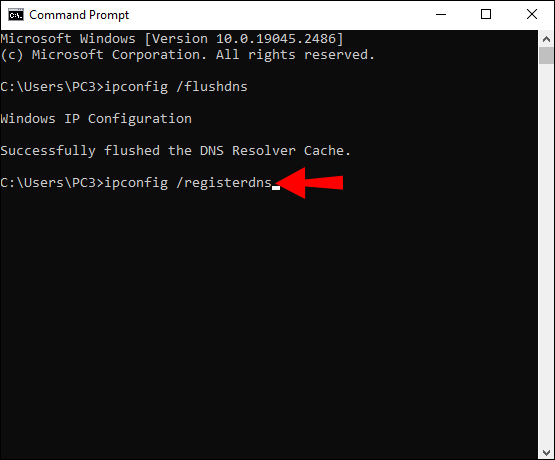
- Type the “ipconfig /flushdns” command and hit “Enter.”

- Enter the “ipconfig /registerdns” command after flushing the DNS.

- Type the “ipconfig /renew” command and press “Enter.”

Although resetting the IP is a complex process, users can do it with three simple commands and a bit of patience. However, using all three commands in the listed order is essential. You will clean the system of old IP addresses that could affect your connections.
Note that Steam may ask you to authorize the device again, so keep an eye out for the confirmation code on your phone or inbox.
Check the Port Availability
Steam has a list of ports it needs to use for you to access its server network. It’s worth checking the status of the ports when you can’t connect using the desktop launcher.
- Type “cmd” in the Windows search bar.

- Open Command Prompt as an administrator.

- Type “netstat –ab” and press “Enter.”

The command will list all open ports used by apps and services on your machine. Look for fields listing the Steam app. You want to see the tag “LISTENING” under the “State” column. A port that doesn’t have that tag could be closed and interfere with your connection.
Reset the TCP/IP Stack
Another common solution for many connection failures or limited connection problems is to reset the TCP/IP stack. You can do this from Command Prompt. Follow the steps below to get started.
- Type “cmd” in the search bar.

- Right-click and start the terminal as an administrator.

- Type the following commands (without quotes) in order and press “Enter” after each line:
“netsh int tcp set heuristics disabled netsh int”
“netsh interface tcp set global autotuninglevel=disabled”
“netsh interface tcp set global rss=enabled”
- Verify the settings were disabled by running this command: “netsh int tcp show global”.

- Restart your computer and try Steam again.

Reinstall the App
Reinstalling Steam may seem like a drag. But when all else fails, it could be the only remaining solution. The biggest inconvenience is that reinstalling the app will delete all games. For some users, that could mean hundreds of gigabytes that require downloading, lost screenshots, etc.
Because of this, many people prefer a common workaround. They copy the “Steamapps” folder to a new location and then remove the app. After a fresh installation, the “Steamapps” folder can be copied to the new one to access all games immediately.
However, games can also have corrupted files, which could be why you cannot connect. Thus, the sensible solution is to perform a clean reinstallation by deleting all game files, cookies, saves, and all other Steam-related data. It’s the only way to ensure the app itself isn’t responsible for the connection failure.
Don’t Forget to Take a Break From Gaming
No one likes to see “could not connect to Steam network” when they’re in the mood for gaming. But that doesn’t mean you should forget to rest your eyes occasionally. Experiment with other sources of entertainment and game responsibly.
With that out of the way, this Steam connectivity error may have many fixes. It comes down to isolating the root cause. Most users do that by trial and error. But slow internet speed, bad updates, and incompatible background apps are often the primary reasons you can’t connect to Steam.
With that in mind, what fixes usually work for you? Let us know how often you get this error and what you use to fix it. Feel free to share extra tips in the comments section below.
Disclaimer: Some pages on this site may include an affiliate link. This does not effect our editorial in any way.


