Steam is a cloud-based gaming site that allows users to purchase and store online games. Launched in 2003, the gamer-focused platform has been around for nearly two decades. Some users have maintained loyalty to the platform since its inception.
The thing about gaming usernames is that what seemed cool when you were 16 doesn’t quite have the same ring to it when you get a little older. For platforms like Steam, where we have been gaming since we were very young, names can mean a lot or very little, depending on your perspective. If you’ve outgrown your account name on Steam, can you change it?
Before answering that question, you must understand that there is a difference between your Account name and other usernames on the platform. Your Steam account name is a number that cannot be changed. Your Steam profile name is the name your friends and other gamers see, and this can be changed.
Change your Steam account name
You cannot change your Steam account name. This is the numeric identifier tied to your account and cannot be changed under any circumstances. Exactly why is unknown, but it is made clear in Steam’s T&Cs that it cannot be modified.
Change your Steam profile name
Your Steam profile name is another matter. This is the name that appears at the top of the page or in the top right. This is the name your friends will see and use to contact you in-game. You can change this name.
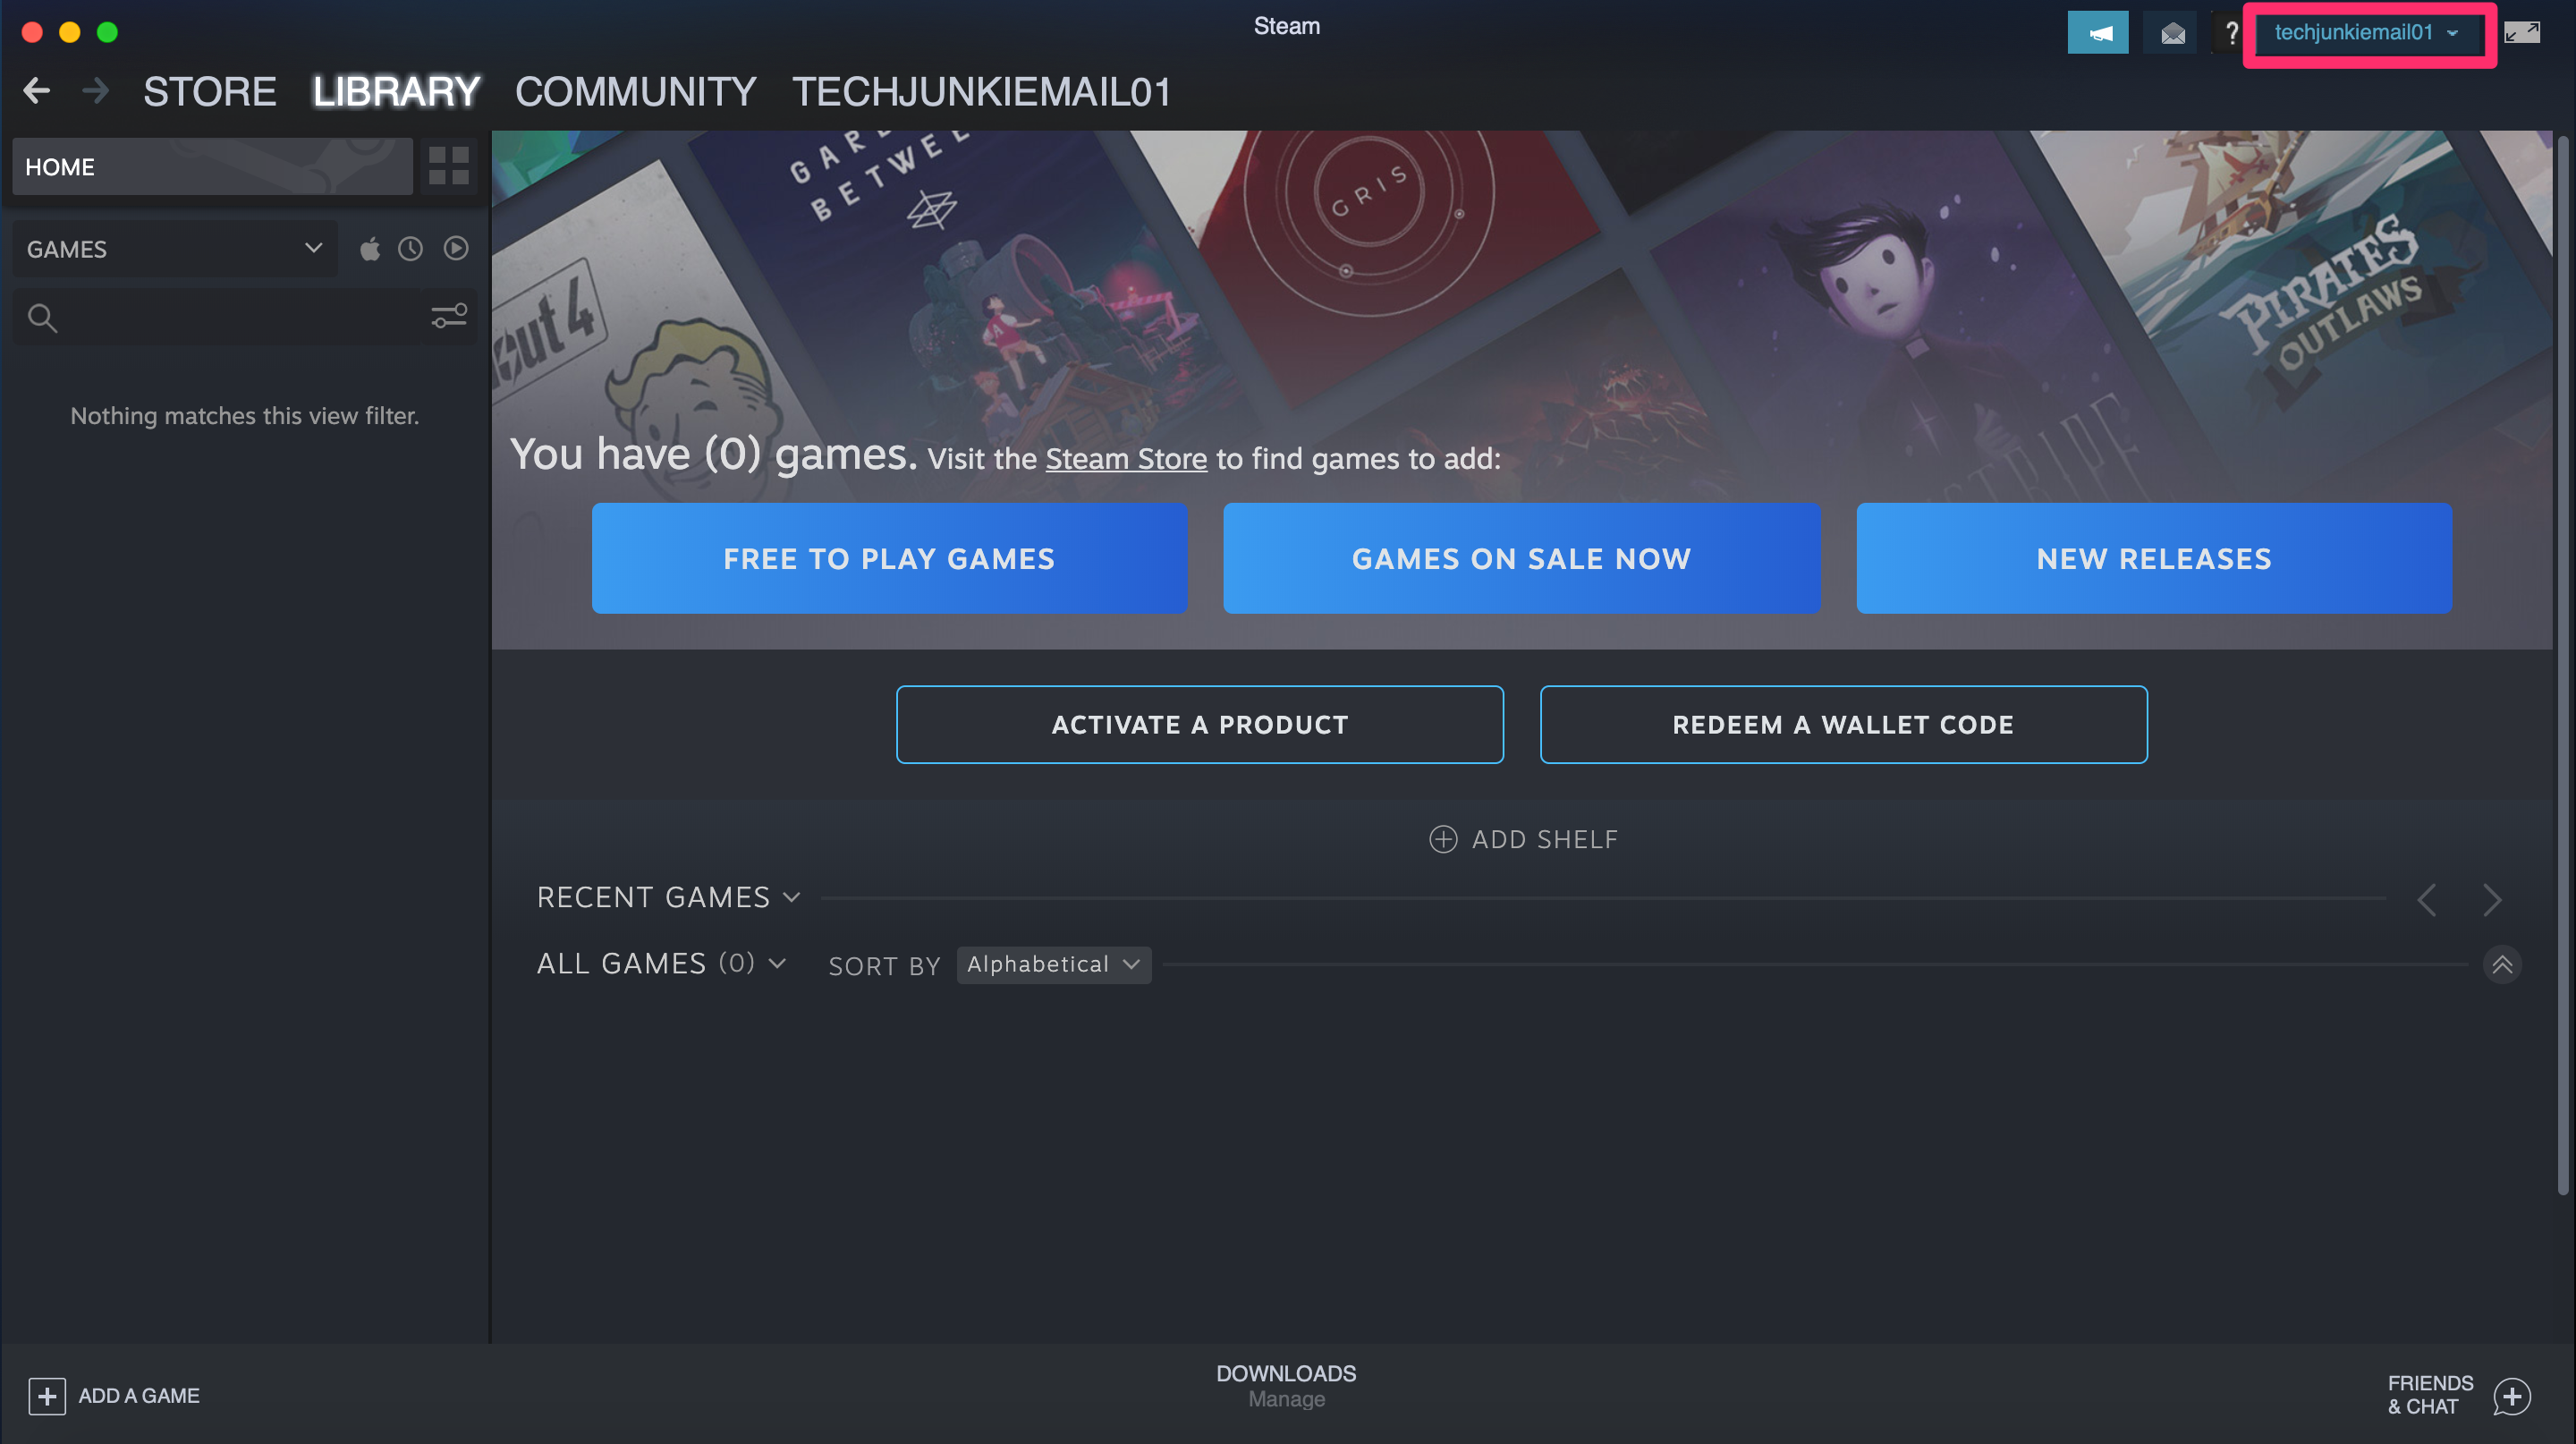
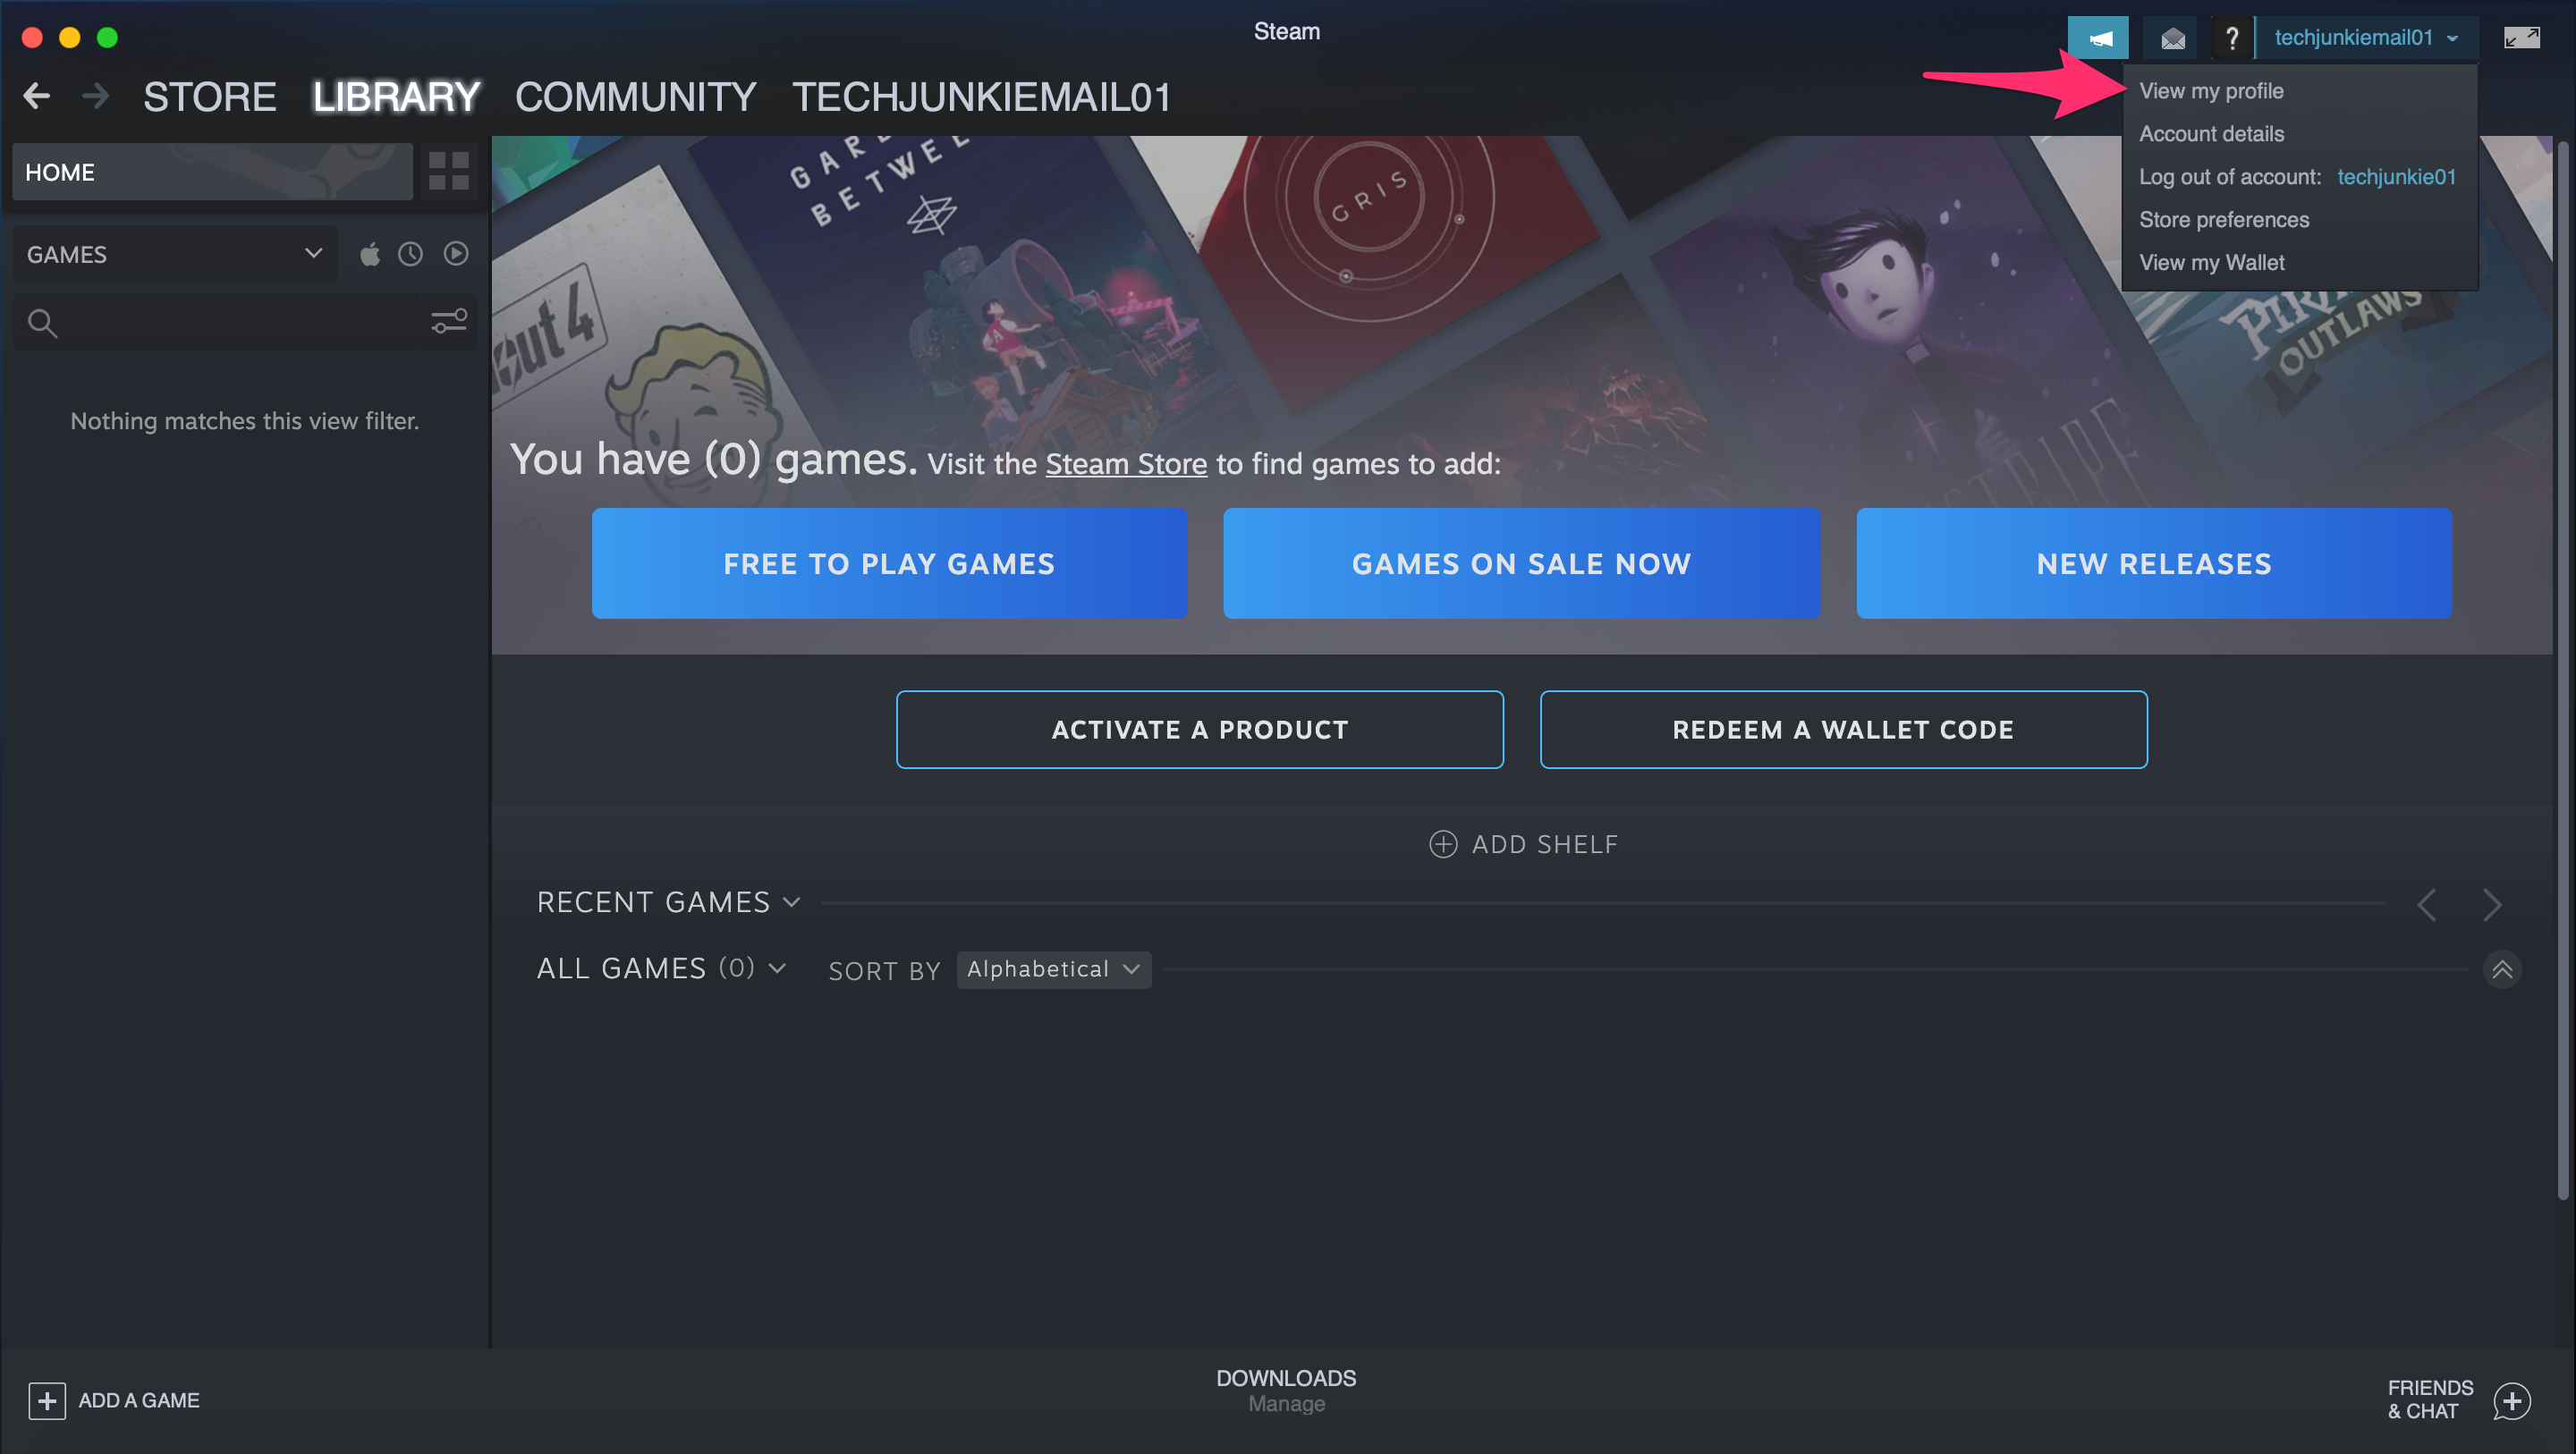
- Log into Steam and select your current username in the upper right-hand corner.

- Click View Profile in the dropdown menu.
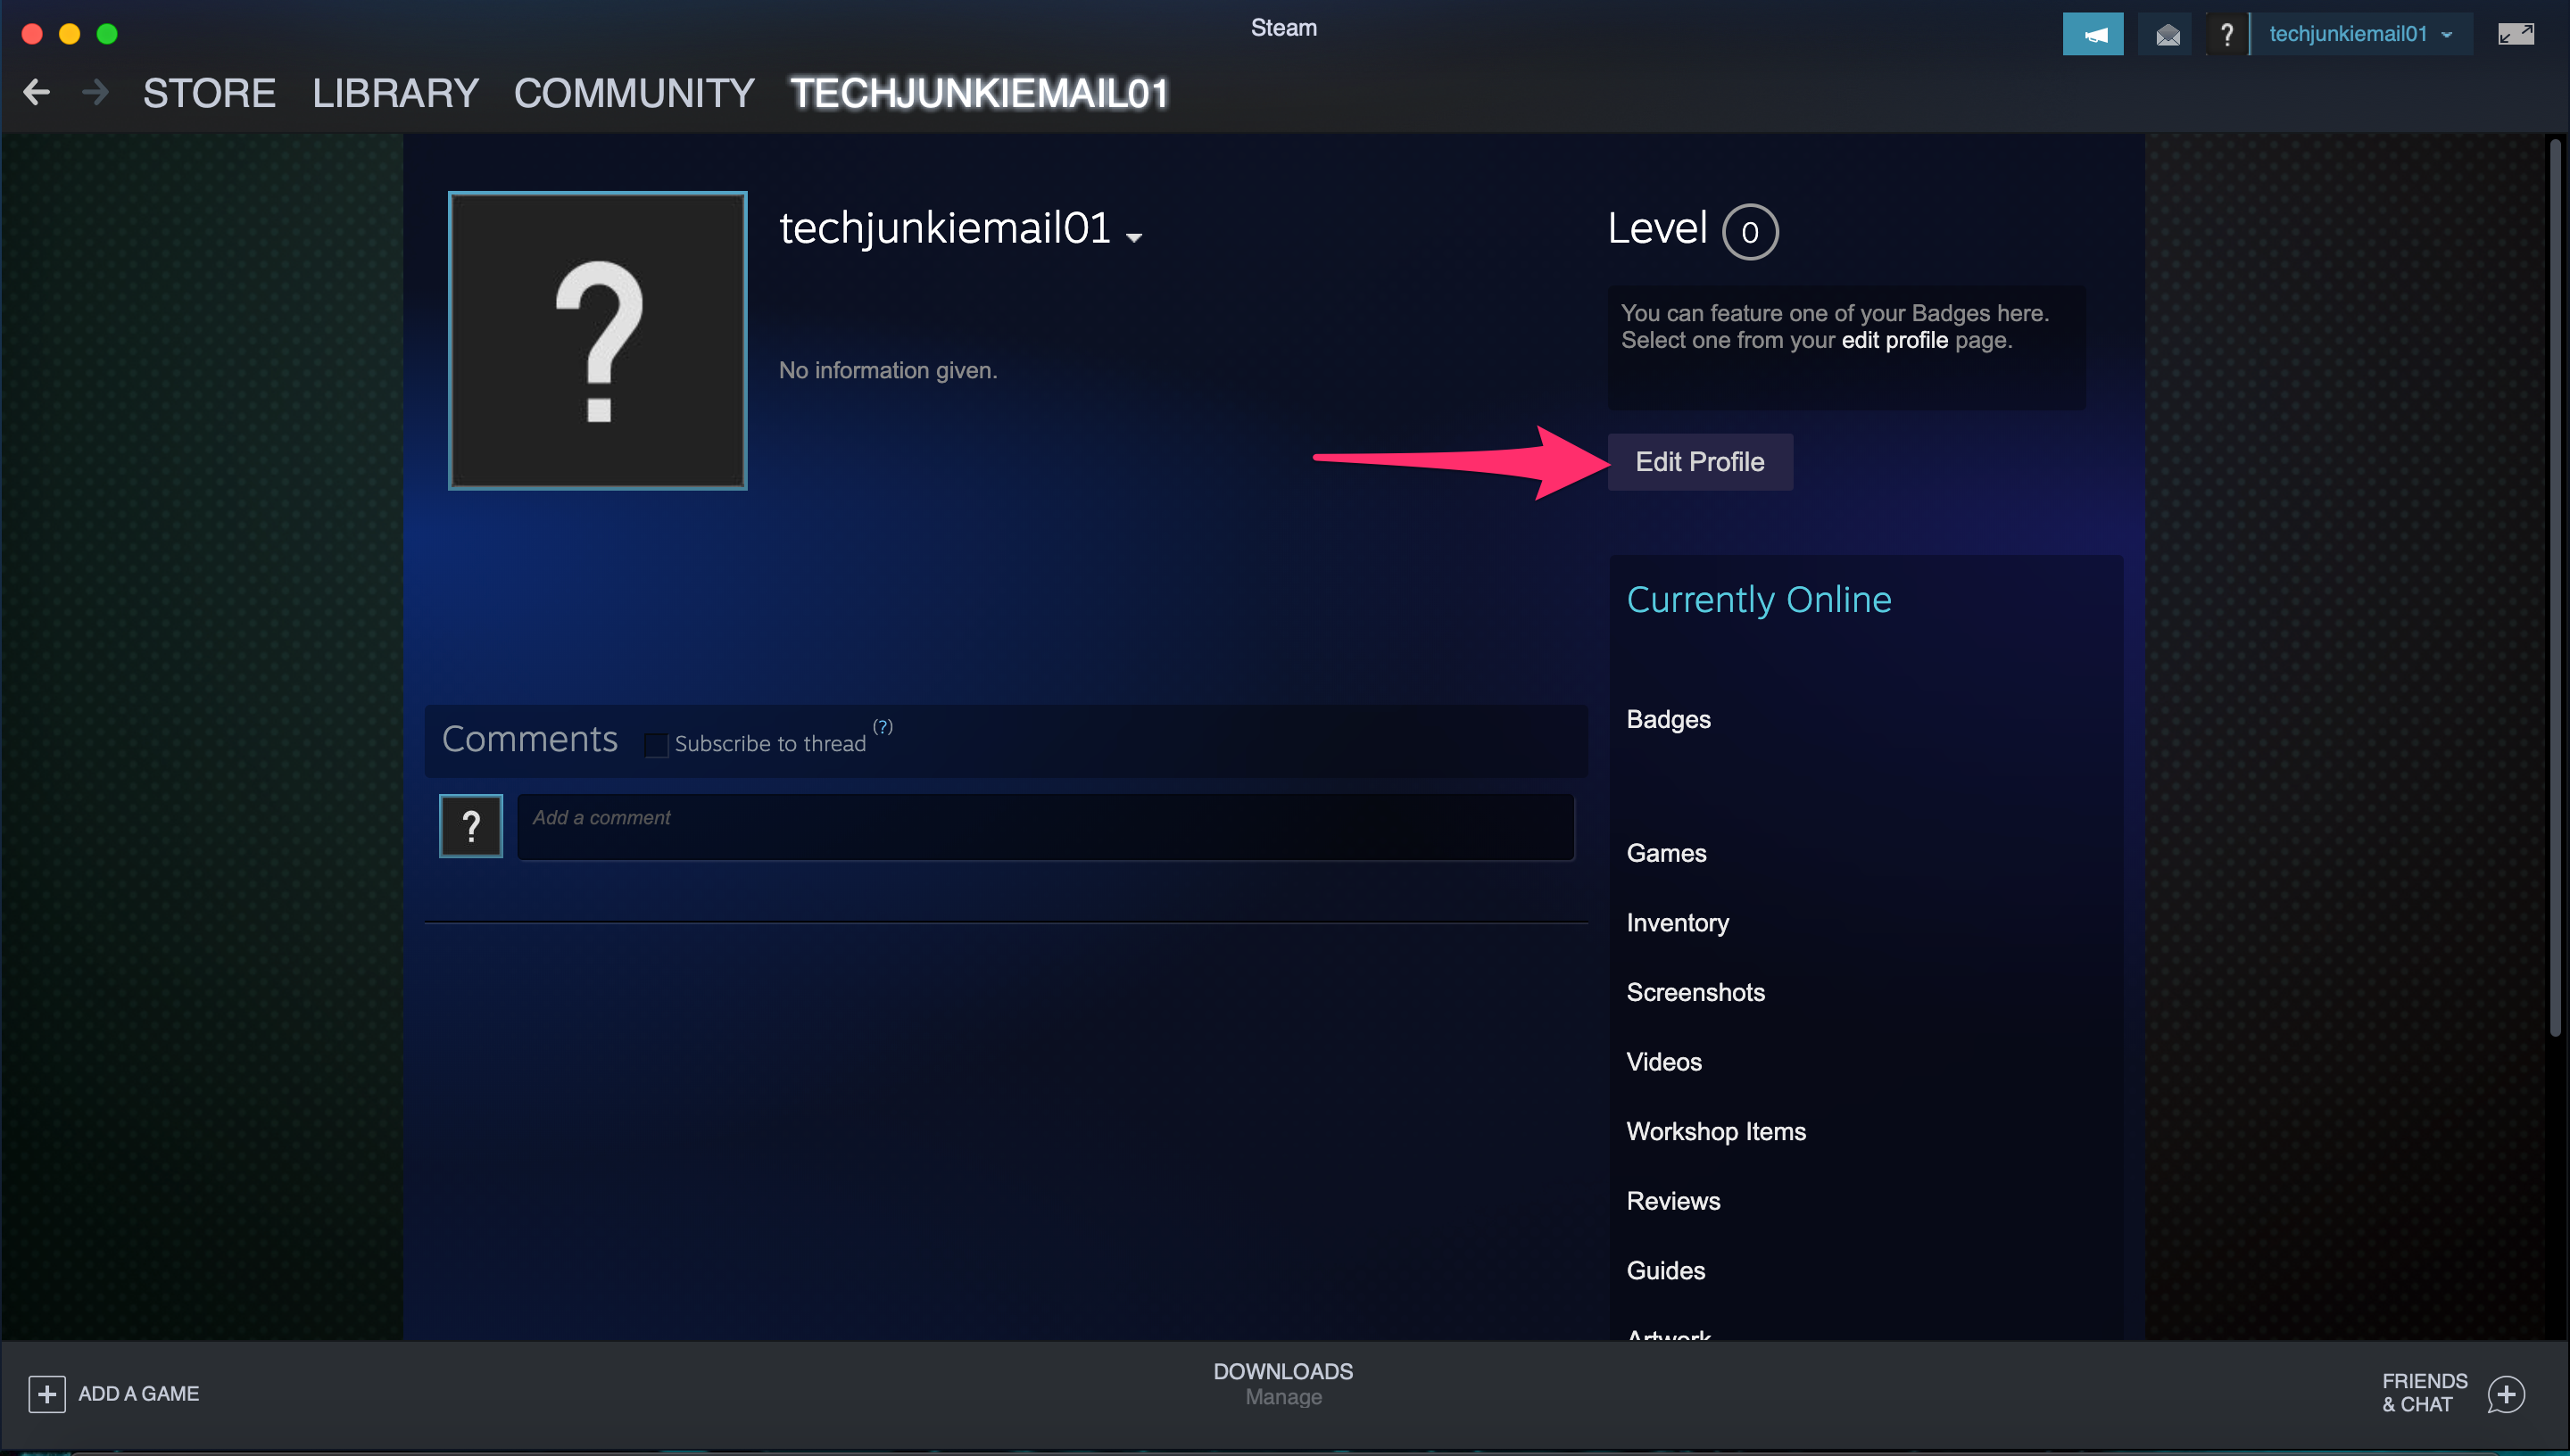
- Click Edit Profile located to the right.
- Type over your existing name to change it.
- Select Save Changes at the bottom to save it.
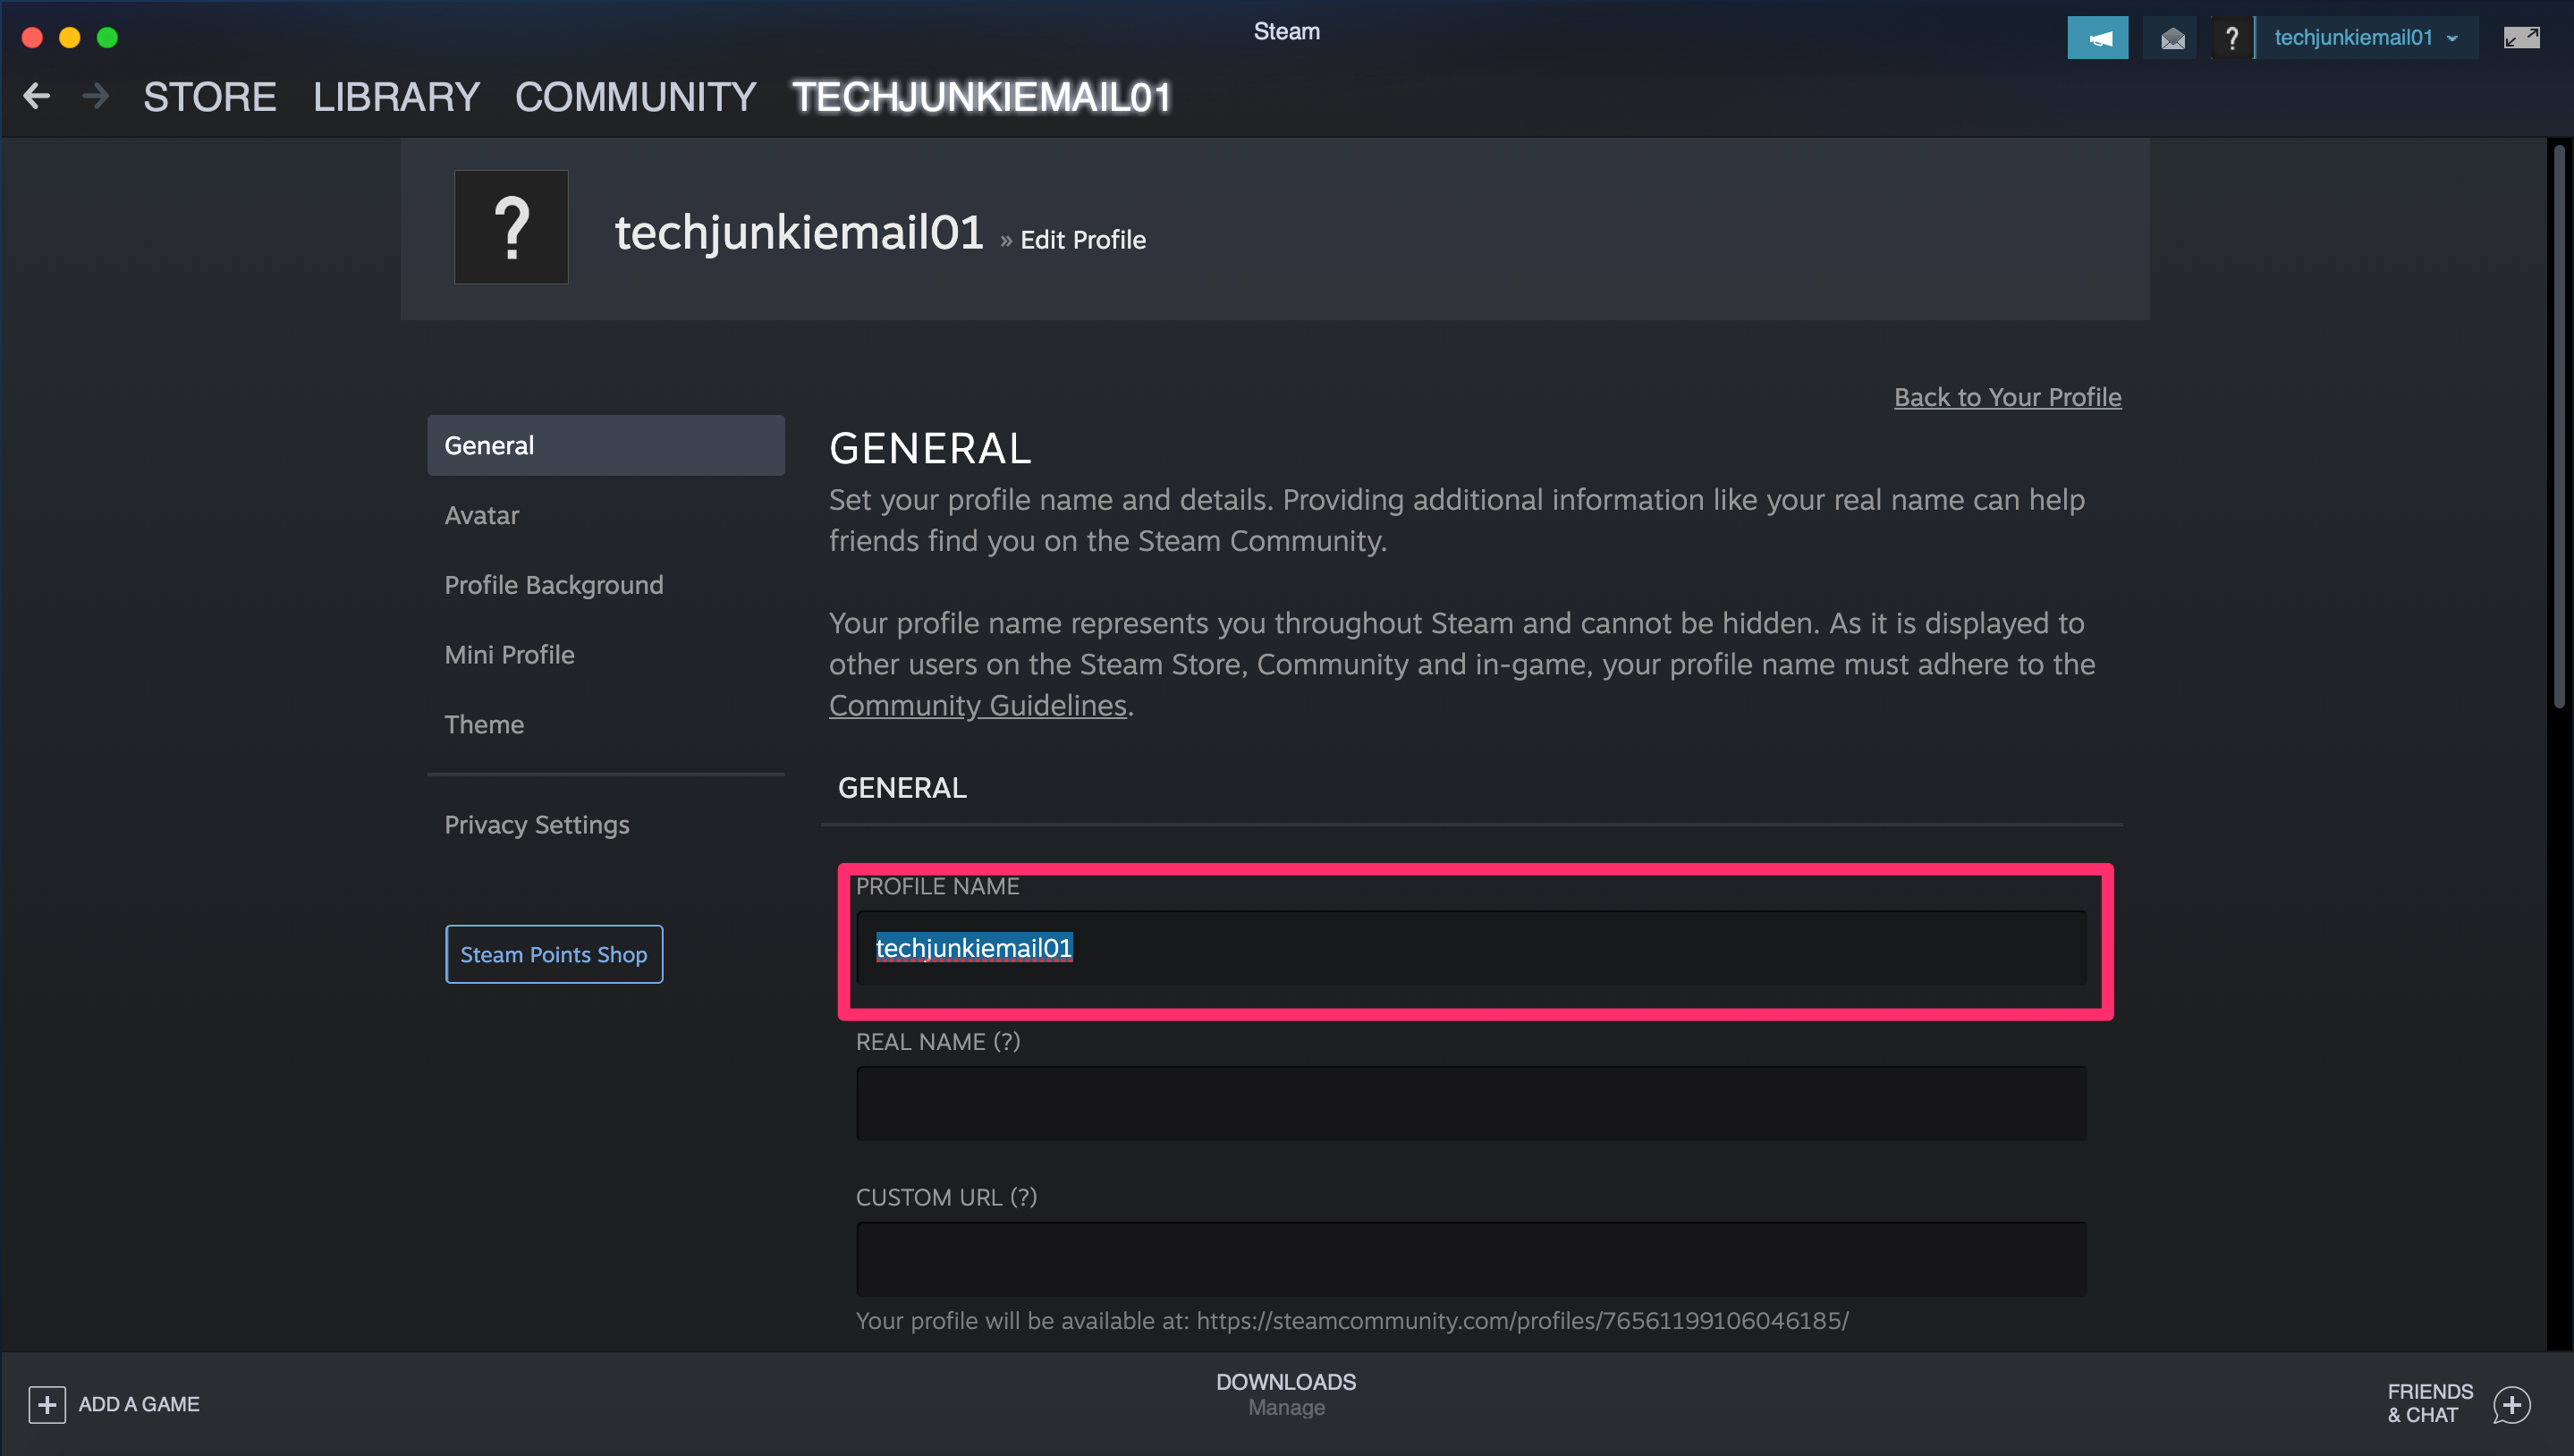

Your new profile name should change immediately so everyone you’re connected with can see it.
Can I Set up a new Steam account and transfer my games?
If you cannot create a new Steam account name, wouldn’t it be nice if you could set up a new account and transfer all your games? It would be nice, but you cannot do it. Game licenses are single-user licenses and are already assigned to your Steam account. You cannot merge accounts, which is what setting up a new account and transferring existing games is. You are stuck with what you have.
Deleting your Steam account
There is a big difference between uninstalling Steam and deleting your Steam account. Uninstalling just means freeing up a terabyte or so of hard disk space. Deleting your Steam account means exactly that. Deleting all of your account details, your licenses, your CD keys, and everything to do with that account.
You can set up a new Steam account name this way, but you also lose access to all your games. You will lose access to all games bought through Steam and will not be able to reuse any CD keys purchased through the platform. Games you bought elsewhere but added to Steam should still be playable outside of Steam as the license was acquired elsewhere.
Finally, all of your community contributions, posts, discussions, mods, and anything else will be deleted too. You can only delete your account by filing a support ticket. Keep in mind that you will need to go through a few verification steps to close the profile.
Creating a New Account
Once your Steam account is canceled, or even before if you’d like to use another email account. Creating a new Steam account is super easy. You will need to verify your new email address. Then you choose a new account name.
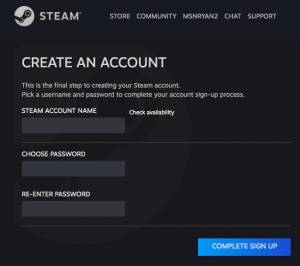
Your account name should reflect who you are while understanding your personality or likes may change in the future. Rather than choosing “DallasCowboysfan08” try “NFLfan” because who knows what will happen in the future.
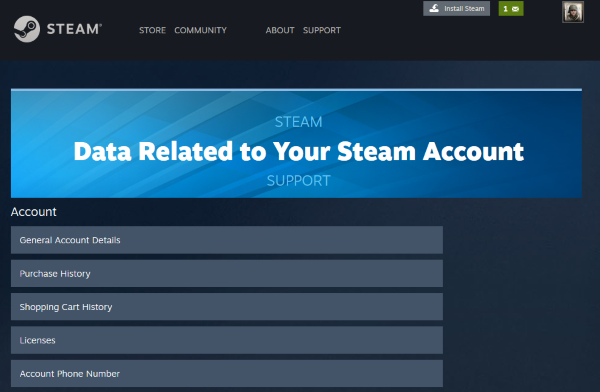
Viewing data held by Steam
You can view your Steam records, change some of the data held there, or tune your Steam experience. You still cannot change your Steam account name, but you can modify account details, your profile name, two-factor authentication, and a ton of other stuff.
Going through the entire list takes a while, but you would be surprised at some of the settings. This is especially true if your Steam account is as old as mine is!
Keeping your Steam account safe
Considering how important our Steam accounts are to us, it pays to keep them safe. Nothing is 100% secure, but if you take a couple of practical steps, you should be able to avoid the more prevalent issues that are around.
Make sure you’ve enabled Steam Guard two-factor authentication. This will send a code to your email or phone any time someone tries to log in from an unauthorized computer or tries to make changes to your account.
Use a strong password on your Steam account. Using a passphrase rather than a single word is more effective as long as you can remember it. Only allow Steam to remember your login details if you’re the only one with access to your computer and obviously never share it.
Ignore emails from Steam that ask for details. Phishing for Steam accounts is pretty common, so ignoring them all is best. If you are notified of something via email, delete the mail but go check it out personally on Steam. Do not go through any links in the email. If it is legit, you should be able to do whatever it is you need to do from within Steam.


Disclaimer: Some pages on this site may include an affiliate link. This does not effect our editorial in any way.