If you want to manage your Discord server effectively, you will need to know how to control the conversation and handle toxicity online. While the vast majority of people just want to get on and enjoy themselves, there are always a few who seem to take pleasure in spoiling things for others. That’s why you need to know how to block and unblock someone on Discord.
Discord began as a games chat server to take on TeamSpeak. It did that, and it won. Discord then grew into something much more than just games. It is now used by people across the world for all kinds of reasons, from business to hobbies and everything in-between.
Sometimes it’s a cultural thing; sometimes, it’s just a being a jerk thing. Hardly a day goes by online where someone doesn’t make an annoyance of themselves in one form or another. Whether that’s by throwing insults, sarcasm, being rude, spamming, talking trash, being offensive, or worse. Whatever is going on, knowing how to handle it is key.
Discord provides several tools to control your chat server. The most widely used are blocking and unblocking. You can also mute or kick or even ban someone from your channel. This tutorial will show you how.

Blocking Someone on Discord
Blocking shouldn’t be the first thing you do, but as it’s in the title of this tutorial, we should tackle it first. There are two ways to block someone on Discord.
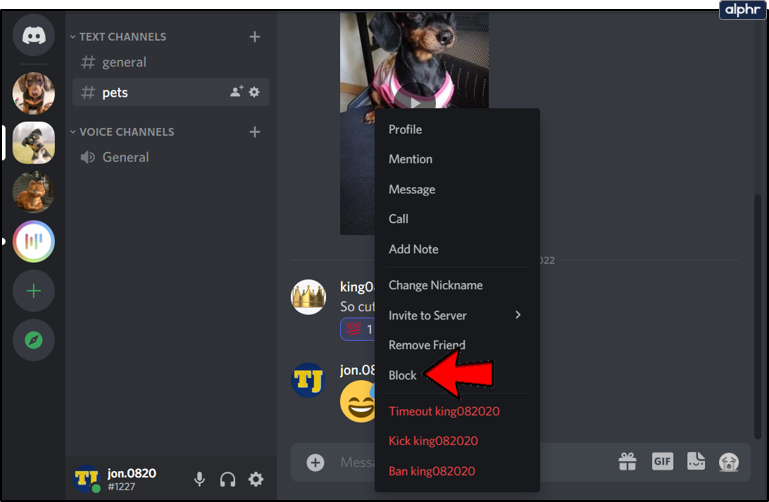
Block them from the chat:
All you need to do to block someone from inside a channel is to right-click on their username and select Block.
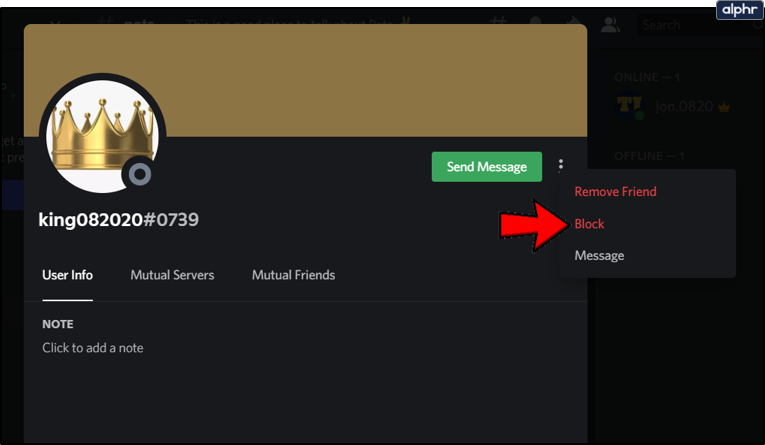
To block someone from their profile:
- Click on the user’s name in the message part of Discord.

- Click on their profile picture.
- Select the three-dot menu icon at the top right.
- Select Block.


Blocking is limited to chat. The person you block will still be able to see what you write and see your status but will not be able to contact you via DM.
It may be more effective just to mute the person. This shuts out their noise without blocking them from contacting you altogether.
Unblock Someone on Discord
If you have blocked someone and they promise to be good, you may like to unblock them to see if they are true to their word. It is as simple as blocking as long as you can find their username from chat history or your friends’ list.
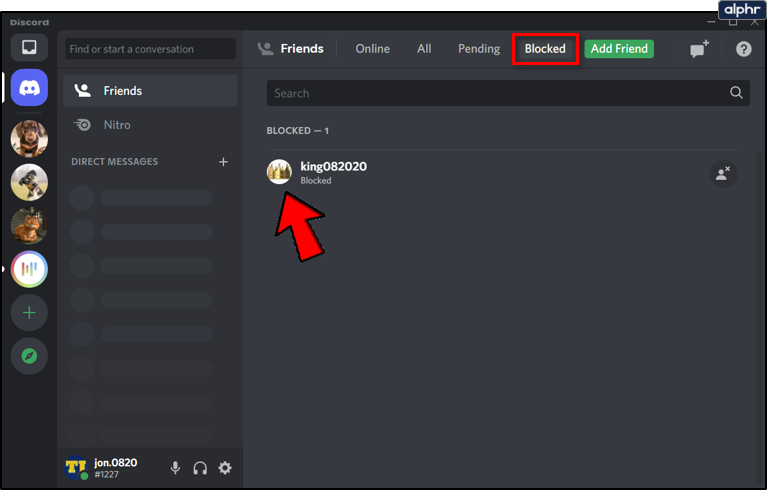
- Select the Friends tab from the DM list.
- Find the person you blocked from the Blocked list.
- Click on their profile picture.
- Click on the three-dot menu icon in the upper right-hand corner and select Unblock.


That person will now be able to interact with you on your chat server. Do keep in mind that you will need to send them another friend request and have them accept it after you’ve unblocked them.

Mute Someone on Discord
Muting is less permanent than blocking and will clear the airwaves of their noise, for you anyway. You will no longer hear anything they say on the server for that session.
- Right-click the person’s name in the user list on the left.
- Select Mute.
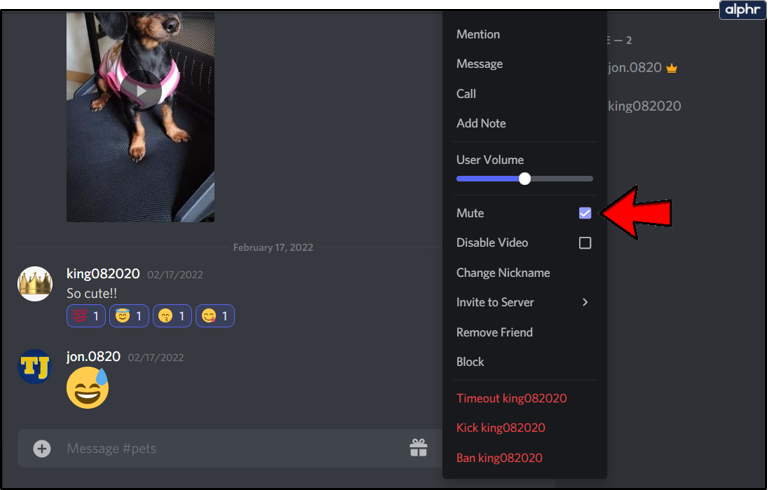
From now on, during that session, they will be able to talk as much as they like, but you won’t hear a thing! What’s more, they don’t know you have muted them either. Although it will quickly become apparent when you don’t react or reply.
So far, we have tackled someone who has been making trouble for you individually. But what about if they are generally annoying to the whole server? Then you have two crowd control options, kicking and banning. Both are useful in their own right but should only be used in the worst-case scenario.

Kicking Someone from Chat in Discord
Kicking someone in Discord is the same as any other chat. They are booted from the server and will have to rejoin if they can. If the person is being an annoyance to everyone, this is how to handle them.
- Right-click the person’s name in the user list on the left.
- Select Kick and enter a reason if you want to.

Adding a reason is purely optional but will tell the person you’re kicking exactly why it happened.
Banning Someone in Discord
Banning someone in Discord is the measure of last resort. If you have muted, blocked, or kicked someone, and they keep coming back for more, it’s time to get the ban hammer out. It’s the same as kicking, only permanent.
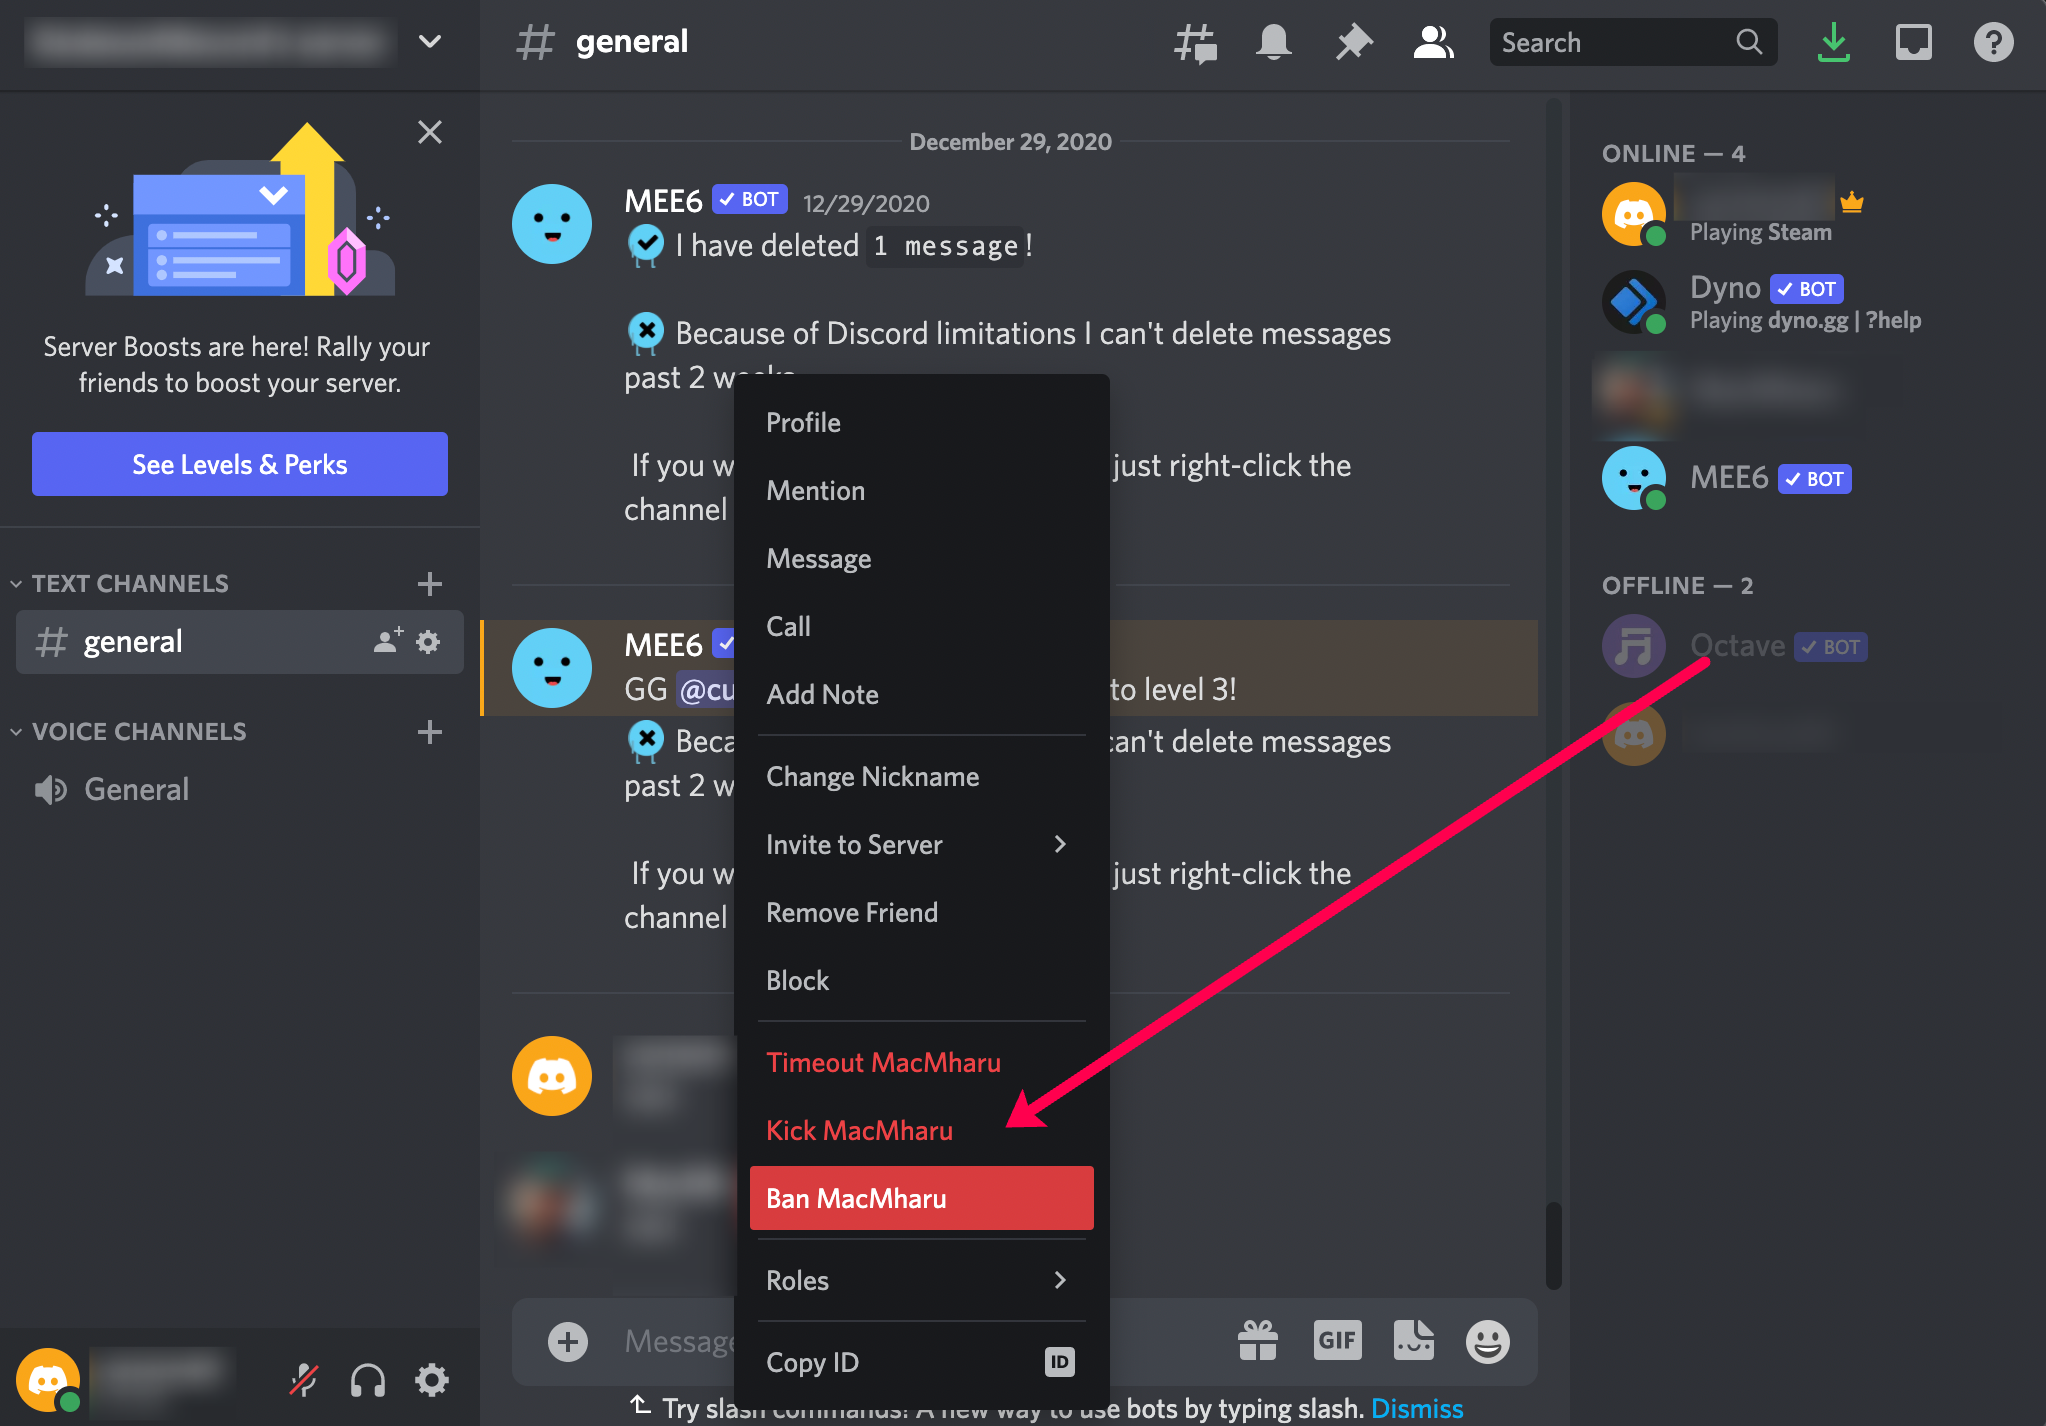
- Right-click the person’s name in the user list on the left of the chat dashboard.
- Select Ban and enter a reason if you want to.


Again, adding a reason is optional as it’s only the person you’re banning who sees it.
Frequently Asked Questions
Here are the answers to more of your questions about blocking users on Discord.
What happens when you block someone on Discord?
Unlike the blocking behaviors of many social media sites, Discord works a little bit differently. Mostly, because this is a group messaging app, it wouldn’t make much sense to hide your messages within a mutual channel. So, while Discord will hide messages in the chat, you can click on them to read them.
When you block someone on Discord, they cannot send you direct messages or mention you directly, and you’ll no longer appear on their friend list.
Can I block someone who blocked me?
Perhaps your nemesis beat you to the Block button. If so, don’t worry. You don’t need to wait until they block you to return the favor. Follow the same steps we outlined above to block a user even when the user blocked you first.
Discord provides all the tools you need to maintain a happy and productive chat server.


Disclaimer: Some pages on this site may include an affiliate link. This does not effect our editorial in any way.


