Want to know how to blacklist and ban words in Twitch? Want to control the language that you hear on Twitch? Make your channel accessible by all ages or cultures? Want to control the amount of swear words or insults thrown around in Twitch chat? This tutorial will show you how to ban phrases and words on Twitch.
There is a fine line between free speech and harassment or generally being annoying. If you spend time and effort streaming on Twitch, you want to make those streams a place where people like to spend time. You want to allow people to have freedom of expression and enable people to hang out in safety.
The balance has to be struck between protecting First Amendment rights with the rights of others to live without the bullying, hate speech, insults, and the general toxicity that can happen in an online community.
In essence, managing a Twitch channel is a microcosmic version of our society’s more significant problems right now with civility.
The good news is that you have more control over your Twitch channel than you do most of the world around you!
Using Twitch AutoMod to Automatically Ban Words on Chat
Twitch uses AutoMod, which is an automatic bot that blacklists and bans words in Twitch for you. It can help block the worst toxicity that can occur on the platform.
AutoMod isn’t perfect, but it does seem to go a long way toward protecting your Twitch streams from the worst comments and language you might otherwise see. Given your preferences, you can configure AutoMod to be as strict or as relaxed as you deem necessary.
AutoMod will flag messages for you to allow or deny. It will not automatically block or mute anybody, nor will it create timeouts against users for you. You’ll still have to initiate blocking, muting, and timeouts manually.
What AutoMod does for you is monitor chat on your behalf and flag something up for you to check and allow or deny as you see fit. It’s perfect for enabling you to retain control of moderation with help from a bot specifically designed to flag questionable content for you.
How to Setup and Configure AutoMod
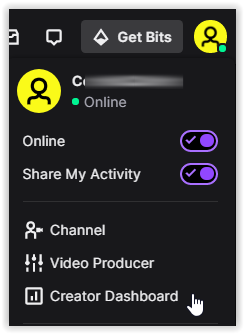
- From the main Twitch website page, Click on your “profile pic” in the top-right section, then select “Creator Dashboard” from the menu.
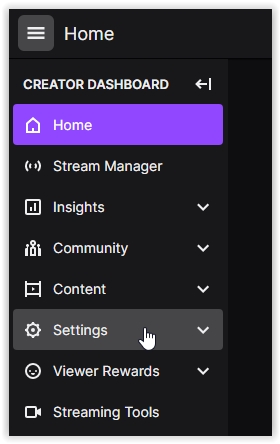
- Click on the “hamburger icon” in the top-left section of the page to open the “Navigation Menu.”

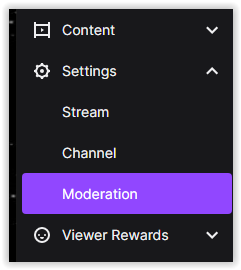
- Select “Settings” from the list.
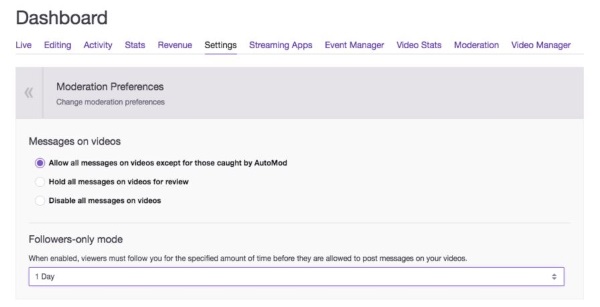
- Choose “Moderation” from the “Settings” sub-menu.
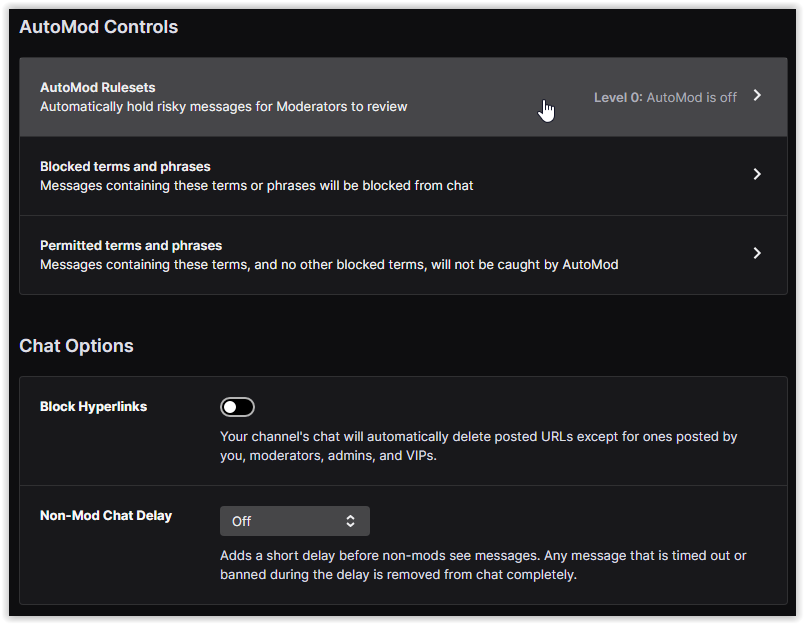
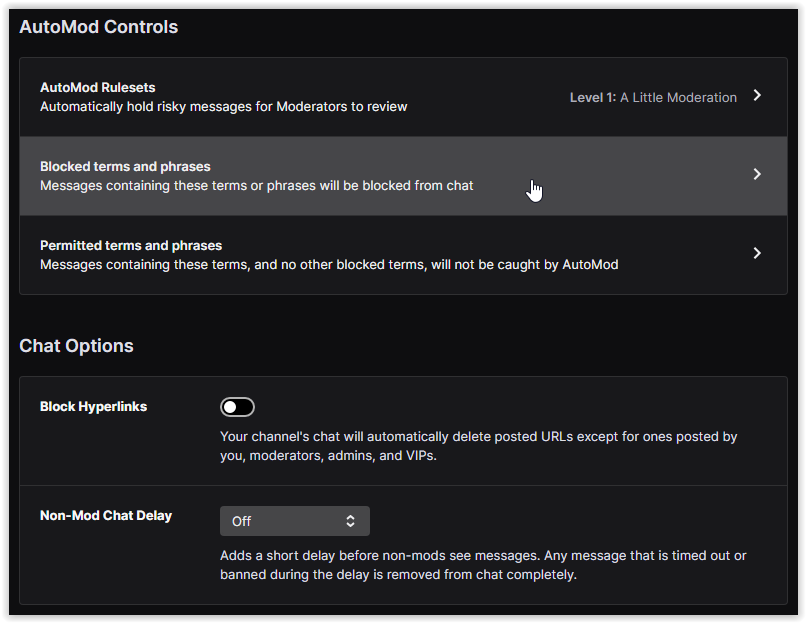
- In the “AutoMod Controls” menu, click on “AutoMod Rulesets” to open the auto-moderation settings.
- Click on “Turn On AutoMod” in the bottom-left section to activate the feature.
- In the “Your AutoMod Setting” section, use the slider to adjust your auto-moderation level. The categories below the slider will change to reflect the level you choose.
- To fine tune your moderation settings, you can click on a preset moderation setting and manually adjust it using the dropdown options.
- Once finished with your AutoMod settings, click “Save” in the bottom-left section to activate your custom configuration.


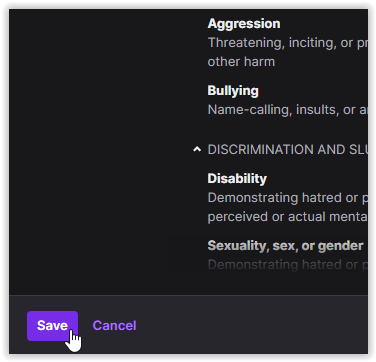
The five AutoMod levels are numbered from 0-4. “Level 0” has no filtering at all. “Level 1” is slightly more controlling and removes discriminative speech. “Level 2” removes sexually explicit and hostile language. “Level 3” adds more discrimination control, sexually explicit language, and hostility to the blocked list. “Level 4” adds more hostility restrictions plus increases control over swear words, profanity, and sexual harassment. Just remember that the higher the level, the more chances of chats not getting through, and the more you need to approve.
Note: When setting the AutoMod to “Level 0,” any words you added to the “Blocked Terms” section of Twitch will still function and could also prevent messages from getting sent.
Configuring AutoMod further
Twitch regularly monitors channels to identify new words and how AutoMod performs. It should automatically alert you to most terms and does an excellent job of blacklisting and banning words in Twitch. There is also a whitelist and blacklist you can configure manually for total control.
Customization of AutoMod is beneficial if your viewers are using slang, non-English words, or using words that you want to ban but that slip through AutoMod’s filters.
- Log into Twitch, click on your profile icon, then go to “Creator Dashboard -> Settings -> Moderation.”
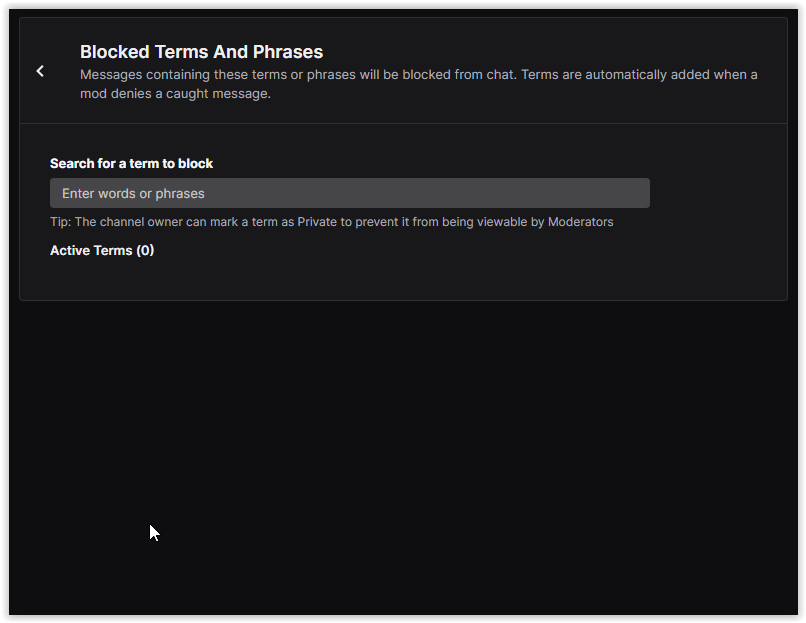
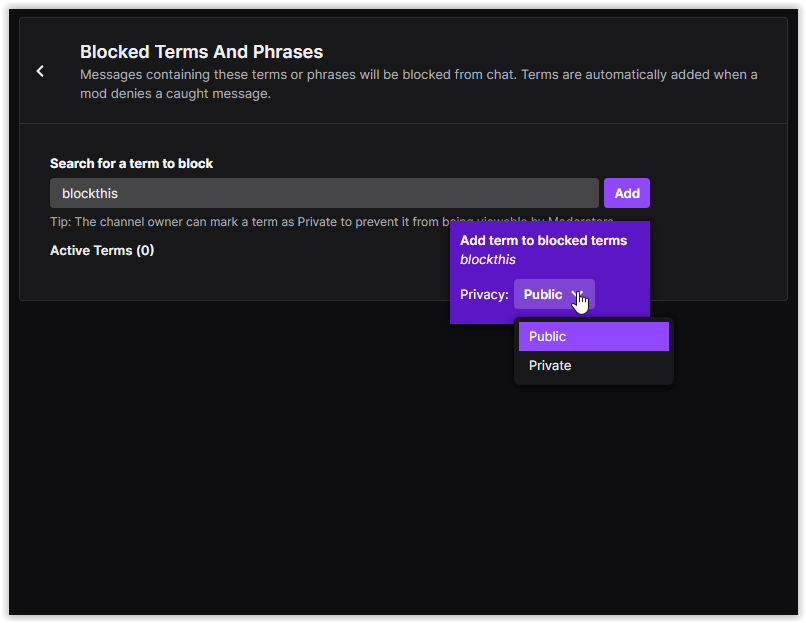
- Click on “Blocked terms and phrases.”
- Type the word(s) you want to block in the box provided.
- After typing a phrase or word, a popup appears. Choose either “Public” or “Private,” then click “Add” to save the term to your filtered list.
AutoMod will block the entire term you add rather than individual ones. So if you add a term with a common use word and something you want to ban, the common use word will not be blocked, only the complete term. Twitch allows unlimited blacklist blocking so that you can configure this to your exact needs.
AutoMod allows wildcards in the form of ‘*.’ For example, if you use ‘hate*,’ you will block words like ‘hateful’ and ‘hater.’ It is a valuable tool for filtering out a wide array of terms. Be careful using it, so you don’t inadvertently block other words you didn’t intend to stop.
On the same page as Blocked Terms, if you scroll down, you should see Permitted Terms. This section is where you can configure your whitelist. If you see AutoMod blocking words you’re okay with, you can add them here. Use the same method as above, remember to save your settings, and you’re golden.
Nightbot
Twitch AutoMod is a capable bot that can help maintain some resemblance of order on your Twitch channel. If AutoMod doesn’t quite do it for you, there is always Nightbot.
Nightbot is a third-party automated moderation bot that works on YouTube and Twitch and offers a compelling way to blacklist and ban words in Twitch.
I have never used Nightbot, but it may be worth checking out if you’re looking for an excellent alternative to AutoMod.
If you need to blacklist and ban words in Twitch, AutoMod is a good start. As a configurable bot, it has everything, and the included blacklist and whitelist offer granular control. Now you can configure your channels to make them somewhere people can go without the toxicity that puts us off.
If you enjoyed this article on how to moderate your Twitch feed chat, you might also like Everything You Need to Know About How To Cheer on Twitch, as well as How To Activate or Enable Bits on Twitch.


Disclaimer: Some pages on this site may include an affiliate link. This does not effect our editorial in any way.