When you broadcast your gameplay on Twitch, you might wonder if your settings are correct or if others are seeing the same things as you. While Twitch doesn’t like users from the same IP watching the same stream, you can still use another device to see if everything is alright. Be warned though, as using this trick to reach Affiliated status can be harmful.
For those who want to watch their past streams, that’s possible too. You’ll want to do both eventually since it helps you become a better streamer. Read on for all the details.
Watching Your Own Twitch Stream
When you set up your stream in OBS or other software, you can already see a preview of your stream. However, there are times when others aren’t getting the same footage. That’s when using a second device comes in handy.
While Twitch counts that second device as a viewer if you follow the proper process, don’t use this as a way to achieve growth. This type of artificial growth is against the Twitch Terms of Service. But you’ll be fine if you just want to view the stream.
- Start broadcasting your stream.
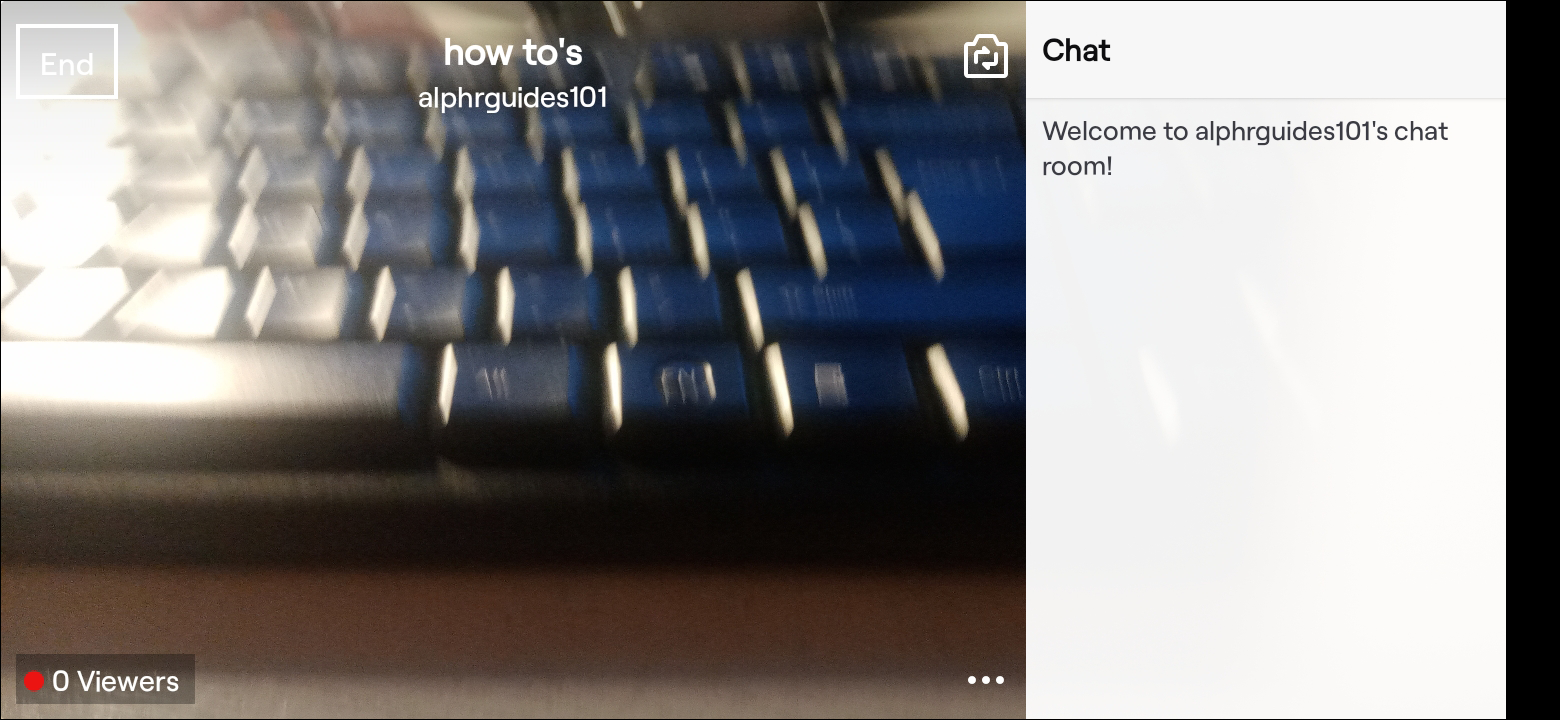
- Use another device such as a laptop or smartphone and log in to another Twitch account.

- Head to your stream.

- Start watching.

You can easily make a new Twitch account with another email address. The second device will watch your stream as a viewer, so you can tell if something feels off.
If your stream doesn’t have a chat, the second device isn’t counted as a viewer. Skipping a video preview also discounts it as a viewer.
To be safe, consider watching the broadcast on an entirely different network, such as using mobile data on your smartphone. Take care to use a different Twitch account, though.
Watching VODs
VODs are videos-on-demand, and they’re essentially the past broadcasts that you can go back to. Many streamers enable viewing past broadcasts, but they don’t last forever. After a certain period, Twitch will delete them permanently. Highlighting them can work, but you shouldn’t rely on this feature too much.
To enable the setting, follow these steps:
- Log in to your Twitch account.

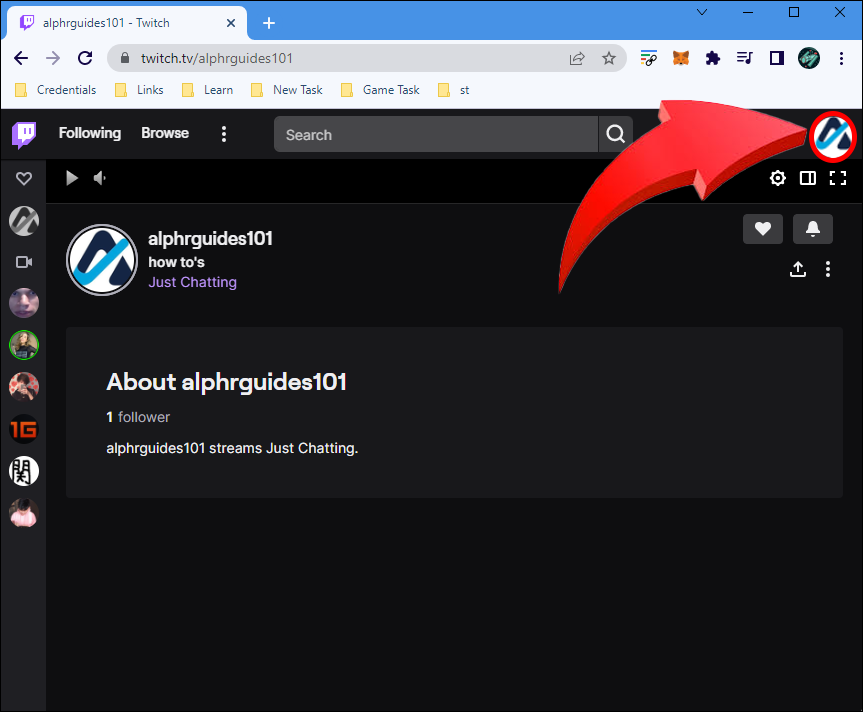
- Click on your profile icon in the top-right corner of the screen.

- Select “Creator Dashboard.”

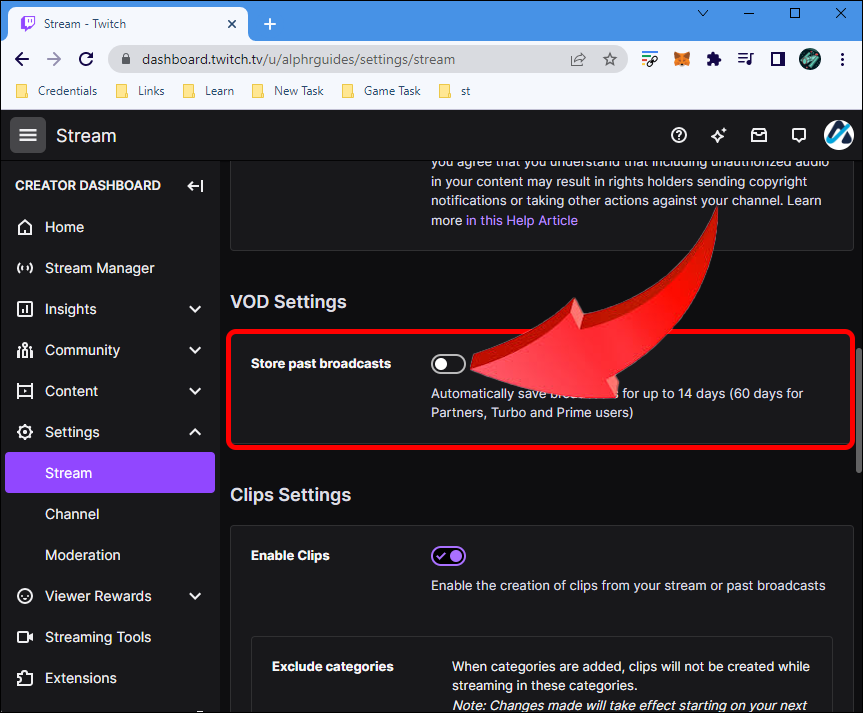
- Go to the Settings menu and click on “Stream.”

- Locate “VOD Settings” and toggle “Store Past Broadcasts” on.

- When the purple checkmark appears, you know your account will start saving VODs.

VODs last for a minimum of 14 days. This rule will apply to your account if it isn’t linked by Twitch Prime or Twitch Turbo. Non-Twitch Partners will also lose their past broadcasts after 14 days, including Twitch Affiliates.
Twitch Partners get to save VODs for 60 days before they vanish from existence.
To watch your own VODs, you only have to go to the Video section on your Twitch channel. Select any available VOD and start watching.
Fortunately, VODs aren’t broadcasts. You can stay on the same account without fear of getting banned or penalized.
Highlighting VODs
There are two main ways to save VODs for future viewing. One way is more accessible, which is to highlight them. The other involves downloading them and potentially uploading them to YouTube, which is objectively better.
Highlighting a VOD or portion of a broadcast will save it indefinitely on your channel. You don’t need to be a Twitch Partner to highlight and keep them forever, which is an excellent advantage for smaller streamers.
Here’s how you highlight a VOD.
- Log in to Twitch.

- Click on your account icon at the top-right.

- Go to the Creator Dashboard.

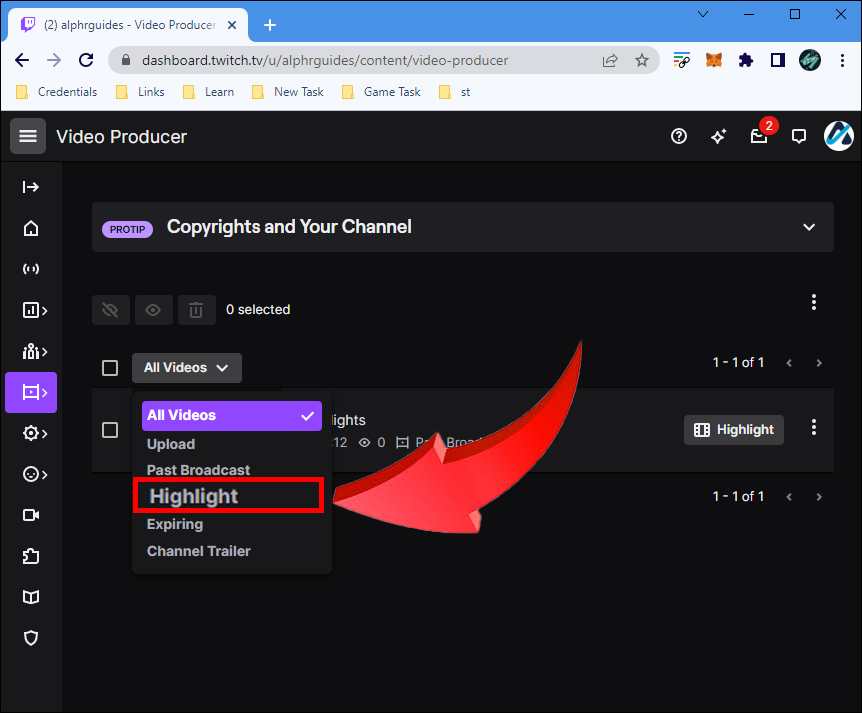
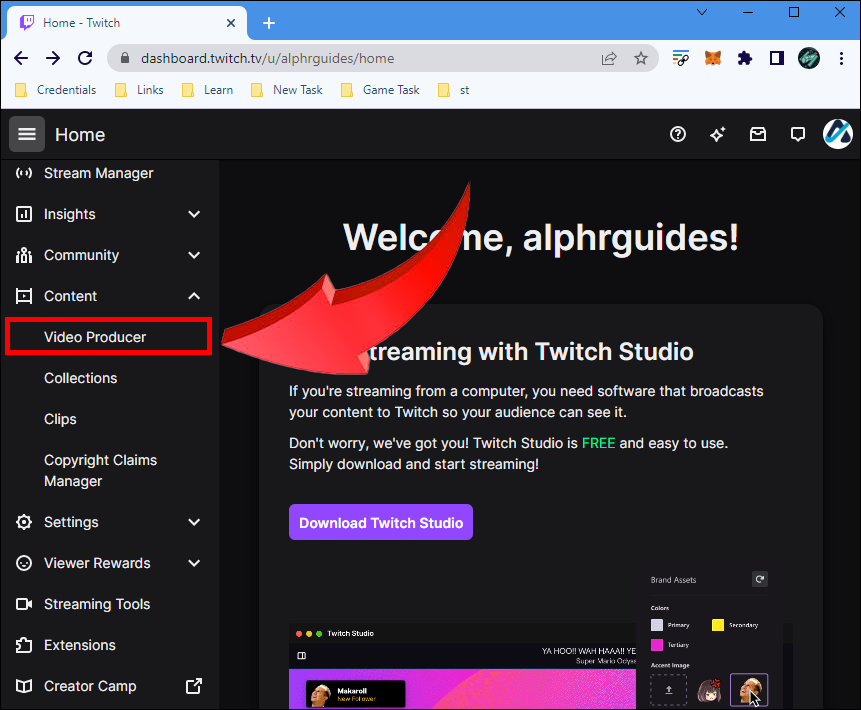
- From there, select “Video Producer” under “Content.”

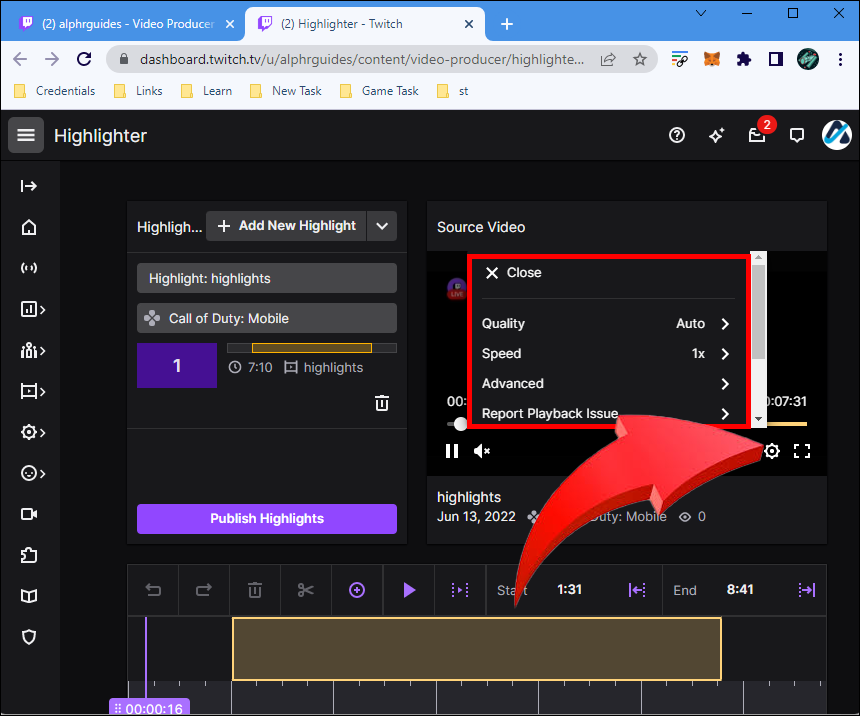
- When you’re on this screen, click on ‘Highlight.”

- Adjust the settings and create the perfect highlight.

When making one, you can’t highlight the entire VOD, so you’ll have to be creative and only select the sections that matter.
Twitch highlights are usually quicker snippets of your favorite or best moments that newcomers want to see. Therefore, overwhelming them with hours of footage will only prove discouraging to most. Consequently, we prefer the other method of saving VODs indefinitely.
Downloading Twitch VODs
All of your Twitch broadcasts can be downloaded immediately after they’re published as VODs. Since past broadcasts last for different periods for users, you have 14 or 60 days maximum to download them. Be sure to hurry, as you’ll never have the chance after they expire.
Assuming you’ve enabled saving all broadcasts as VODs, you can now download them.
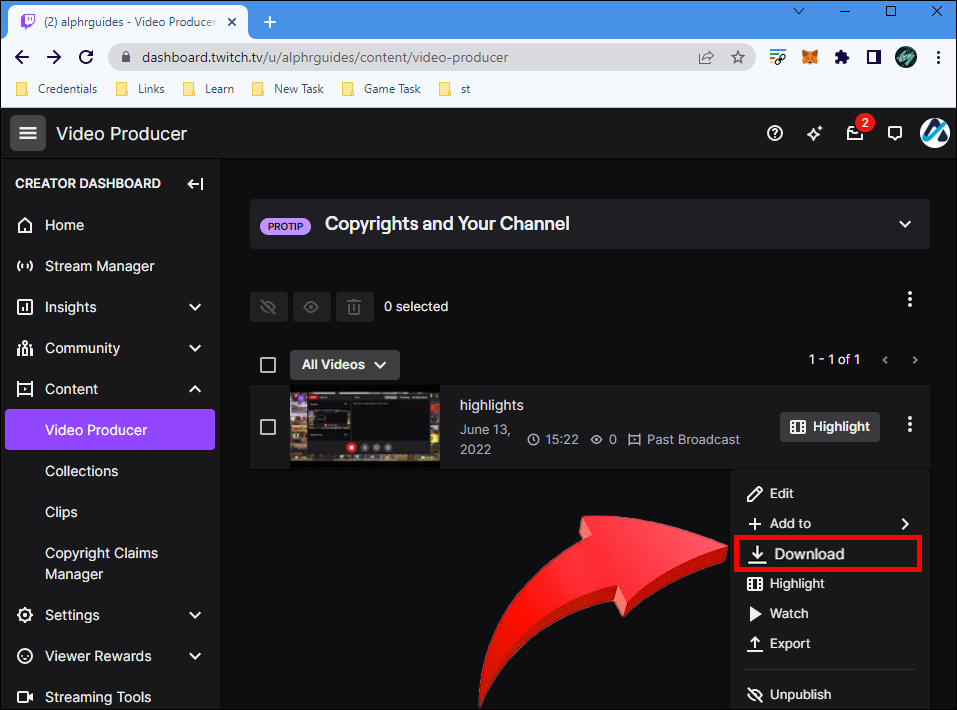
- Open the Video Producer.

- Select the three dots beside the VOD to download.

- Click on “Download” to save the VOD.

- Wait for the download to finish.

- Save the broadcast to an external hard drive if you lack space.
- Upload the VOD to YouTube.
While uploading it isn’t strictly necessary, it’s still a convenient way to watch your past streams anywhere and with any device. Your fans might also enjoy scanning through the VODs to pick out their favorite moments.
Everything Seems to Be Alright
Testing a broadcast is relatively straightforward and usually safe from penalties. However, some streamers also wish to upload their past broadcasts, and doing that on YouTube tends to be the best choice. That way, you don’t need a designated hard drive or a specific computer to watch them.
How do you test your streams? Can Twitch improve in terms of stream testing? Let us know in the comments section below.
Disclaimer: Some pages on this site may include an affiliate link. This does not effect our editorial in any way.


