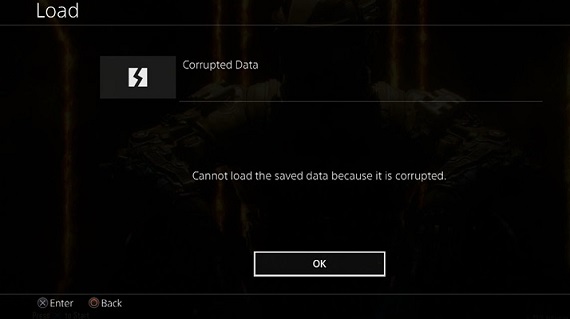
Corrupted data on your Sony PlayStation 4 sounds like an awful thing, but it’s actually relatively easy to fix. So, if you get a “Corrupted data” error message, you shouldn’t worry.
The files can malfunction in many ways. Sometimes an installation may be incomplete, or another process may interrupt it. If you have a damaged game disc, it probably won’t install the game properly. Other times saving the file may run into an issue and corrupt the entire game file.
Usually, corrupted data affects only the corresponding games or apps. Therefore, reinstalling them should fix the issue. However, there are rare instances where some essential data gets corrupted. It is more involved if that’s the case.
This article goes over a few ways of fixing the Corrupted data issue.
How to Know if Data is Corrupted on PS4
At times it may be more obvious that you have corrupted data on your PS4, but the symptoms can also appear in other forms. First, if you receive a Corrupted Data error code, clearly, you have corrupted data. But, there are times that you’re having a problem and don’t have an error code letting you know that this is the problem.
Here are some other signs to look for:
- A game is lagging or isn’t loading correctly. Your internet connection is secure, and the disk isn’t scratched, but you are still having problems.
- Your PS4 is slow to move through menus or settings.
- Your PS4 will not read a disk even though it isn’t scratched.
If you’re having problems with your system and you’ve already tried basic troubleshooting steps, it’s likely because you have corrupted data. Fortunately, the steps to correct the error are quite simple.
How to Locate and Remove Corrupted PS4 Game Files Manually
When you get a corrupted data error screen for saved game data or when the game icon appears with a downward zigzag icon, the system identifies it as corrupt and stores the file in a separate folder. With a few simple steps, you can locate the file and manually remove it. Here’s how to do it.
- Enter Settings and go to System Storage Management.

- Now, go to Saved Data > Media Player.
- In the folder, you’ll see a “corrupt data” file.
- Hit the Options button.
- Select Delete to remove the corrupted file from your drive.
When you reopen the media player folder, the corrupted file should not appear anymore. If the file is from a video game, try to reinstall it.
Manually Remove Downloaded File
If the file became corrupted while it was being downloaded, it would appear in your Downloads folder as a grayed-out broken square icon.
To fix this, you need to:
- Open the Notifications menu on your home screen.
- Press the Options button and select Downloads.
- Find the corrupted file.
- Press Options again.
- Delete the file.
Once you do it, try to download the file again.
How to Rebuild the PS4 Database
If the above problems do not apply, you can try the Rebuild database process. This will scan your whole PS4 system for any bugs, glitches, and anything that isn’t working properly. It won’t erase anything from your drive, but it will attempt to repair corrupted files.
To start this process:
- Turn off your PS4 and connect the controller to the PS4 via a USB port. (Bluetooth controllers don’t work in safe mode.)
- Hold the Power button, it should beep twice before you release it.
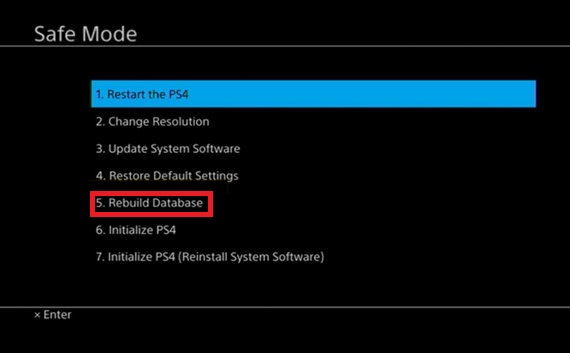
- The PS4 will enter Safe Mode; select the Rebuild Database option. Usually, it is the 5th option in the Safe Mode menu.

- Wait until the process is complete.
- Turn on your console and check if the corrupted data still exists.
For Major Issues – Initialize PS4
If the above methods don’t get rid of the corrupted files, or if the files keep appearing, you may have to wipe all your data and start from scratch.
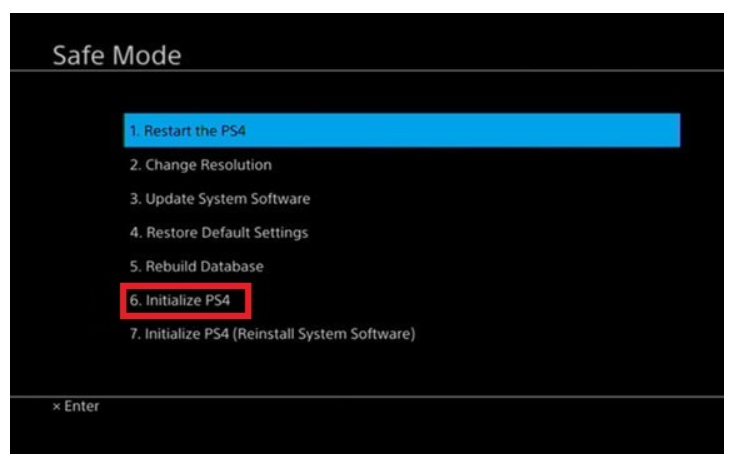
- Follow steps 1-5 from the previous section to enter Safe Mode. Now, instead of choosing Rebuild database, you need to select Initialize PS4. It should be just below it.
This method will erase all user-added data and restore the PS4 back to its default settings. Make sure to back up all the relevant files to avoid any data loss. When it’s done, all the corrupted and malfunctioning files should disappear from your drive.
Still Having Issues with Corrupted Data?
If you’ve gone through all the methods above and still find corrupted data all the time, the problem may not be in the system.
Usually, this means that the game disc may be damaged, and you might have to get a new one. However, it’s possible that your hard drive may be to blame. There are two potential scenarios:
The Hard Drive Ran Out of Space
The PS4’s built-in hard drive may not be large enough for your use. In that situation, you’re going to run into problems with updates, saving games, and installing new apps. Sometimes the system won’t be able to address this by itself, and the files will get corrupted in the process.
If your HDD is almost full, you should consider freeing up some space or upgrading to a larger disk.
The Hard Disk is Damaged
Your PS4 HDD can sometimes have bad sectors that slip through the cracks in the Rebuild database process, which you may have to try again. Depending on the number and spread of bad sectors, this may or may not result in frequent corrupted data. You can either live with it or replace the hard disk.
Frequently Asked Questions
Here are some more answers to your most frequently asked questions.
What causes data to become corrupted on the PS4?
One of the more common reasons behind corrupted files on a PS4 is a power outage. If the system isn’t properly shut down or there’s a power surge, your PS4 may experience issues due to damaged files.
Another reason you may have problems is that your PS4 failed to complete or properly install an update. If your system shuts down or loses its internet connection during an update, you’ll likely experience issues related to corrupted files.
Other causes range from hardware failure to downloading corrupted files. Depending on the severity of the problem, you may need to upgrade your hard drive or reach out to Sony for additional support.
How do I recover my data?
If you’ve decided to go with the nuclear option and reset your system to factory defaults, you may be able to recover your data with a system restoration.
If you’ve backed up your content, you can follow these steps to recover data:
1. Go to Settings > System > Backup and Restore > Restore PS4.
2. Then, choose the files you’d like to recover and attempt to restore any lost data.
Fortunately, you can recover a lot of your saved progress and games by signing into your PlayStation account (or the corresponding account with your game, such as Bethesda or Epic Games account).
Related Posts
 How to Fix a Corrupted Video or MP4 File
 How to Transfer PS4 Data to PS5
 How to Boot Up a PS4 in Safe Mode
 How to See How Many Hours Played on PS4
 How to Stream Gameplay from a PS4
 How to Fix Cellular Data Not Working on iPad
 Can a PS5 Play PS3 and PS4 Games? Yes, Mostly
 How to Turn on or off 2FA on a PS4
Disclaimer: Some pages on this site may include an affiliate link. This does not effect our editorial in any way.