Visual Studio (VS) Code offers Python development support that both professionals and hobbyists can appreciate. This article will provide practical knowledge on setting up your Python environment and running and debugging Python code, along with valuable and interesting bonus features.
Setting Up Python Environment
You will have to manually set up the Python interpreter on your computer before VS Code can use it. Here’s how to do it:
- Visit the official Python website.

- Go to the Downloads page and choose your operating system version (Windows, macOS, or Linux, depending on the library) and click download.

- Download and run the installer.
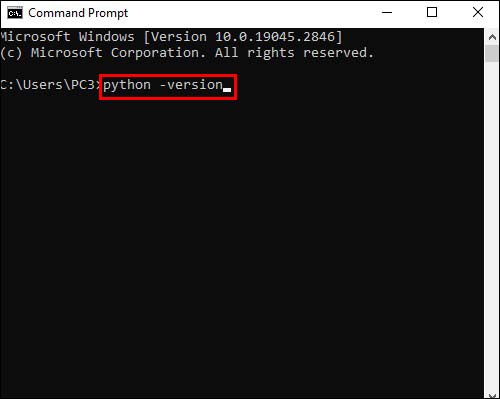
- Open a terminal or command prompt.
- Type “
python –version” and press “Enter.” - You should see the installed Python version on-screen.


If data science is your main reason for using Python, consider downloading Anaconda and getting Python through it. Anaconda comes with a Python interpreter and a multitude of specialized libraries and tools for data science.
For Windows users who want a Linux environment to work with Python, the Windows Subsystem for Linux (WSL) is another viable option. Opting for WSL also involves installing the correlating extension. To learn more about using WSL with VS Code, refer to the VS Code Remote Development documentation or the Working in WSL tutorial.
After you complete these steps successfully, python libraries will be installed on your system, and you’ll be ready to write code.
Installing the Python Extension in VS Code
To properly use the Python environment in VS Code, you also have to install the Python extension. Here are the further steps for setting the extension up in the IDE:
- Launch VS Code.
- Click on the “Extensions” icon in the Activity Bar.
- Search for “Python” in the Extensions view search bar.
- Find the Python extension by Microsoft on the Marketplace.
- Click the “Install” button to add the extension to VS Code.


After following these steps, you’ll have the following prerequisites for Python coding:
- Python (version 3 or up)
- VS Code
- VS Code Python extension
Debugging Python Code in VS Code
Debugging is an inextricable part of the coding process, so you’ll want to have Python’s debugging capabilities ready as soon as you start coding. Let’s go through the steps for debugging Python within VS Code.
- Click on the left margin next to the line number where you want to add a breakpoint (e.g., next to the print statement).
- Click on the Debug icon in the Activity Bar on the side of the window.
- Press F5 or click on the green “Run and Debug” button.
- Choose “Python File” as the debug configuration.


The debugger will stop at the breakpoint. You’ll have the chance to inspect variables, view the call stack, and execute commands in the Debug Console.
Configuring Your Python Interpreter
VS Code automatically detects and selects the Python interpreter if it exists on your system. However, you might need to change the interpreter if you work with multiple Python versions or run virtual environments.
- Press Ctrl + Shift + P (or Cmd + Shift + P on macOS) to open the Command Palette.
- Type “
Python: Select Interpreter” in the Command Palette and press “Enter.” - Choose the desired Python interpreter from the list.


With these settings, VS Code will now use the manually-selected interpreter.
Customizing the VS Code Python Environment
Personalizing your Python development environment is a fairly straightforward task in VS Code. Moreover, it’s invaluable for enhancing productivity, as an environment tailored to your needs will make writing code faster and more efficient and reduce frustration.
For this purpose, VS Code offers robust, easy-access customization features. Experiment with different settings and extensions to find the most fitting configuration as you get more comfortable using the tool.
Let’s look at ways to adjust the environment to your preferences.
Changing the Python Linting Tool
Linting identifies and corrects stylistic and syntactical issues in the source code that may lead to errors. Unlike formatting, which only restructures how code appears, linting also analyses how the code runs and identifies errors that improper formatting may cause.
- Open the Command Palette by pressing Ctrl + Shift + P.
- Select “Python: Select Linter” to display a list of linters.
- Pick a preferred linting tool from the list (such as Pylint, flake8, or Mypy).
- Install the linting tool in your Python environment if prompted.
If the installation cannot proceed, try running Visual Studio Code with admin privileges or manually install the linter with a pip command.
Linting will automatically run when you save a file if it’s enabled. Any issues it detects will show in the Problems panel and as wavy underlines in the editor window. You can keep the linter enabled or disable it when it’s no longer necessary. Open the Command Palette (Ctrl + Shift + P) and select “Python: Enable/Disable Linting” to change the toggle.
Setting Up Python Black for Formatting
Python Black is a code formatter that automatically changes your Python code to follow styling conventions focusing on readability and code consistency.
- Install Black in your Python environment using the command: pip install black. To install the Python extension for Visual Studio Code, press Ctrl + P, past the “ext install ms-python.python” line, and hit “Enter.”
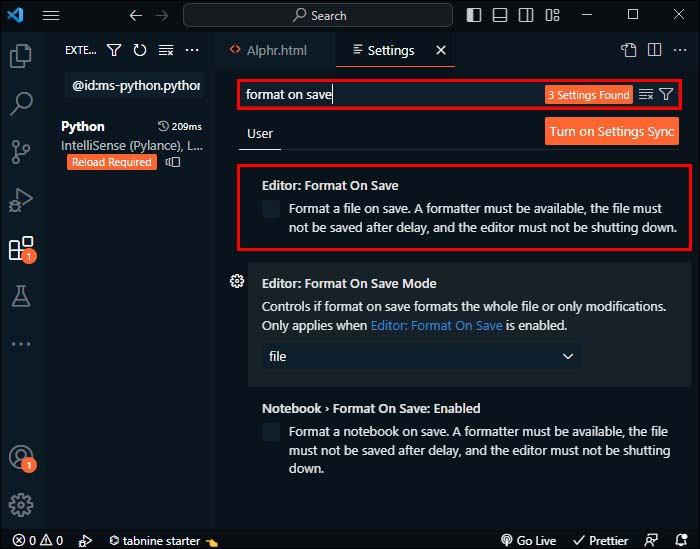
- Type Ctrl +, or click the gear icon in the lower left corner and select “Settings [Ctrl+,]” to open the Settings menu.
- In the search bar at the top of the Settings tab, type “format on save” and tick the checkbox.
- Search for “Python formatting provider” and select “Black.”


When you open or create a Python file, write some code, and save it (Ctrl + S), the Black formatter will automatically adjust this code. If, for any reason, Black is not working, it may be that your Python code has some syntax errors. In that case, recheck the code and test again.
Customizing Python Snippets
Python snippets can be a helpful tool for code streamlining. Snippets are pre-defined or user-defined code blocks you can insert into the code. They make writing repetitive code patterns like loops or conditional statements quicker. These are the steps for customizing Python snippets in Visual Studio Code:
- Open the Extensions view by pressing Ctrl + Shift + X and search for “Python Snippets.”
- Install a Python Snippets extension that suits your needs.
- Start using the new snippets in your Python code by typing the snippet prefix and pressing “Tab” or “Enter.”


Visual Studio Code has built-in snippets for various programming languages. You can find and insert these snippets using IntelliSense (Ctrl + Space) or a dedicated snippet picker. Python snippets are available to download from Visual Studio Code’s Marketplace.
Many extensions on the Visual Studio Code Marketplace include snippets. You can find them by searching for “@category: “snippets” in the Extensions view. Once you’ve found an extension you like and installed it, restart Visual Studio Code. The new snippets will be available in the text editor on re-launch.
Using Integrated Terminal
One of the powerful features of VS Code is the integrated terminal, which allows you to execute various commands, including Python scripts, without leaving the editor. Use the integrated terminal to run Python scripts, manage packages, and interact with version control systems like Git as you work on your Python scripts.
Collaborating With Live Share
Visual Studio Code comes with a Live Share extension. This feature enables remote, real-time developer collaboration. Live Share lets you hash out Python projects with team members and participate in joint programming sessions. Furthermore, you can get instant feedback on your code from a supervisor or an assistant. This feature improves collaboration and encourages learning, as you can share ideas and best practices with your co-developers.
Utilizing Jupyter Notebooks
Python developers often work with Jupyter Notebooks (formerly IPython Notebooks). It’s an open-source documentation project that allows the mixing of code, text, and visualizations. The application contains documents with computer code and rich text elements like paragraphs, equations, figures, and links.
Visual Studio Code provides native support and help via Python code files for working with Jupyter Notebooks.
Additionally, the Python extension in VS Code lets you create, edit, and run Jupyter Notebooks directly. This integration provides a more efficient workflow that may appeal to data scientists and researchers who regularly rely on Jupyter Notebooks.
Testing With Python Features
Knowing that your code behaves as expected grants indispensable peace of mind. It prevents bugs from accumulating as you code. This way, debugging won’t become more burdensome as the code matures. VS Code supports different Python testing frameworks, including the popular unittest or pytest.
Take advantage of the built-in testing features to quickly discover, run, and debug within the editor. Testing your development process lets you catch bugs early, thus maintaining high code quality.
Execution via Python Interactive Window
The Python interactive window in VS Code allows you to execute pieces of code and show the results visually. This feature helps you experiment with new ideas, explore libraries, or quickly test small code. While working on your Python projects, consider using the interactive window to gain deeper insight into the behavior and performance of your code.
Python Made Easy
If you’ve made it this far, you will know how to run, debug, and customize Python code in VS Code as you see fit. VS Code is a powerful, versatile, and reasonably beginner-friendly Python development environment accommodating various coding styles.
Do you run Python in VS Code regularly? Which Python customization in VS Code do you find most helpful? Let us know in the comment section below.


Disclaimer: Some pages on this site may include an affiliate link. This does not effect our editorial in any way.