Disclaimer: Some pages on this site may include an affiliate link. This does not effect our editorial in any way.
Are you searching for the best VPN for Chromebook? Chromebooks have a lot going for them. They are cheap, well-specified for their intended use, usually light, fully-featured, and have a pretty good battery life. They are great for school and work. But, many users may have some privacy concerns surrounding the Google-based laptops.
Google is not evil, but it is seemingly intent on making as much money as it can get away with from your data. A VPN won’t be able to stop the company from harvesting data while you use the Chromebook, but it can stop it from seeing what you do online. A VPN on any device can stop anyone from seeing what you do online.
As our browsing data is now viewed as fair game by ISPs, marketers, and big businesses, it’s down to us to protect it. A VPN is one of the most effective ways of doing that.
Chromebook VPN Support
While Chromebooks aren’t like your Windows or Mac computers, they do support VPNs. Chrome OS supports the three main types of VPN connection, L2TP over IPSec with PSK, L2TP over IPSec with certificate-based authentication, and OpenVPN.
As we’re discussing Chromebook, your options to get a VPN up and running are to use a Chrome extension, an app, or a VPN client. While all three will work, an app or VPN client is the best option as they will protect all traffic from your device, not just Chrome traffic. Most VPN services come with their own client that will work on Chrome OS, among others.
You can configure Chrome OS manually to use an L2TP connection if you prefer. Otherwise, installing a VPN client or app is very straightforward to do the hard work for you.
Best VPN for Chromebook
We know why we need to install a VPN, to encrypt all your internet traffic securely. Now let’s get to the VPN services you should consider to do it. Each of the following will offer 256-bit encryption, a client or app to install on your Chromebook, and have a reputation for reliability. They will also all be no-log VPNs which is vital if you’re doing anything online you don’t want to be identified doing.
You won’t go wrong with any of these options:
ExpressVPN

ExpressVPN is the best VPN for Chromebook. It is fast, reliable, has a range of VPN servers in 160 locations across 94 countries. It also works to allow Netflix and other geo-locked services, which is an added bonus. ExpressVPN doesn’t have a Chrome OS client but offers a stable Android version and a Chrome extension that you can install from Google Play Store.
ExpressVPN is compatible with most Chromebooks and you can easily install it by going to this website. If your Chromebook is limited on storage, you can even use the Chrome extension available here.
Unlike some of the other VPNs on our list, the service offers a free trial and a moneyback guarantee, so even if you sign up and don’t like it, you can get your money back. If you do decide to keep the service, it’s only $12.95/mo. for five devices.
Thanks to easy installation, great value, and its versatility, you can’t go wrong with ExpressVPN on any device, especially a Chromebook.
NordVPN

NordVPN is another regular in our VPN lists, for the same reasons ExpressVPN appears so often too. It’s reliable, secure with 256-bit encryption, fast, and works on almost any device. It isn’t the cheapest option. Not by a long shot, but it does have an enviable number of VPN servers and can use a double VPN connection for when you really need to be secure.
You can use an Android app or Chrome extension if you don’t want to configure L2TP manually.
Private Internet Access
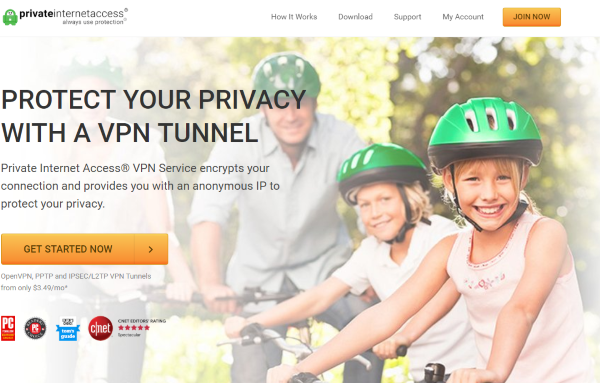
Private Internet Access is another VPN that is compatible with ChromeOS. It is fast, secure, and uses 256-bit encryption. It has an Android app and a Chrome extension for easy installation and offers over 30,000 servers in 80 countries worldwide. It is compatible with PPTP, OpenVPN, and L2TP/IPSec and allows you to connect up to ten devices at once, which none of these others do.
PIA is also more competitively priced than some of these other services, making it a good option for the price-conscious. There’s a free trial too.
IPVanish

IPVanish is another great VPN option for Chromebooks as it works as an Android app or Chrome extension. IPVanish differs from these other services in that it owns its own server farms rather than rents them. This offers a little more control over speeds and traffic but no added benefits for security. It is secure though, with 256-bit encryption and no logs.
IPVanish offers a free trial and moneyback guarantee, but you shouldn’t need it. Like the others in this list, the service is fast and reliable and does everything you need it to do.
Benefits of Using a VPN for Chromebook
If you connect your Chromebook to public WiFi networks, you are susceptible to hacking, phishing, and other attacks that can intercept and steal your data. Your passwords or bank details can be stolen if your traffic is not encrypted. Even when you use you Chromebook at home, you’re still not safe from data and privacy leaks.
A VPN routes traffic through an encrypted, invisible tunnel. In case hackers intercept your private data, they won’t be able to use it, as the encryption makes the data unreadable. Furthermore, your ISP, other trackers, or the government won’t be able to see what you are doing online.
And of course, a VPN can help you bypass geoblocks. It will allow you to connect to a server in another country and unblock restricted sites.
Frequently Asked Questions
Perhaps you’re still learning about your Chromebook, or you still have questions about VPNs. Either way, we’ve included this section to answer your more frequently asked questions.
Will a VPN slow down my Chromebook?
A good VPN shouldn’t slow down your internet connection too much. But, as the old saying goes “you get what you pay for.” Aside from the VPN provider you choose, you’ll also need to consider the distance of the server that you’re connecting to from your device. For example, if you’re in the United States and connect to a server in Australia, you may see a little more latency than if you connect to a server in the UK.
Choosing a solid, reliable VPN like ExpressVPN is going to serve you better than some other providers that offer free connections because they simply don’t have the support needed to maximize your internet speeds.
How do I set up a VPN on my Chromebook?
Setting up a VPN on a Chromebook is really simple. If you decide to use an extension, simply open the Google Chrome browser on your Chromebook and visit the Chrome Web Store. From there, you can search the Web Store for the VPN you’d like to use.
If you’d like to use one of the VPN apps on your Chromebook, first go to the provider’s website and register if you haven’t already. Next, you’ll need to open the Network settings on your Chromebook by clicking on the time in the lower right corner and clicking on the Settings cog. Click the option to Add next to VPN. Then, you can follow the instructions on the screen to complete the set up. Depending on which VPN you’re using the instructions may vary slightly.
Securing your Chromebook is as important as securing any device. You would be amazed at just how much data you give away with a simple surfing session. The best VPN for Chromebook can help secure that and keep your devices secure at the same time. Try one today and enjoy real peace of mind!


Disclaimer: Some pages on this site may include an affiliate link. This does not effect our editorial in any way.


