Like many other online applications, WhatsApp does its best to keep its users’ data private and secure. The platform is relatively safe with features such as one login at a time and two-factor authentication.
But, like anything connected to the internet, there are security vulnerabilities that nefarious individuals are all too happy to explore. Due to the nature of WhatsApp, it’s essential to act fast if you think your account was breached.
This article will teach you how to spot suspicious activity on WhatsApp and teach you how to secure your account. Let’s dive in!
1. Sign in to Your WhatsApp Account
To better understand how WhatsApp security works, we’ll first walk you through logging into your account. WhatsApp provides two ways to access; online and via iOS WhatsApp Messenger or the Android WhatsApp app.
Using WhatsApp’s web version makes it a lot easier to type, as you can do it on a keyboard rather than tapping on your phone screen. However, you have to start with your mobile device.
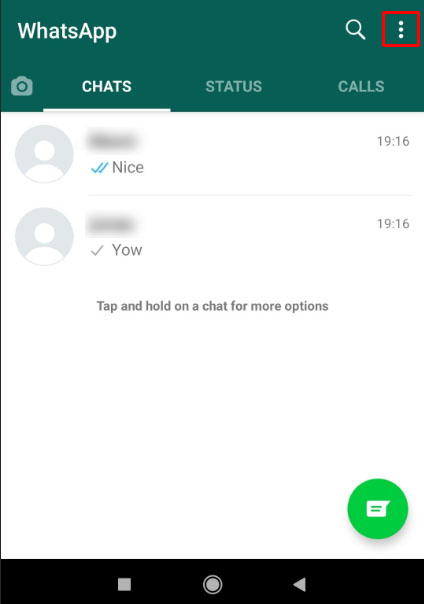
- Open a WhatsApp Web session on your tablet or phone by tapping the vertical ellipsis (three vertical dots) menu icon in the main WhatsApp window.
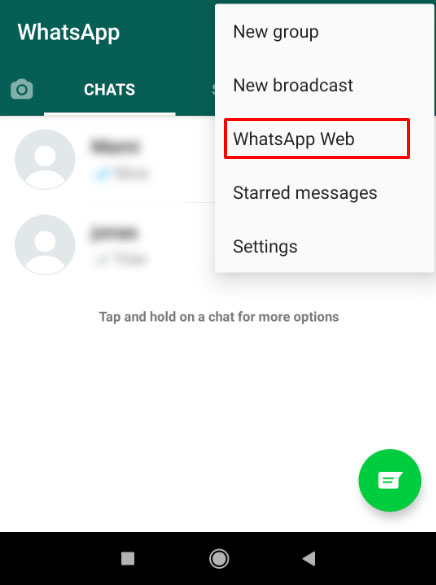
- Select WhatsApp Web. This opens your camera to use in the next step.

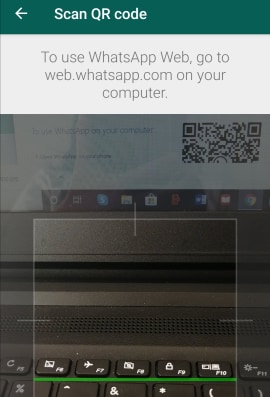
- You will be directed to scan a QR code, which you can get by opening WhatsApp Web in your browser.
- Open WhatsApp Web using a browser on your PC.
- Scan the QR code in the browser window using your device’s camera.


You can now type messages using your PC’s keyboard, and your WhatsApp window on your phone should match what you see in the browser, allowing you to chat and interact as usual.
2. Check if Someone is Using Your WhatsApp Account
WhatsApp is relatively easy to use. Unfortunately, it can be challenging to spot an interloper if they aren’t interacting with the application. This scenario would most likely be someone who only wants to eavesdrop on your conversations, but some hackers also want to take over your account.
Regardless of their intentions, we will use this section to educate you on some warning signs that someone is in your account.
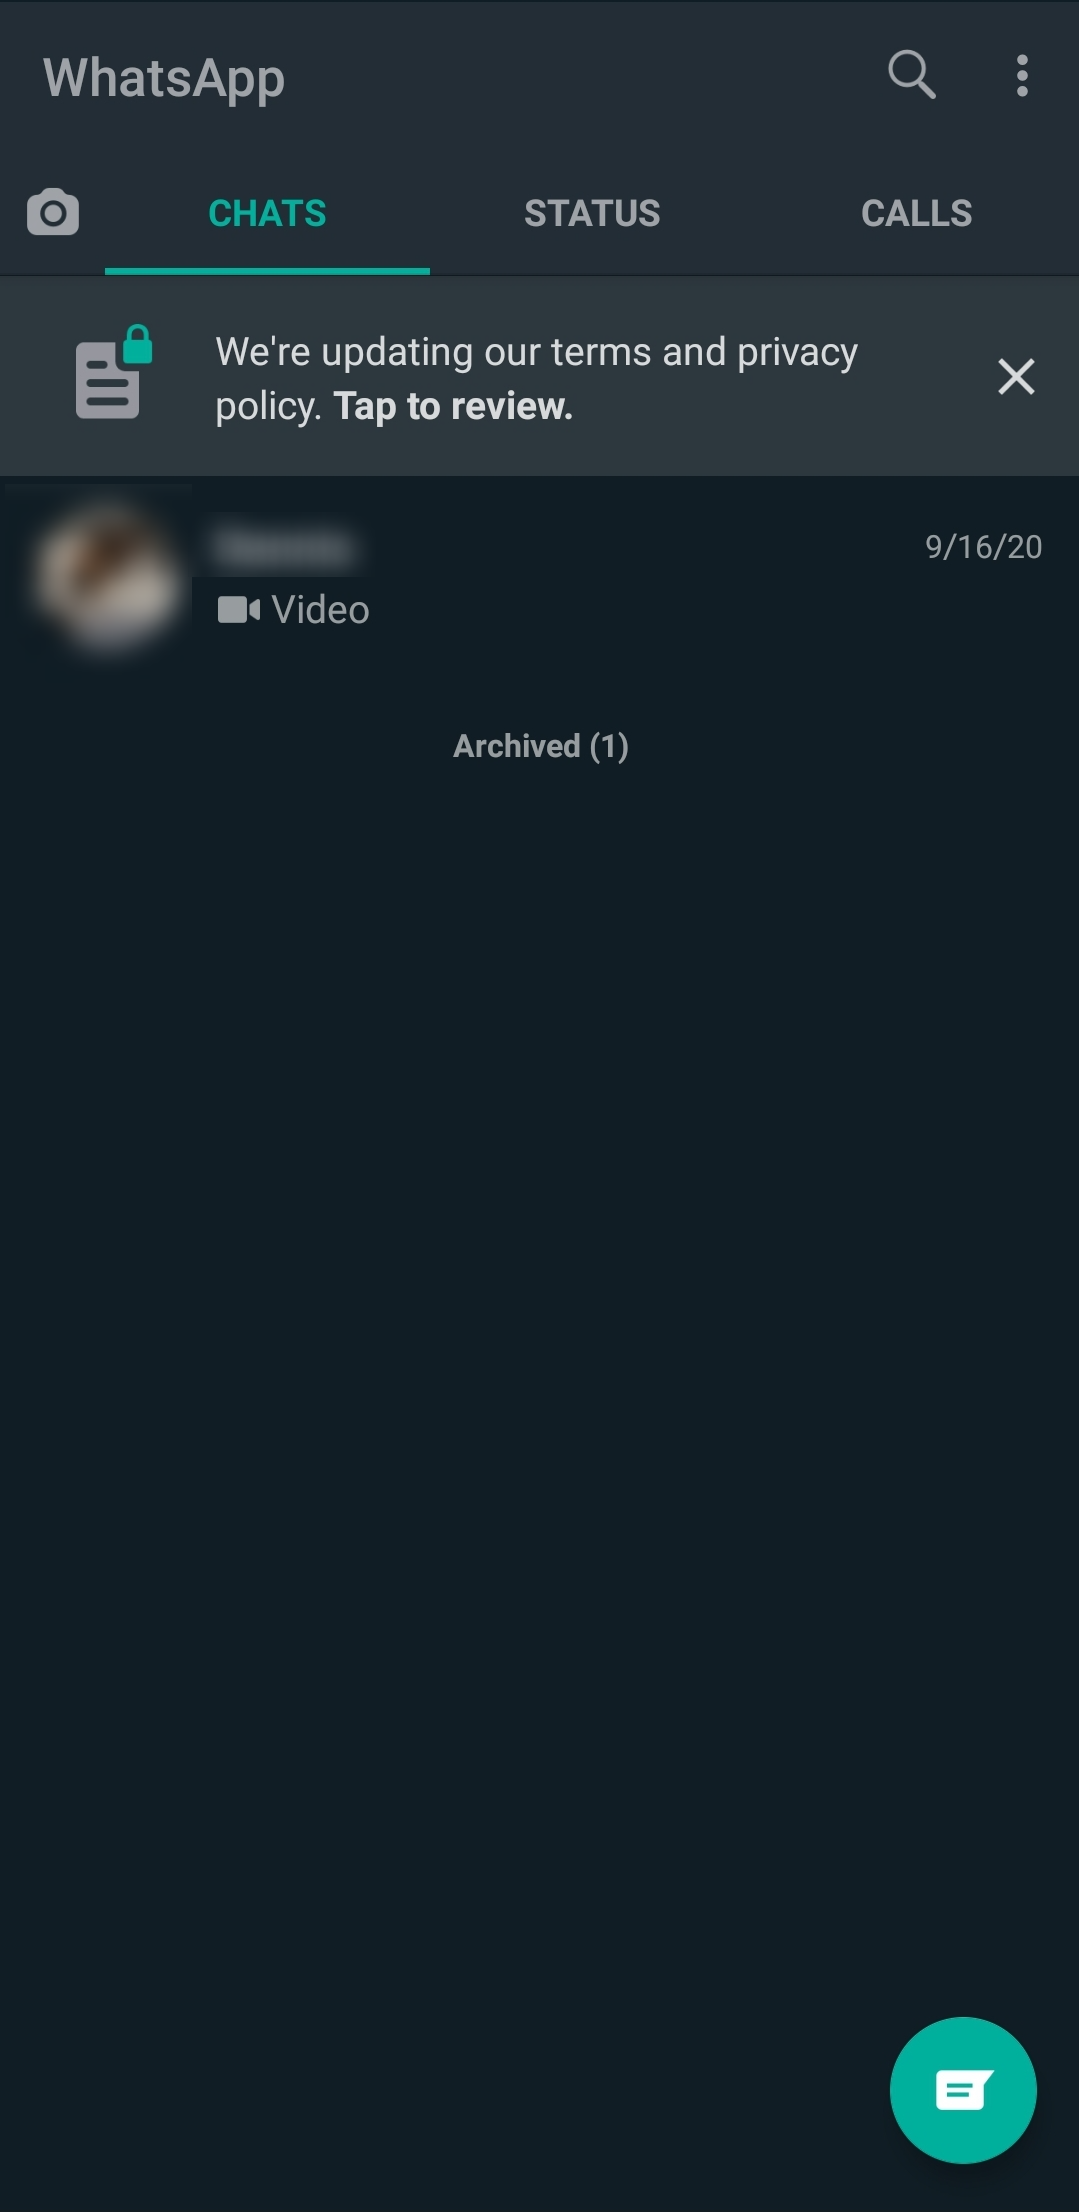
- Check Your WhatsApp Activity. When you open WhatsApp, you’ll first see a list of messages. Review this list for any messages you didn’t send or received from people you don’t know.
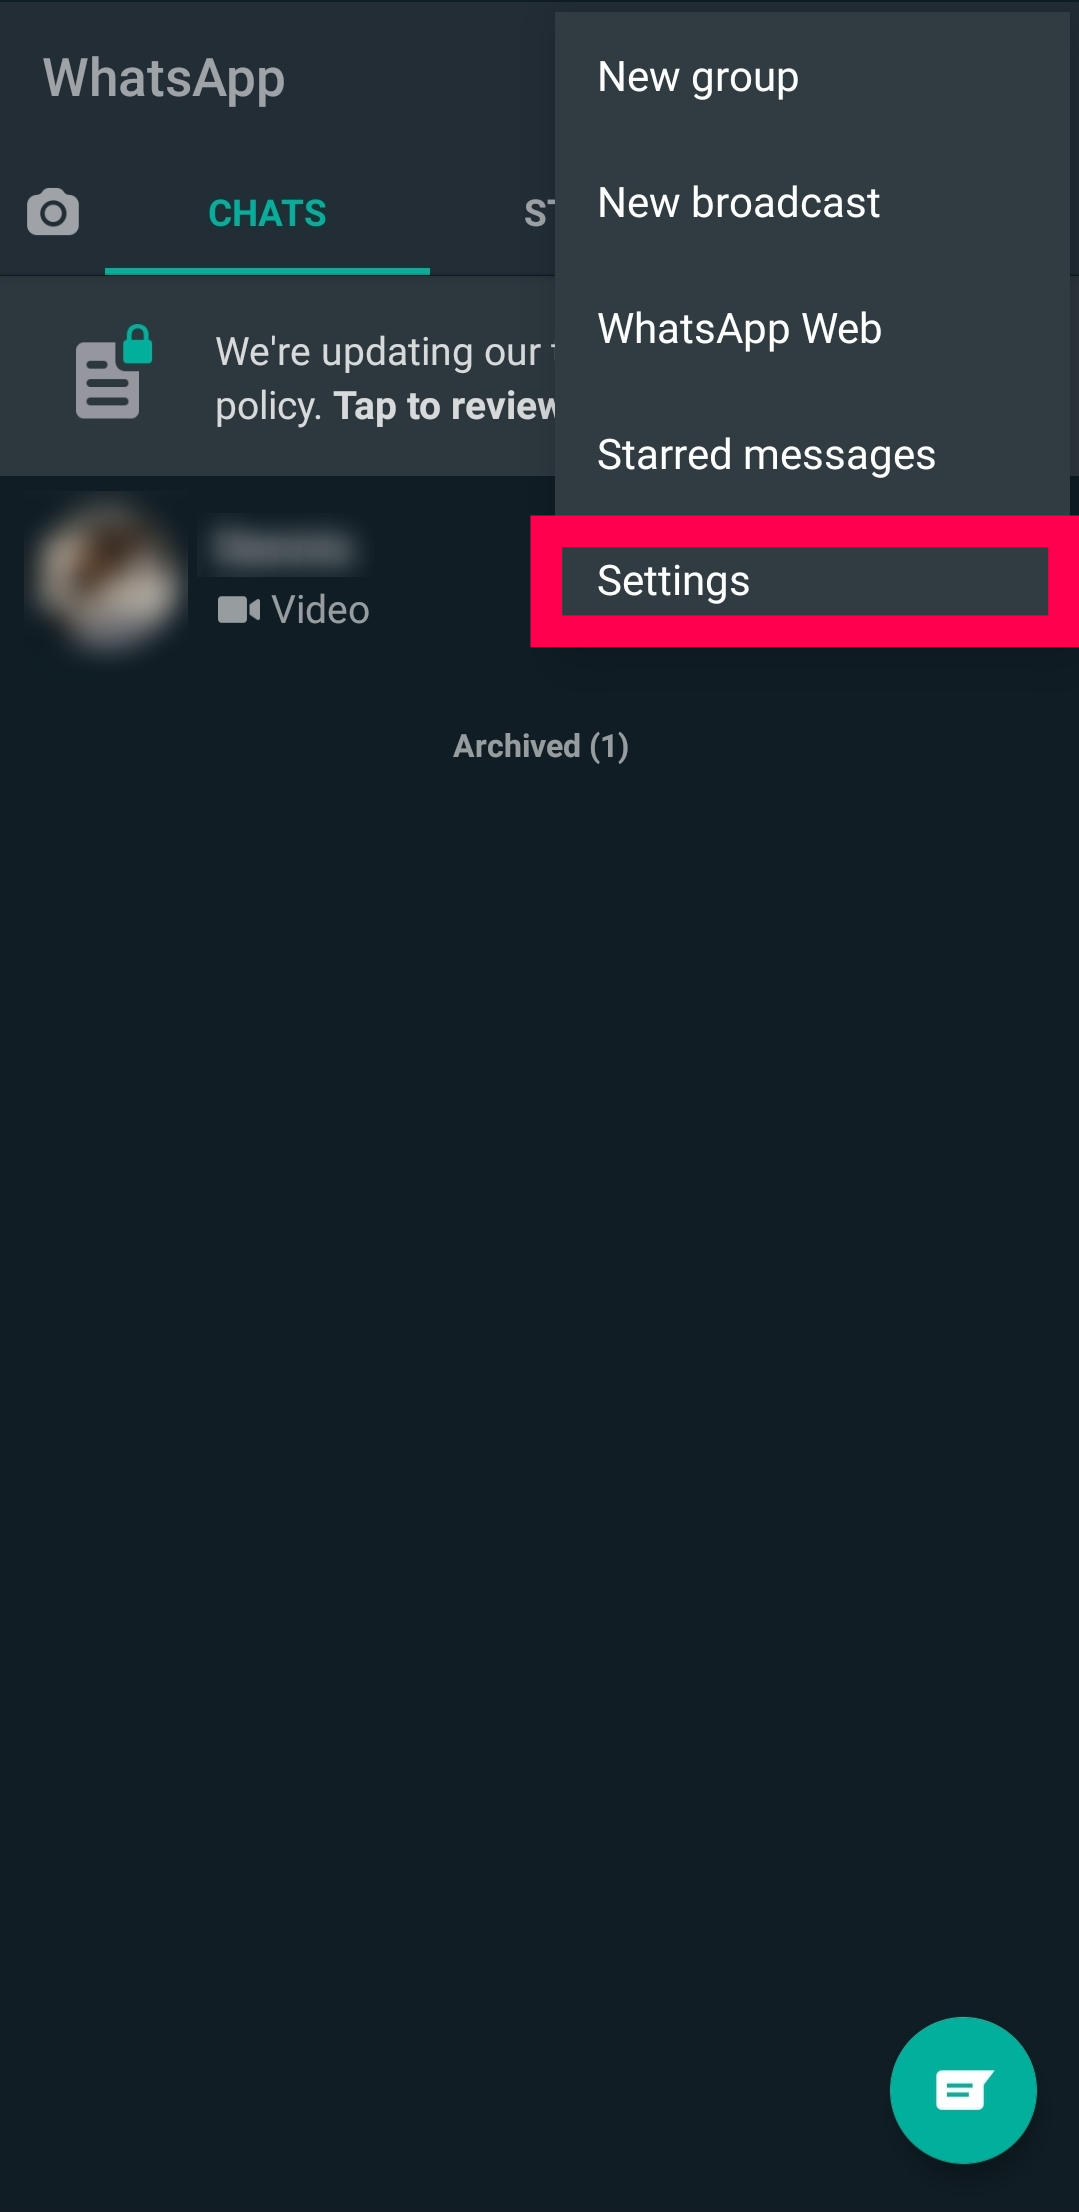
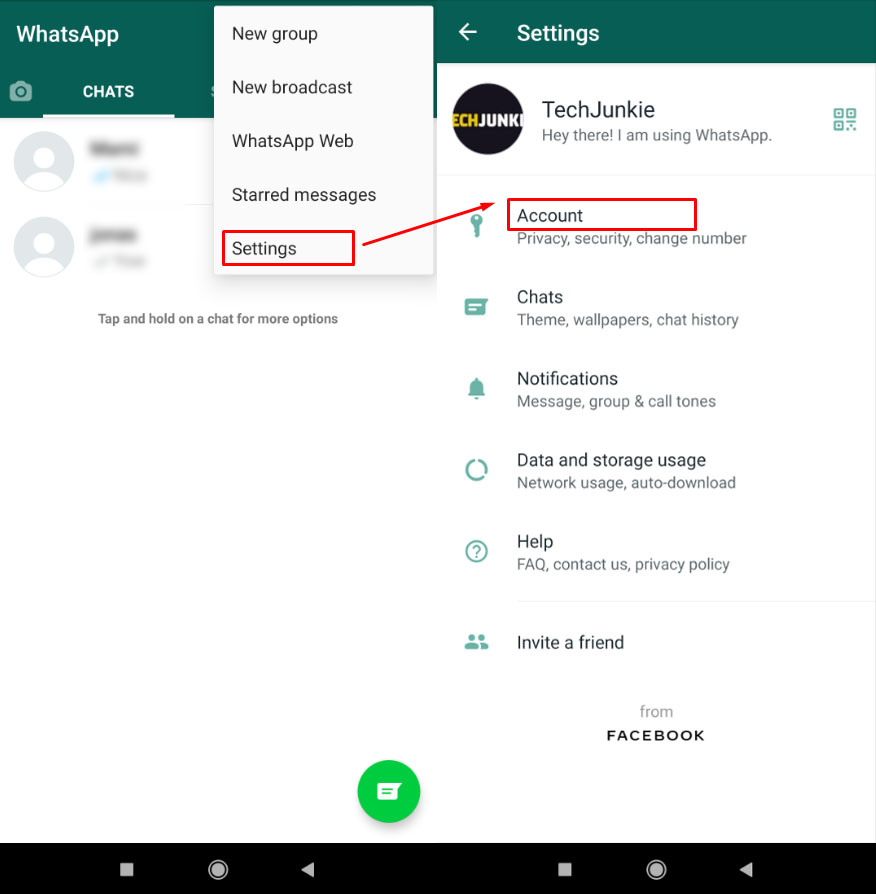
- Check your contact information. If the interloper tries to hijack your account, they’ll start changing your contact information. On mobile, tap on the vertical ellipsis (three vertical dots) in the upper right-hand corner.
- Tap Settings.
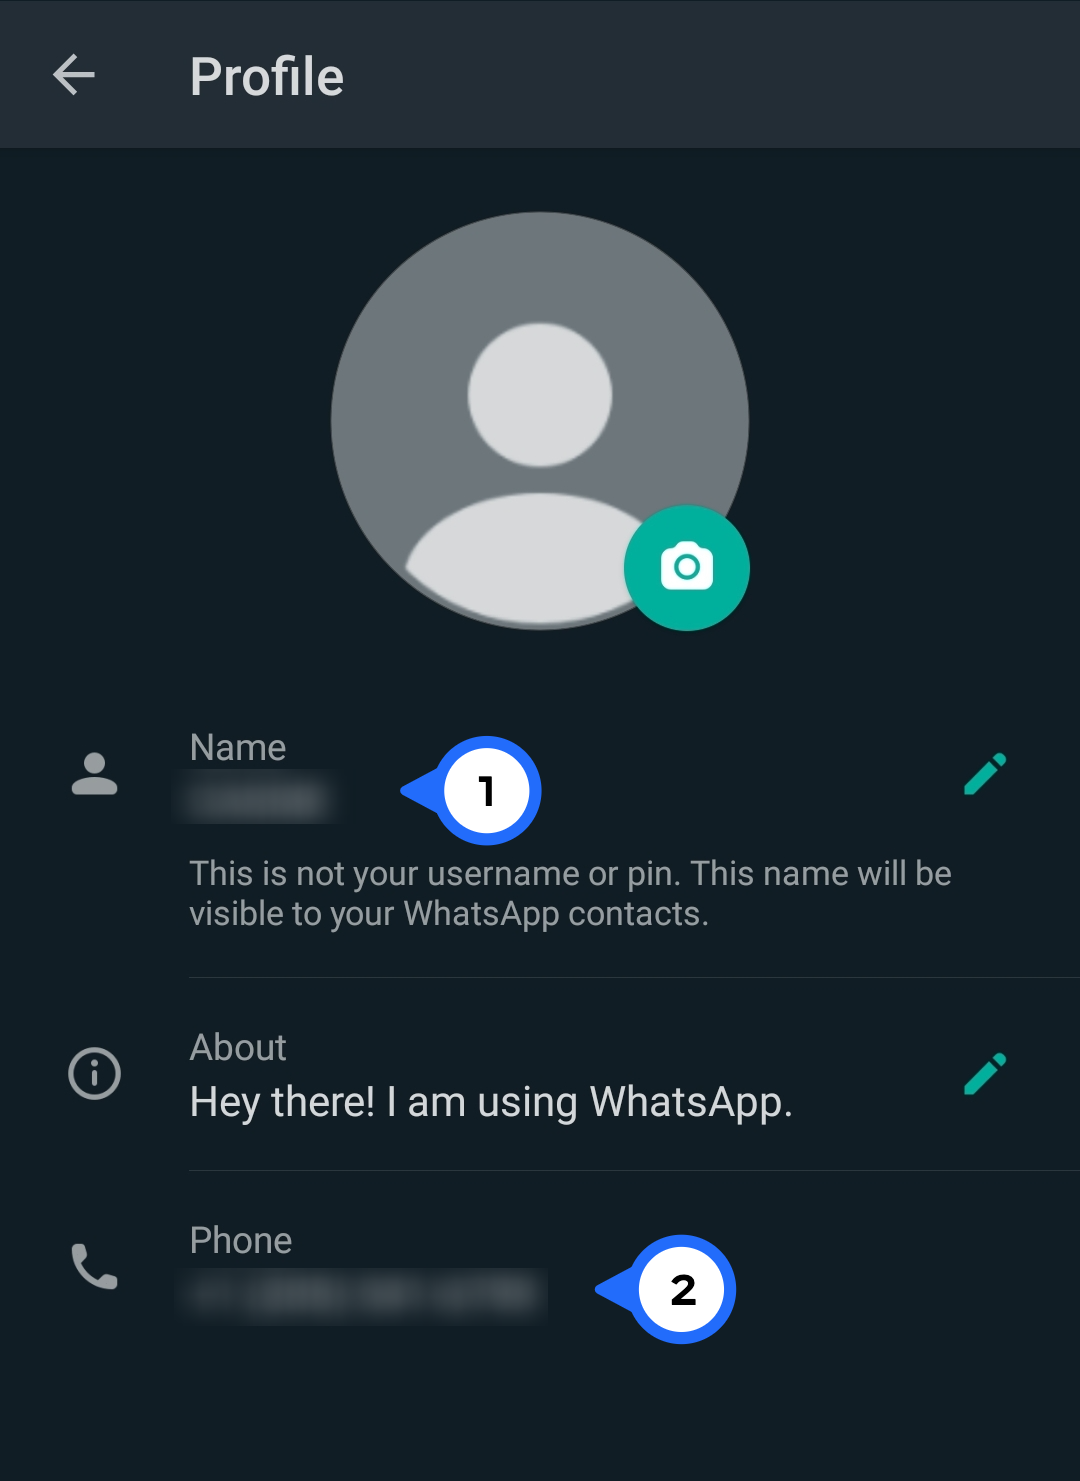
- Select your profile at the top of the menu.
- Review the information and verify that it is accurate and up-to-date.
- If anything has changed, or there is information that you do not recognize, you’ll need to secure your account. Follow the steps in the next section on using two-step verification.
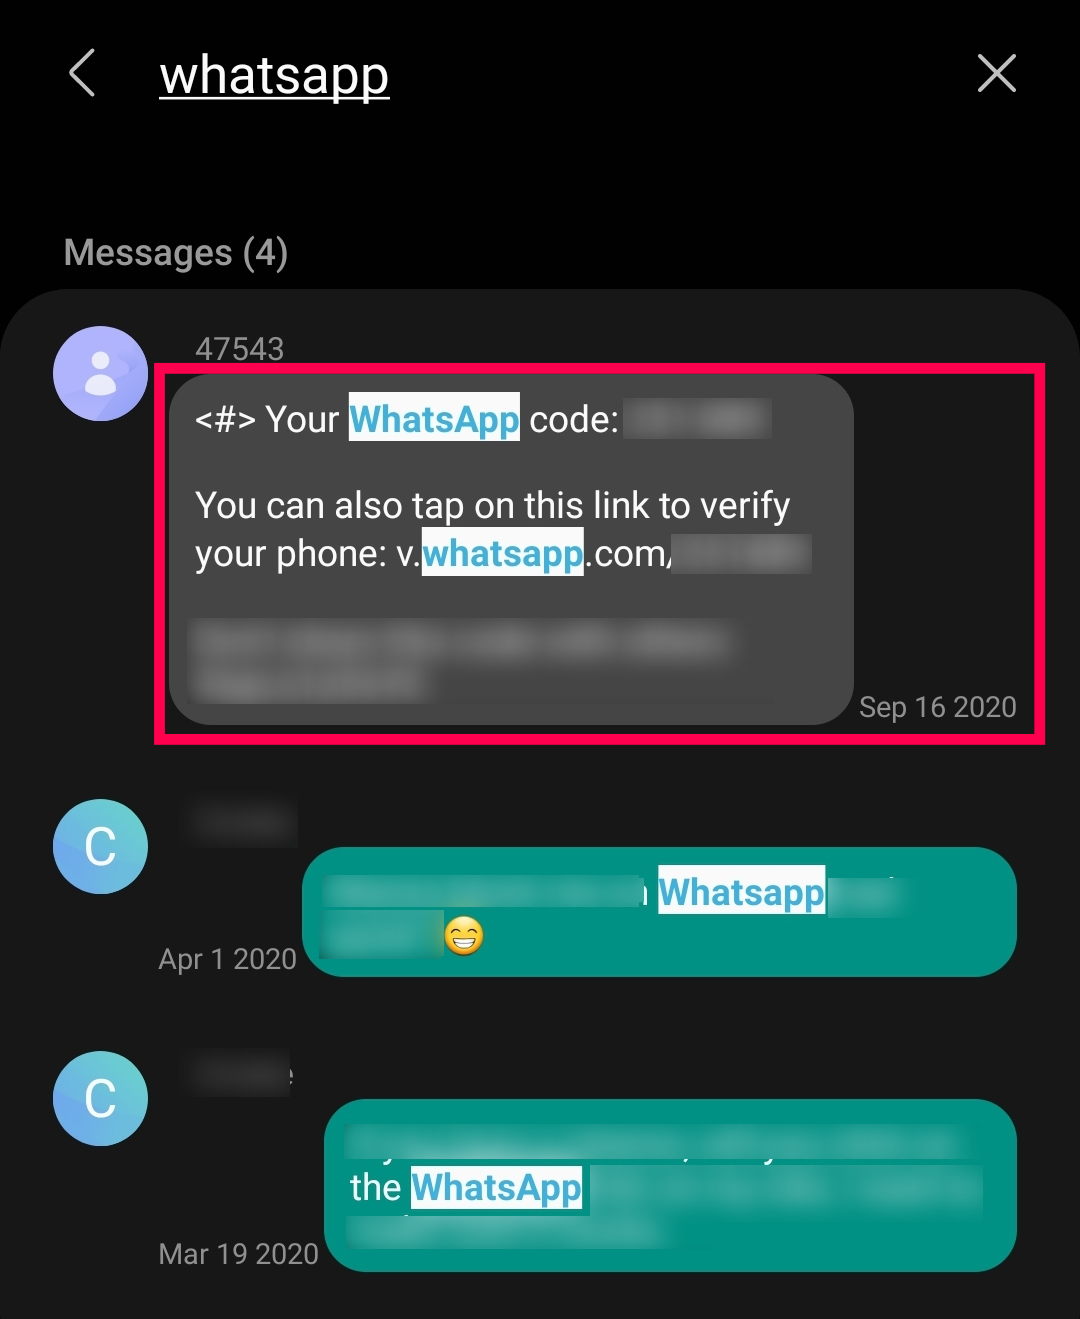
- Check for Messages from WhatsApp. Search your messages by typing WhatsApp in the search bar at the top on iPhone or using the magnifying glass on Android. Look for messages about account changes or access.
- Check for New Friends. Review your contacts on WhatsApp by opening the app and tapping on the Chat icon in the lower right-hand corner. Confirm that no new, unknown friends have appeared on the list.
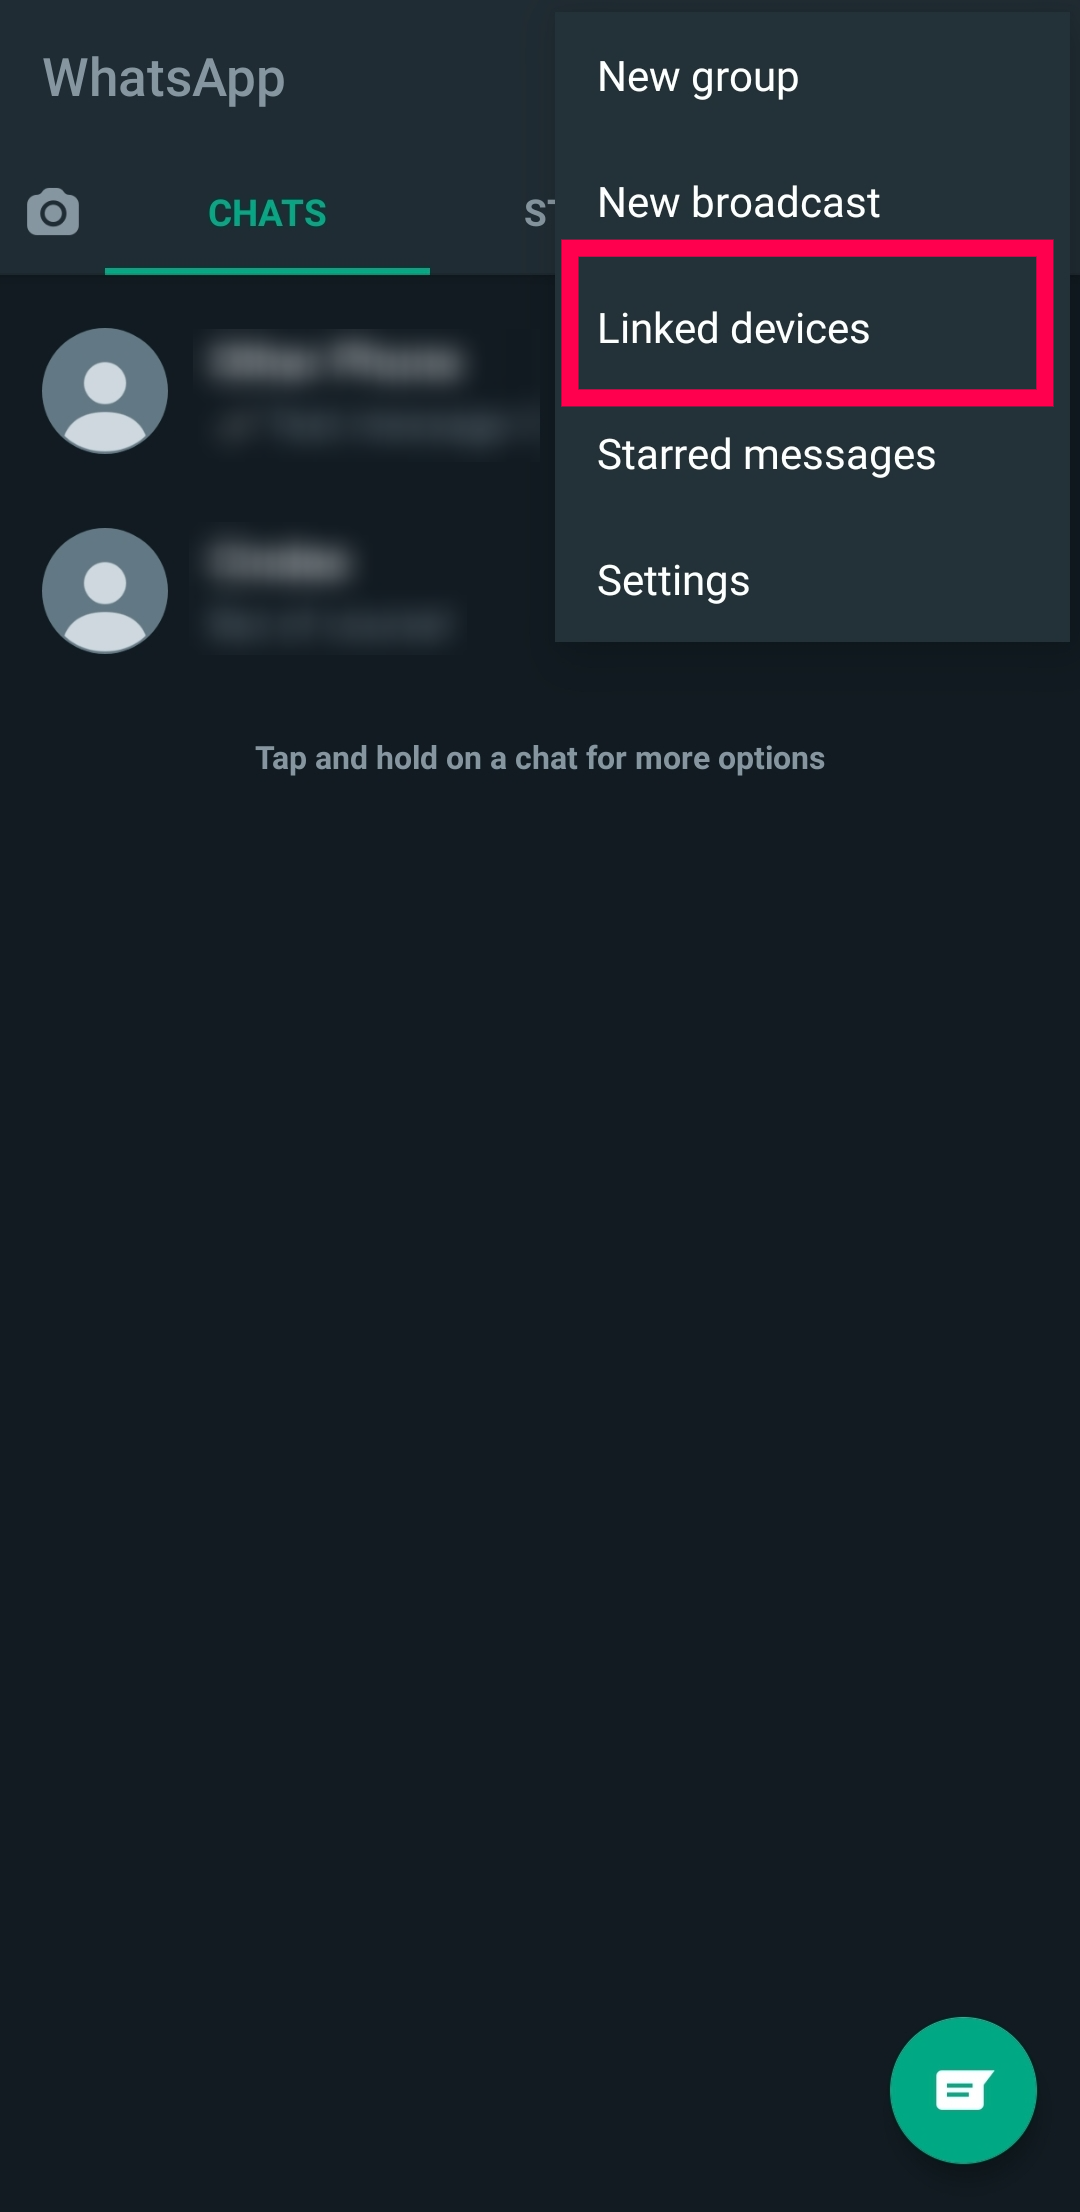
- Check the latest chat sessions. View the last session or any open session by tapping the vertical ellipsis (three vertical dots) menu icon.
- Select Linked devices.
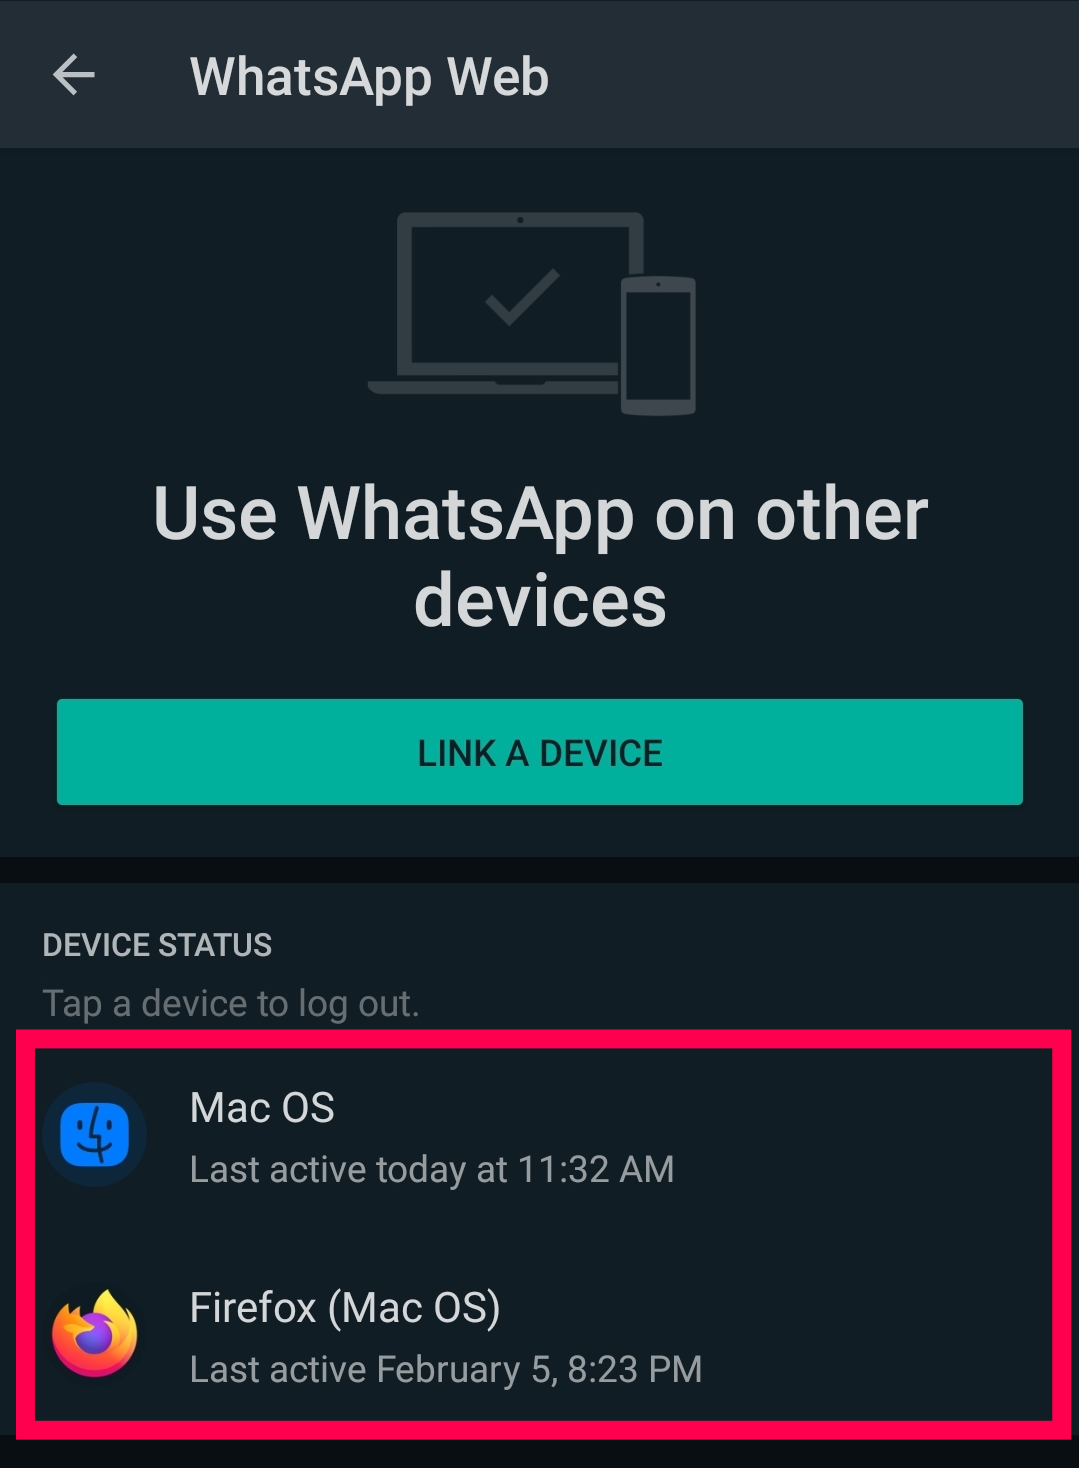
- Review the Last active… list for any unknown devices.
- If you find an unknown device, tap it and select Log Out.


Unlike other services, the steps above are the only way to see your WhatsApp login activity.
Securing Your WhatsApp Account
If you find that someone else is using your account, it’s time to secure it. Keep in mind that if any of the situations mentioned above are present, you’ll need to act quickly.
How to Enable Two-Factor Authentication in WhatsApp
If someone has been using your WhatsApp account, you need to lock it down. If you’re lucky, it’s a sibling or partner spying on what you’re doing. If you’re not so fortunate, it could be a hacker stealing your contacts and data and wreaking havoc with your social life. Either way, you need to lock it down by turning on two-factor authentication.
WhatsApp doesn’t use passwords. Instead, you need to enable two-factor authentication. That way, anyone trying to log in must enter a verification code.
- Open WhatsApp and select the vertical ellipsis (three vertical dots) menu icon from the main window.
- Select Settings and then Account.
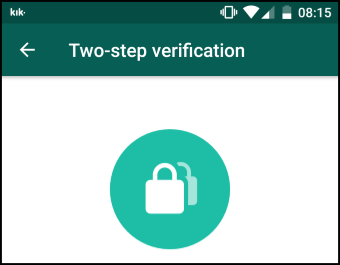
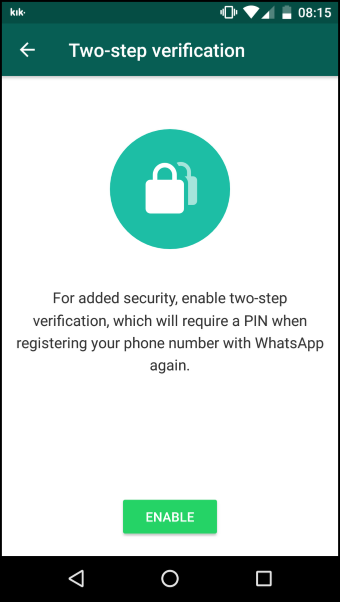
- Choose Two-step verification, then tap on Enable.
- Type a 6-digit PIN code, then tap on Next.


Once set, you need to enter that PIN code to authenticate every time you open WhatsApp. Make sure the PIN isn’t something obvious that others could choose. After completing the above steps, you have secured your WhatsApp account even further.
WhatsApp is a very secure app but is only as safe as you keep it. Using two-factor authentication is a viable way to lock down your account if someone has been accessing it.
WhatsApp Hacked FAQs
What can I do if I’ve lost access to my WhatsApp account?
Chances are that a hacker has taken over your account. When this happens, you can’t log in, and all of your account information is in the hands of the hacker. Getting your account back can be complicated. Fortunately, you can still reclaim your WhatsApp account.
I received a text verification code from WhatsApp. Does that mean someone is using my account?
One of the more notorious ways someone can gain access to your WhatsApp account is by obtaining the text verification code. If WhatsApp sends you a text verification code that you didn’t invoke, it’s best to ignore it.
You may even receive multiple codes back to back. However, WhatsApp will only send so many verification codes within a specific period. Afterward, the app will lock you out if you log out.


Disclaimer: Some pages on this site may include an affiliate link. This does not effect our editorial in any way.


