With the rise of hacking and cybercriminals, it’s great that apps like Instagram use tools to verify your identity before allowing access to your account. One verification method is sending an SMS security code.
If you’re trying to access your Instagram account but can’t send or receive a security code, we’ve got you covered. This article will explain some troubleshooting methods to fix the error.
Troubleshooting for Receiving Instagram Security Codes
There are methods available to address any issues with sending or receiving Instagram security codes so you can access your account.
Check if Your Phone Can Receive SMS
Your mobile carrier service may be experiencing a glitch with sending or receiving SMS. To double-check if this is the case, ask someone to send you an SMS to see if you can receive messages.
Disable Do Not Disturb
Security codes may not be delivered to your phone because it’s set to Do Not Disturb. To turn this off with an iPhone, swipe down from the screen’s top and select the “Focus” button. If anything besides “Focus” is displayed, tap to enable your notifications.
On Android devices, swipe down from the top, search for the Do Not Disturb icon, and tap to turn it off.
Check if Instagram Is Offline
It could be that you aren’t receiving security verification codes because Instagram is down. To confirm, view Instagram’s status page on Downdetector, or search whether Instagram is down via your browser. If you see that Instagram is facing challenges, you’ll have to wait for normal service to be restored, then try to access your account again.
Clear Instagram’s Cache
If the app’s cache has corrupted data, this can affect receiving SMS verification codes. To fix this issue on iPhone, uninstall and then reinstall the app from the App Store.
For Android devices:
- Go to “Settings,” then “Apps.”
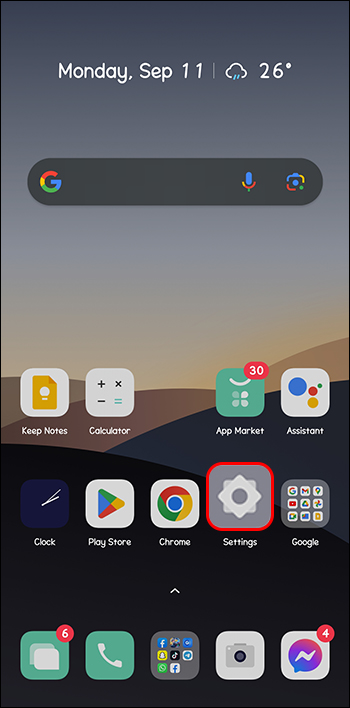
- Search for Instagram.

- Select “Storage usage.”

- Tap on “Clear cache” and “Clear data.”

Check Your Wi-Fi or Mobile Data Connection
Your internet connection is a huge factor in Instagram log-in issues. If you face challenges receiving your Instagram security code, change your internet connection to a more stable option.
Enable Permissions in Instagram
If you’re particular about the permissions, you may have turned off some off for Instagram. Instagram needs specific permissions to send security codes to your phone.
To allow Instagram permissions on Android devices, do the following:
- Do a long key press on “Instagram.”

- Tap on the “I” icon for the App info.

- Select “App Permissions.”

- Press on “Phone” then select “Allow.”

On iPhone:
- In iPhone “Settings,” find and tap on “Instagram.”
- Enable all permissions.
Update Instagram
When you’re not receiving security codes from Instagram, try updating the app to the latest version. This removes any glitches or bugs, and Instagram should work seamlessly afterward.
Login via a Browser
If you aren’t receiving security codes because Instagram blocked your mobile connection’s IP, log in to your Instagram account via a browser. Try to send and receive your Instagram security code from there.
Check the Blocked Numbers List of Your Device
You or your phone might have blocked the number “32665,” thinking it was spam. Instagram may use this number to send security codes to your device. Hence, it’s a good idea to check your blocked numbers list and unblock it if necessary.
Here’s how it’s done:
iPhone
- Go to “Settings,” then “Messages.”
- Tap on “Blocked Contacts.”
- Look for “32665.”
- If you find it, swipe left and choose “Delete.”
Android
- Open the “Phone” app.

- Tap on the three-dot icon.

- Go to “Settings.”

- Choose “Block Numbers.”

- Find “32665” and tap on the icon to the right of it to unblock.

Launch Instagram and request a new security code.
Ensure You’re Using the Right Phone Number
You may have changed your phone number since you set up Instagram’s two-factor authentication for your account. Therefore, it could be sending the SMS code to your old phone number.
Here are steps to change your authentication phone number in your Instagram account:
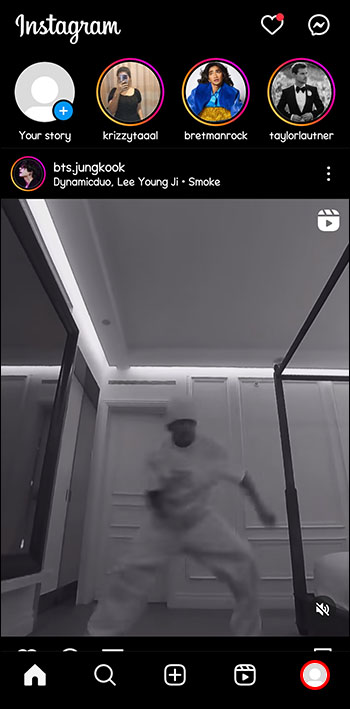
- Launch Instagram on your mobile device.

- Tap on your “Profile Pic.”

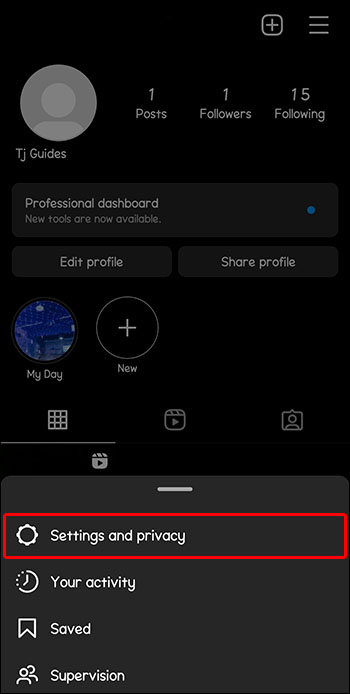
- In the top right corner, select the three-line icon.

- Choose “Settings and Privacy.”

- Go into “Accounts Centre.”

- Press on your Instagram account.

- Tap on “Password and Security.”

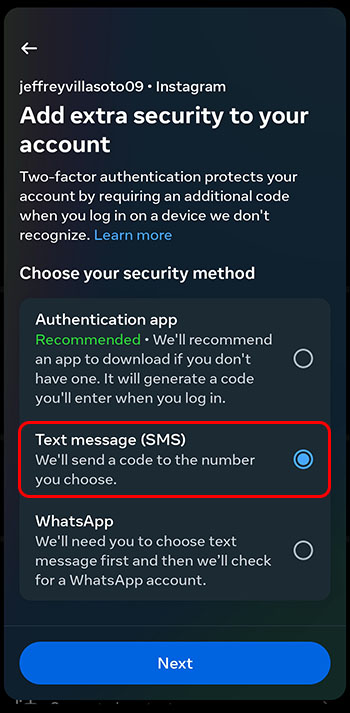
- Select “Two-Factor Authentication.”

- Under “Add a Backup Method,” press on “Text Message.” Add the number you want verification codes sent to.

It’s advisable to go into “Additional Methods” and switch on “Login Requests.” This ensures that a notification to approve log-ins from new devices is sent to your phone or email address.
Last Resort – Contact Instagram Customer Support
If you’ve tried all the above troubleshooting methods but still can’t receive security codes to access your Instagram account, your best bet is to contact their customer support. Email at support@instagram.com or call at +1-650-543-4800.
Prevent Security Code Issues in the Future
To ensure you don’t have any further issues, do the following:
- Check all your personal information and replace old phone numbers or email addresses.
- Change the two-factor authentication method to one that’s more convenient.
Why Instagram Requests Security Verification
Here are some reasons why Instagram requires security verification to access your account.
Your Account Protection
Suppose Instagram detects that your account is being accessed from a different device or location. In that case, it sends a security code to the number registered with your account. If it’s not you trying to access your account, therefore, the person that is won’t succeed, keeping your account safe.
Notify You Regarding Suspicious Activity
If you receive a security code without trying to access your account, this notifies you that someone has tried to hack you. You can then take precautionary measures to ensure your account’s security, like changing the password.
Too Many Sign-ins
People who sign into Instagram from various devices must provide a security code for each device. This ensures that it’s you signing into your account and not hackers.
Reasons for Issues With Receiving Security Codes
You may be having trouble not receiving Instagram security codes for several reasons.
A Blocked Phone Number
If the phone number associated with your Instagram account violated any of Instagram’s regulations, you can’t send or receive security codes for that number. You also won’t be allowed to sign up for a new account with that number.
Your IP Address Was Blocked
Instagram blocks IP addresses it suspects of suspicious activity. If your IP address has been banned, you won’t be able to generate a security code to access your account. To fix this problem, try using a VPN to access Instagram from another IP address. You should then be able to generate a security code.
Solve Issues With Instagram Security Codes
There are several reasons why you aren’t receiving an Instagram security code. You may be using a new phone number you forgot to update on Instagram or your phone service carrier may have trouble sending SMS. Troubleshooting includes checking if Instagram is having online issues, clearing the cache of your Instagram app, enabling Instagram’s app permissions, or updating the Instagram app.
Have you ever had problems receiving Instagram security codes? If so, how did you resolve the issue? Let us know in the comments section below.
Disclaimer: Some pages on this site may include an affiliate link. This does not effect our editorial in any way.


