Device Links
Want to make a film of yourself standing in Paris, but you’ve never been to France? You can do it in iMovie by removing the background and inserting a new one. And the best way to change your video’s background in iMovie is by recording it in front of a green screen and then inserting your desired background underneath. Not only can do this in iMovie, but you can also do it on an iPad, iPhone, or Mac.
This article explains how to add or edit backgrounds in iMovie and how to change the colors of solid, gradient, or pattern backgrounds.
Change Video Background in iMovie Using a Green Screen on iPad and iPhone
Many users know that one of the easiest ways of changing the background in videos is by recording it in front of a green screen. This means shooting your video using a green screen as a background which can then be removed by using iMovie on an iPad or iPhone. This essentially removes the background in iMovie and lets you place your video on a different background.
Using this green screen effect, you can overlay your clip on a photo, image, or background video. To do this, you need to add the video clip on top of the background clip in your iMovie project’s timeline. Then you can use the green screen feature, which shows the background clip behind the subject. Below are steps on how to use the green screen feature to change your background in iMovie:
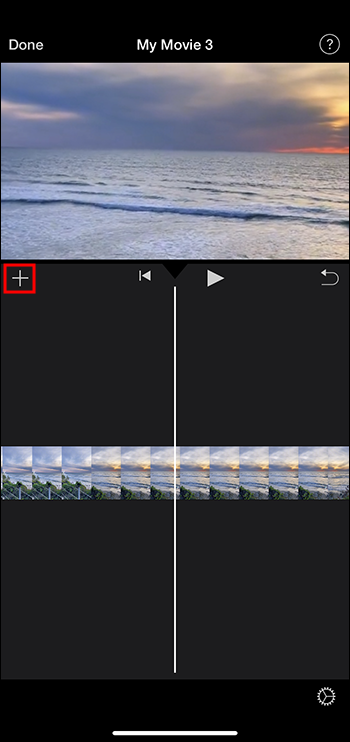
- Open your iMovie project, then add the still image or background video to your timeline.
- Ensure that the white vertical line, the “Playhead,” is over your background clip.

- Select the “Add Media” button then, from the list, choose a category.
- Tap on your green screen clip.
- Press on the three dots icon, then choose the “Green/Blue” screen. Your green screen clip will be added to your project’s timeline at the top of the background clip.
- Move or trim your background clip so it’s the same length as your green screen video clip. The two are connected and will move in sync when you rearrange timeline clips.


Adjust the Green Screen Feature on iPad or iPhone
You can adjust the green screen effect after you’ve placed it on your timeline. Select the green screen clip you’d like to adjust, and make adjustments using any green screen controls. Here are the different ways you can make adjustments to the green screen clip:
- To edit how much green is taken off a green screen clip, tap on “Adjust,” then drag the “Strength” slider right or left.
- To crop sections of your green screen clip, select the “Mask” button, then drag the clip’s corners.
Add or Edit Backgrounds in iMovie on iPhone
If you’d like to use a color background in your iMovie project, you can choose from various customizable solid, pattern, and gradient backgrounds. Here is how you can do this:
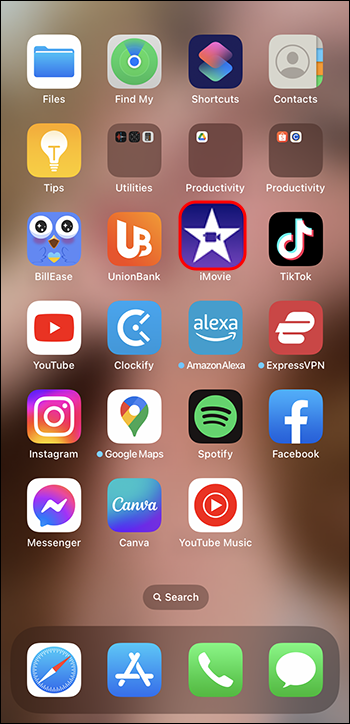
- Open your iMovie app on your iPhone.
- Go into your movie project.
- Ensure that the white vertical line, the “Playhead,” is positioned where you’d like to add your background.
- Tap on “Add Media,” then select “Backgrounds.”
- Choose whether you want a pattern, gradient, or solid color.
- Select “Add to Project.”


Change a Solid Background’s Color
To change the color of a solid background in iMovie on your iPhone, do the following:
- Open your iMovie project from your iMovie app on your iPhone.
- From your timeline, select the background clip you’d like to customize.
- In your viewer’s top right corner, select the “Color” button.
- Select a color from the available ones.


Change a Gradient or Pattern’s Background Colors
Changing the colors of your gradient or pattern background is easy by following these steps:
- From your iPhone, open the iMovie app and open your iMovie project.
- Select the background clip you’d like to customize from within your timeline.
- In your viewer’s top right corner, select the “Color” button. You’ll see two color buttons in your viewer displaying your secondary and primary colors, which are used to create the pattern or gradient.
- Change the colors by:
• Setting a primary color for the background: Select the first “Color” button from the left, and select a color from what’s available.
• Setting a secondary color for the background: Select the second “Color” button from the right, and select a color from what’s available.


Change Video Background in iMovie Using a Green Screen on Mac
To change or adjust your green screen clip on a Mac, follow the steps below:
- Open your iMovie project, then insert your image or background clip into your timeline.
- Insert the green screen clip at the top of your background clip on your timeline.
- Move or trim your background clip so it’s the same length as your green screen video clip. The two are connected and will move in sync when you rearrange timeline clips.
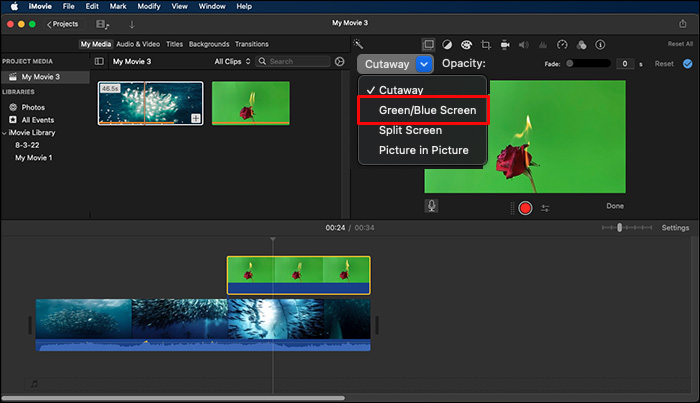
- If you can’t see your video overlay controls, click “Video Overlay Settings” at the top of the viewer, then select “Green/Blue Screen” from the menu.
- iMovie will remove the green from the green screen slip in the viewer, and you’ll see the background clip behind the subject. These clips will move in sync as you rearrange clips on your timeline.


Adjust the Green Screen Feature on Mac
Once you’ve added your green screen to your iMovie project’s timeline, you can adjust it to suit your preferences. Click on the green screen clip from your timeline, then select the “Video Overlay” settings button and use the controls to make adjustments. Here are the different options you can adjust:
- Drag the “Softness” control to adjust the transition between the green screen clips.
- Clicking the “Crop” button and dragging the frame’s corners in the viewer isolates areas of the green screen clip.
- Mask sections of your green screen clip by selecting the “Clean-Up” button and dragging it across the clip from the viewer.
Change Your iMovie Background
Adding or editing your iMovie project’s background is an easy process using the steps above for your preferred device. You can also change the background colors to display a solid background, a pattern, or gradients. The easiest way to change the background is first recording your video using a green screen. iMovie can then replace the greenscreen with an image or a background video clip.
Do you often use the green screen feature in iMovie? Let us know in the comments section below.


Disclaimer: Some pages on this site may include an affiliate link. This does not effect our editorial in any way.