Google Home users who also have a Prime subscription can rest easy. It’s actually really simple to use your free Prime Music subscription or your paid Amazon Music subscription with Google Home. The service is a competitor to Spotify and Google Play Music, but what makes it so appealing to consumers is obvious. Prime members get over two million streaming songs for free with their subscription, and Prime members get a reduced price to gain access to nearly 40 million songs, a library size similar to Spotify.
So whether you’re on the Prime’s free tier of music listening or you’ve upgraded to listen to Amazon’s full music catalog and save some cash over Spotify (not to mention to get all those Garth Brooks albums that are Amazon-exclusives), it’s actually pretty easy to listen to these songs on both your Google Home or Home Mini and your Chromecast or Chromecast Audio. Let’s take a look at how to do it.
Playing Amazon Music on Google home using Your Computer
Like with any other source of audio, you’re going to need to be using Chrome on your computer to stream to a Google device, whether it be a Google Home or Chromecast Audio. If your computer can’t run Chrome for some reason, or you like to use another browser and refuse to use Chrome on your laptop, you’re probably out of luck. Fortunately, most people already use Chrome, which means this guide is pretty easy to follow. Here’s how to do it.
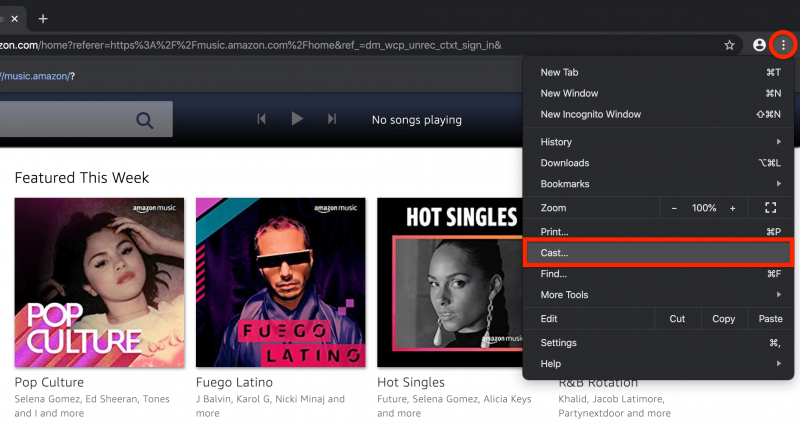
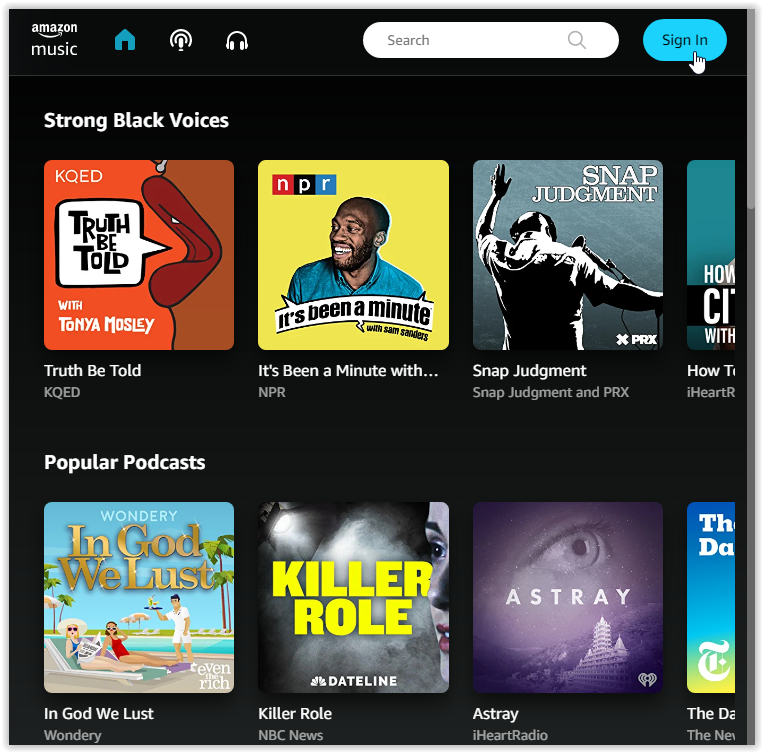
- Launch a new tab in Chrome on your computer, and navigate to the Amazon Music landing page. If needed, sign in to your account or wait for the web app to load on your display—the page is the same for free and paid accounts.
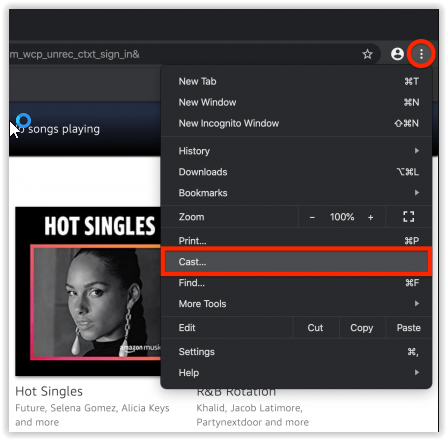
- Ensure you are still on the Amazon music page. Tap or click on the ellipsis (triple-dotted menu icon) in the upper-right hand corner of your browser, then select the “Cast…” option.

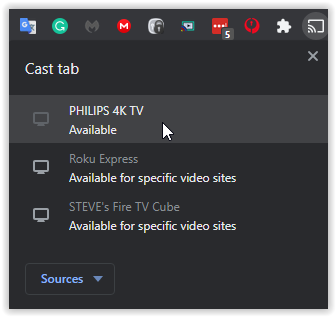
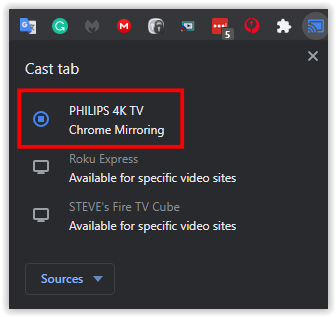
- A new menu window reads “Cast tab” that displays currently castable devices on your network.
- Find the name of your Google Home device (a Google TV, Chromecast with Google TV device, etc.) on the list and select it.
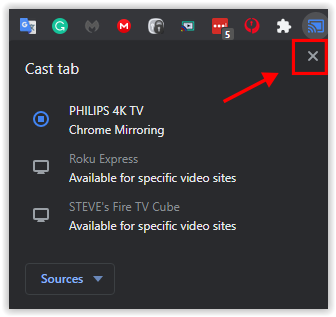
- The “Cast tab” now displays “Chrome Mirroring” to confirm that the browser is casting live.
- Click the “X” in the menu box to close it.
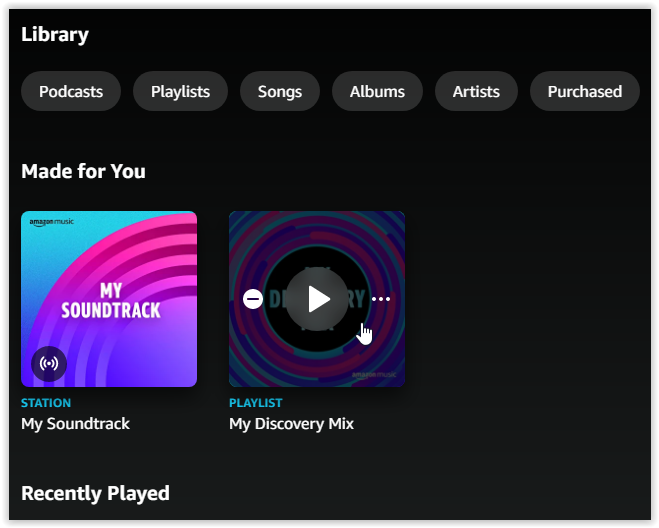
- Go back to the Amazon Music website and browse for something to play on your Google Home device.
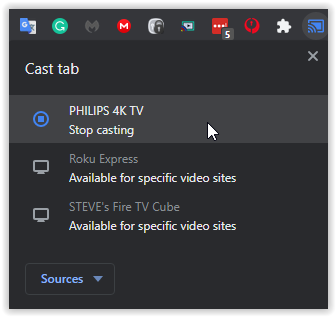
- To stop casting, reopen the “Cast” menu in Chrome and highlight the casted device, Select “Stop casting” to end the session.

You can cast to Google devices such as a Chromecast, Chromecast with Google TV, Chromecast Audio, Google Home, Google Nest Mini, Nest Hub devices, and Google OS TVs. Third-party, Chromecast built-in speakers should also appear. Keep in mind that your devices have to be on the same WiFi network as your computer to cast to them.
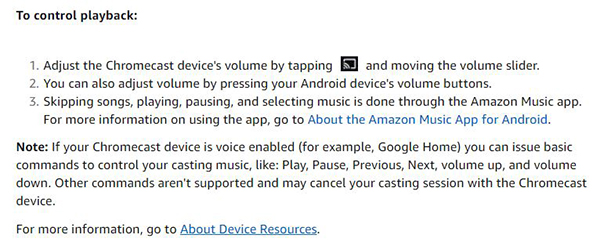
Make sure the volume on your Google Home device is set at a sensible level; you may accidentally blast some loud music by mistake without realizing it. Controlling the volume on your device can be done one of three ways:
- Use the volume control on your Google Home, Home Mini, or Home Max.
- Use the Cast controls by tapping or clicking on the Cast icon in the upper-right corner of your browser and using the slider in the dialogue box.
- In the upper-right hand corner of the Amazon Music display, you’ll find an option to control the volume inside Amazon itself. This slider will also allow you to control how loud or soft your volume is on your Google Home device.
Your browser will automatically push the audio from that tab (and that tab only) from your computer to your Google Home device, and you’ll hear your music begin to playback.
To control the music playback, you can use either the controls inside Chrome itself, the controls from the Cast option by tapping on that icon in the top-right corner of the display, or the Cast controls that appear on your phone’s notification tray (Android only) over your network. All three of these options will allow you to pause and resume playback, though if you want full control over your queue, playlist settings, and more, you’ll need to use the full browser controls inside the Amazon Music site.
Playing Amazon Music on Google home using Your Phone or Tablet (Android Only)
It can be pretty cumbersome using the desktop site on your laptop, Chromebook, or another computer to control music playback throughout your home. This scenario is due to all Google Home devices being in different rooms and your computer being in just one. If you want to change the album that’s playing or skip a song on one of Amazon’s radio stations, you have to head back to your computer. Fortunately, you can control the playback right from your smartphone or tablet. It’s pretty easy to use the app on your phone and cast music directly to your Google Home or Cast-enabled smart speaker, but there’s a catch: you’ll need an Android device to do it.
In November of 2017, amid Google and Amazon’s continuing fight for dominance in their relationship, Amazon finally added Google Cast support to the Android version of its Music app. This action made Amazon Music the first Amazon app with full support for Chromecast. That meant anyone with an Android phone or tablet could use the Amazon Music app to play their favorite songs, stations, playlists, and more on their Google Home speaker. Here’s how to use your Android device to play Amazon Music on Google Home devices.
To start, download the Amazon Music app from the Google Play Store here. Once it’s installed on your device, open the application on your phone and sign in with your Amazon account. If you have Amazon installed on your phone, you shouldn’t have to log in with your email and password; it should automatically sign you in.

From the main display inside the application, look for the Cast icon as pictured here ![]() . As with most audio and video apps on Android, it will appear in the upper-right hand corner of the display. It you don’t see the Cast icon, make sure that you’re connected to the same WiFi network as your Google Home or Chromecast device, and try cycling your WiFi off and on again on your phone to reconnect to the devices on your network.
. As with most audio and video apps on Android, it will appear in the upper-right hand corner of the display. It you don’t see the Cast icon, make sure that you’re connected to the same WiFi network as your Google Home or Chromecast device, and try cycling your WiFi off and on again on your phone to reconnect to the devices on your network.

Tap on the Cast icon to view a list of the supported devices on your network, including your Google Home, Home Mini, or Home Max speaker. Select the speaker you wish to cast to, and you’ll hear a jingle from the device after you’ve connected. Once you start playing music from the Android application, it’ll automatically begin play back on the Google Home speaker in your house. If you’re unsure before you begin playing whether you’re connected to your device, check the Cast icon in the application; it’ll appear filled in with a white color when you’re connected. If you haven’t been playing music for a while, you might see your phone or tablet disconnect from your speaker.

If you happen to have Amazon Music on an iPhone or an iPad, you’re out of luck. As of January 2020, the iOS app still doesn’t have support for Chromecast, which means it can’t stream to your Google Home speaker.
Playing Music With Voice Commands
Obviously, one of the main reasons to get a Google Home device is for its full support for Google Assistant. Assistant is one of the best AI-voice command options on the market right now, using the full power of Google’s knowledge database to allow for users to create reminders, schedule appointments, and more. Unsurprisingly, Google Assistant works best when you’re deep in Google’s ecosystem, using their own music apps to listen to music or calendar apps to make appointments and schedule dates. That doesn’t mean there’s a lack of third-party support, but in the case of Amazon Music, you won’t have the full power of Google Assistant. Let’s take a look at what you can do with voice commands while using Amazon Music.
First things first: while Google does allow for third-party apps to begin playback through Google Home by using the command “Play (song/artist) on (app name),” Amazon Music’s app lacks the support for this feature. So while you might be able to cast from some audio apps installed on your phone (again, assuming you’re using Android), asking Google to “Play “God’s Plan” by Drake on Amazon Music” will garner you a response of “Voice Actions aren’t available for that app.”

So what can you use your voice for on Amazon Music with Google Home? While Voice Actions might be disabled, voice commands—the standard, basic options for controlling playback—are still active. This is good for desktop and Android users alike, since it means less interaction with your device once you begin playback.
To start, follow either guide above to get music from Amazon playing back on your device. Doesn’t matter whether you use the desktop version (which is good for iOS users) or the Android version, just as long as you already have an album, playlist, or radio station playing on your phone.
With audio playing on your speaker, you can ask Google at any time to complete a number of basic commands for your music, which makes using both the mobile and desktop versions with your Google Home device a whole lot easier. Here’s the commands you can use with your smart speaker, activated at any time by saying “Hey Google”:
- Pause
- Play
- Stop
- Previous
- Next
- Volume Up/Volume Down
Ultimately, it does feel a bit like a consolation prize when compared to the full support Amazon Music has when using an Amazon Echo device, but at the very least, basic voice support means you don’t have to be at your computer or constantly on your phone to control playback at a moment’s notice. Hopefully, more support for Amazon’s app comes down the line with Google Home, but with the state of Amazon and Google’s current relationship, we won’t hold our breath.
***
Despite a rocky relationship between Google and Amazon, Amazon Music happens to be a bright spot between the two companies. The app is one of the few areas where Amazon’s software works with Google’s hardware, a positive step for consumers of both companies. While the limitations implemented in using Amazon Music with Google Home, particularly when it comes to voice control, remain frustrating, we’ll take basic support for casting audio over a lack of total support for playback at all.
Hopefully, 2020 sees an improvement between Amazon and Google on both hardware and software sides. We’d love to see full voice support for Amazon Music come to Google Home, but at the very least, we hope Amazon adds Cast support to the iOS version of the Amazon Music app to help out iOS users who own Google Home devices. If and when additional support for Amazon Music on Google Home arrives, we’ll make sure to update this guide with additional information.

![How to Manage Subtitles for Amazon Prime Video [All Major Devices]](https://www.alphr.com/wp-content/uploads/2020/06/How-to-Manage-Subtitles-for-Amazon-Prime-Video-All-Major-Devices.jpg)

Disclaimer: Some pages on this site may include an affiliate link. This does not effect our editorial in any way.