Google Home devices are straight-up incredible. You can do many cool things with them and they make your life easier. However, there are some settings on Google Home which are just difficult to reach.
One of those settings is the time zone setting on your Google Home app. For whatever reason, this is very difficult to change and Google still hasn’t addressed the issue (or perhaps solved it). Regardless, there are some options to try that may work for your Google Home app. You’ll need an Android or iOS device to access Google Home settings. Let’s get started.
1. Ensure Prerequisites are Met
You don’t need too much preparation to change Google Home’s time zone, but you should be aware of the requirements nonetheless. Most importantly, you will need an Apple or Android smartphone, as previously mentioned.
You will use your smartphone to download and install the Google Home app (if not already present). Access the iOS Google Home app or the Google Home Play Store page depending on your smartphone’s OS. Make sure that you have the latest version installed. You can use the same link to update the app as well.
The time zone setting is often not working on a Wi-Fi connection, so you will need spare cellular data to make it work. Don’t worry because this process uses very little data and won’t increase your bill. Google never addressed this issue, and part of the problem used to be with Wi-Fi connections.
Regardless, the problem still remains. At the moment of writing, people are still complaining.
How to Change Google Home Time Zone Using the Google Home App
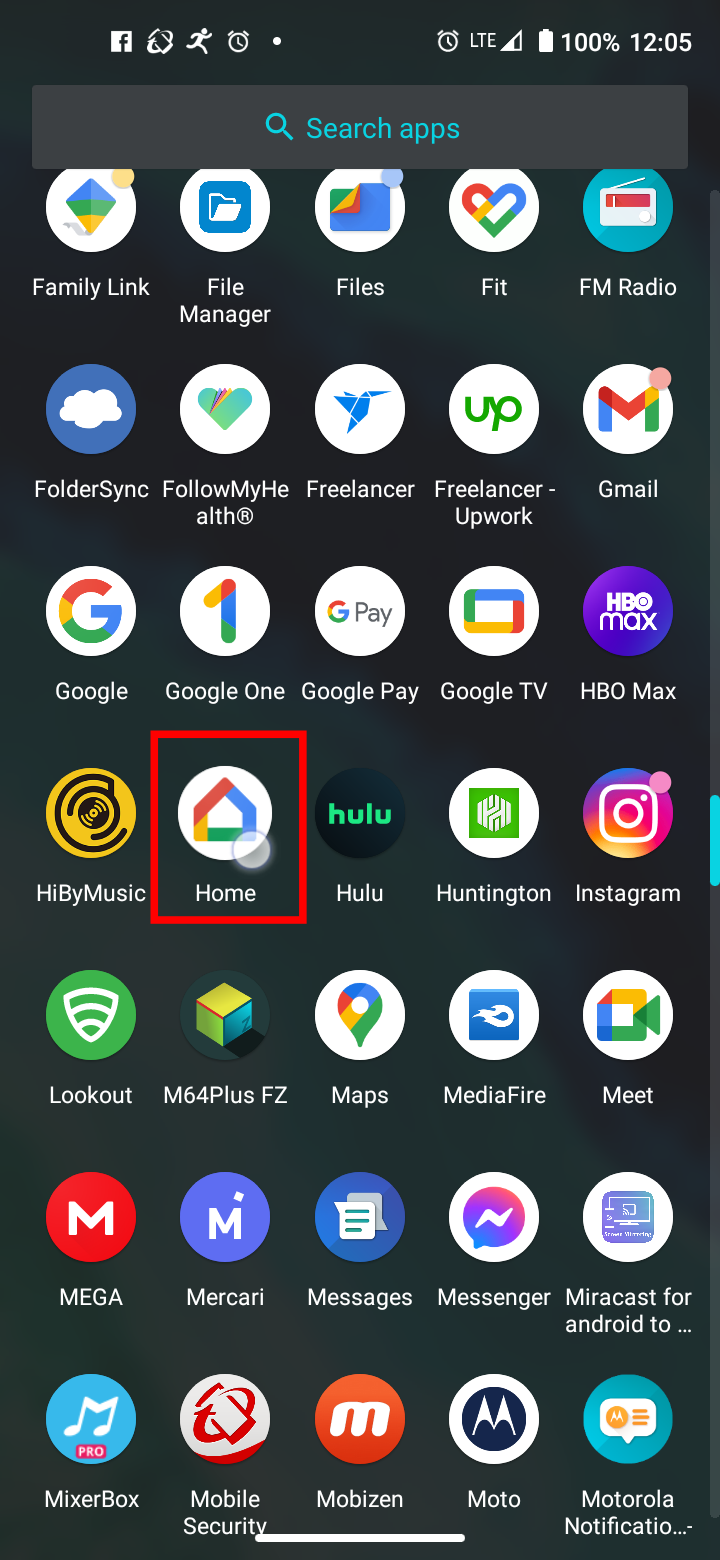
The Google Home app is the only tool you can use to change the Google Home time zone. Here are the steps you need to follow:
- Make sure that your smartphone (Android or iPhone) is connected to the internet using your cellular data. Turn Wi-Fi off. Wi-Fi connections don’t seem to work in resolving the issue, and it will disconnect all Home devices.
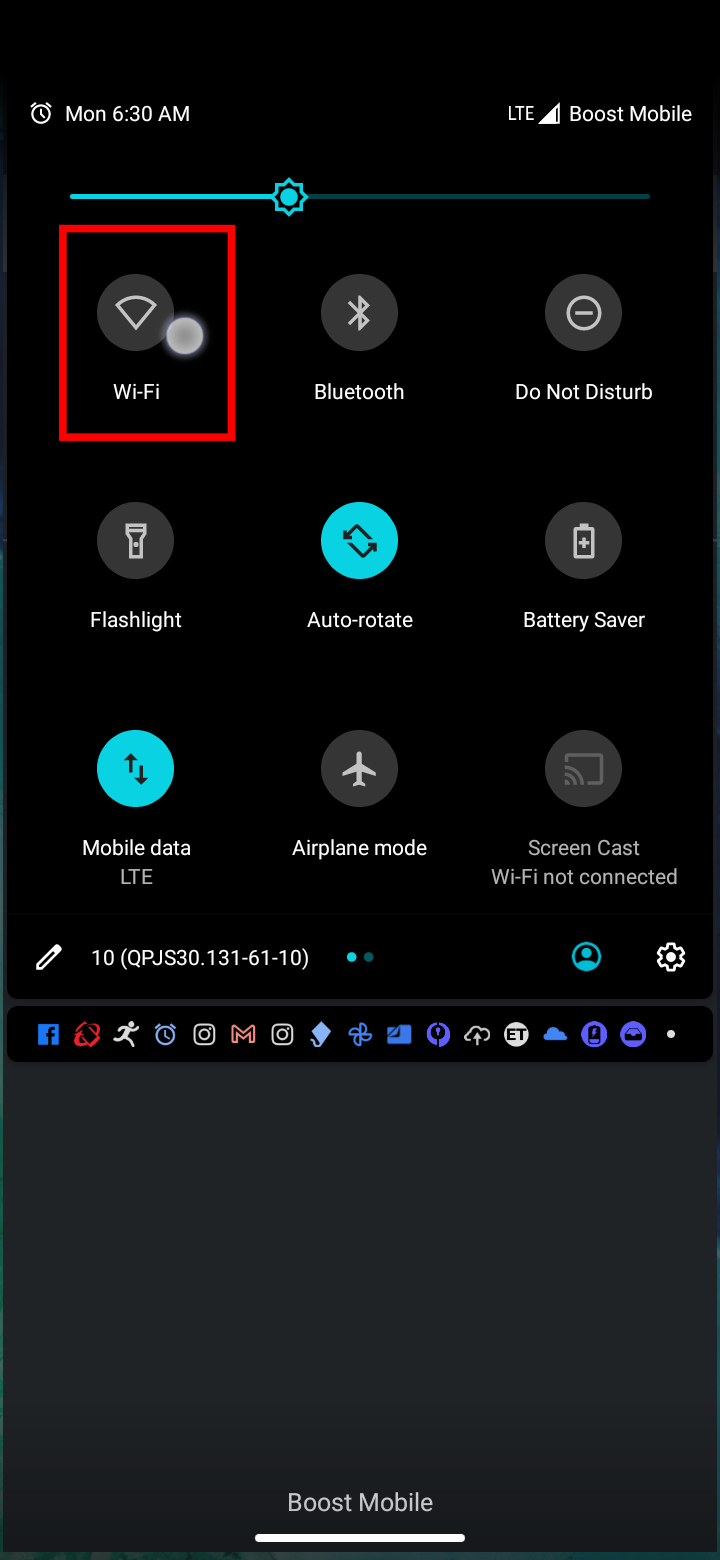
- Launch your Google Home app. All devices will get disconnected since you disabled Wi-Fi.

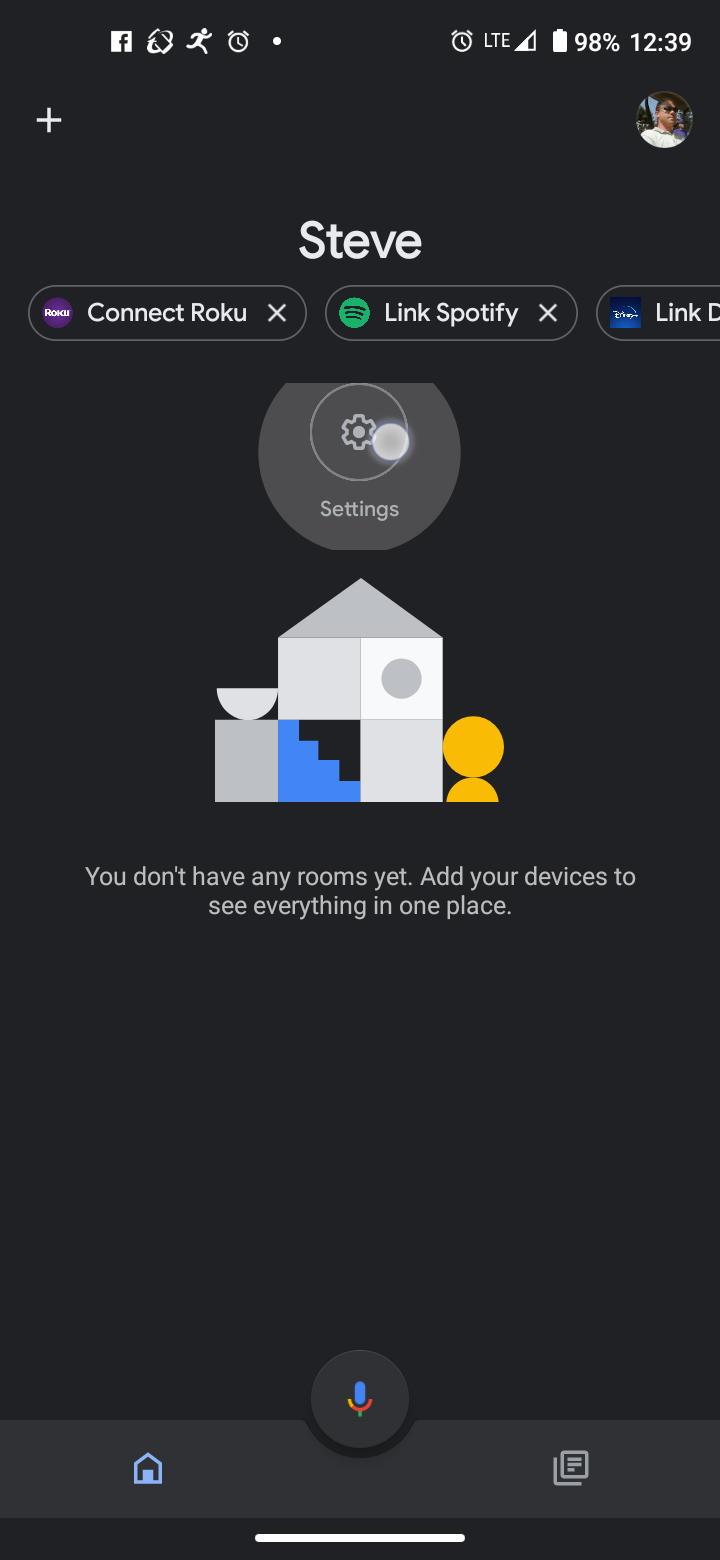
- Click on “Settings” in the middle of the Home screen.

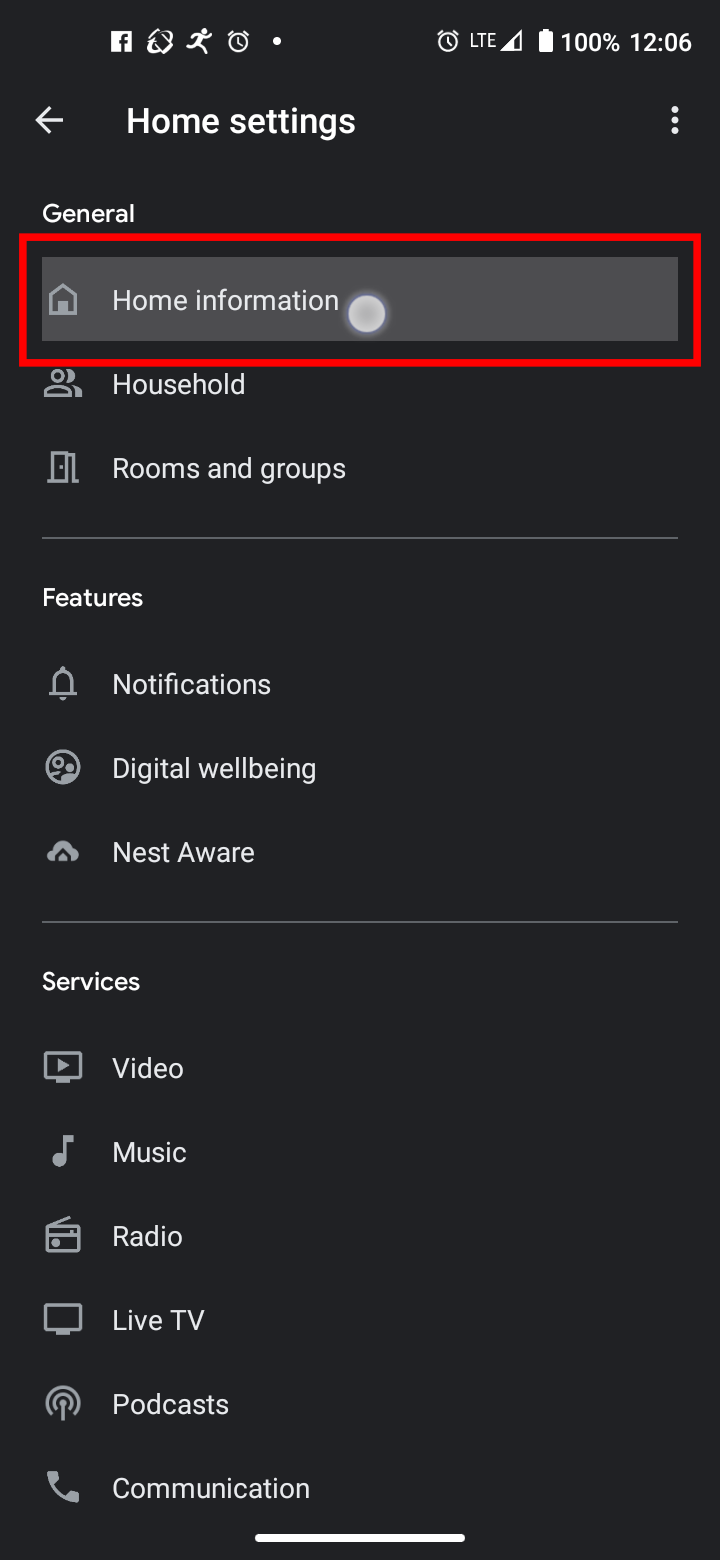
- Select “Home information” at the top of the Home Settings screen.

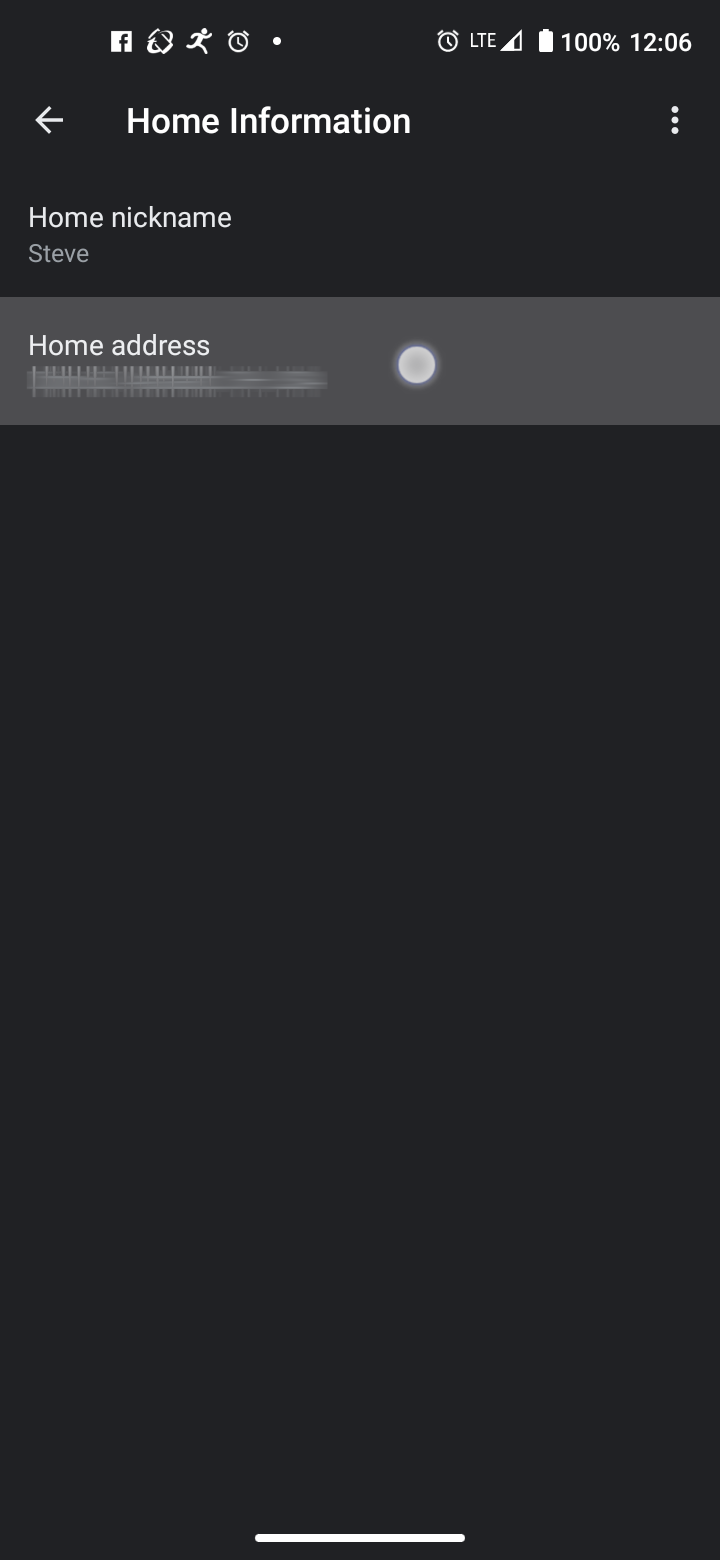
- Tap on the “Home address” row to make changes.

- Tap on “Edit” at the bottom of the Home address screen.

- Ensure your address is correct, then click “Next.”

- The screen returns to the Home address page. Confirm your newly entered address and tap on “Done” to save the changes.

Once you complete the above steps, reboot Google Home and confirm that the time zone is correct on your Home device. If that didn’t sync the correct time zone, try reconnecting to Wi-Fi, then select the Home device and head to its settings, then edit your location there. If the problem persists, ensure that your location is correct while setting up presence sensing. You need to permit the app to run in the background while using your location for it to work properly. If that doesn’t solve the problem, you should contact the official Google support and attempt to resolve the problem with their help.
Why Does This Issue Occur?
This problem seems absurd but it keeps happening. Although there is no official response from Google, people still complain about this issue of Google Home time zone not adjusting. Sometimes, travelling or moving leaves the location to the old address and time zone, but not always.
This means that Google Home has trouble automatically adjusting to a new time zone. Oddly enough, this happens to humans as well, so maybe we shouldn’t be too hard on the poor device. However, Google should do a better job at updating their software, or at least give better instructions for resolving such problems.
People have complained about their Gmail time zone not changing, so it seems to be a recurring problem with Google software. However, that is a topic for another day.

Adjusting to a New Time Zone
Humans get jet-lagged when they travel long distances. Maybe that is also the case with Google Home? On a more serious note, this issue is pretty common, and Google should work out an update for it.
Until then, you have this fix in your pocket. Did you manage to change your Google Home device’s time zone with this tutorial? Let us know in the comments section below and feel free to add anything else related to the topic.
Disclaimer: Some pages on this site may include an affiliate link. This does not effect our editorial in any way.
