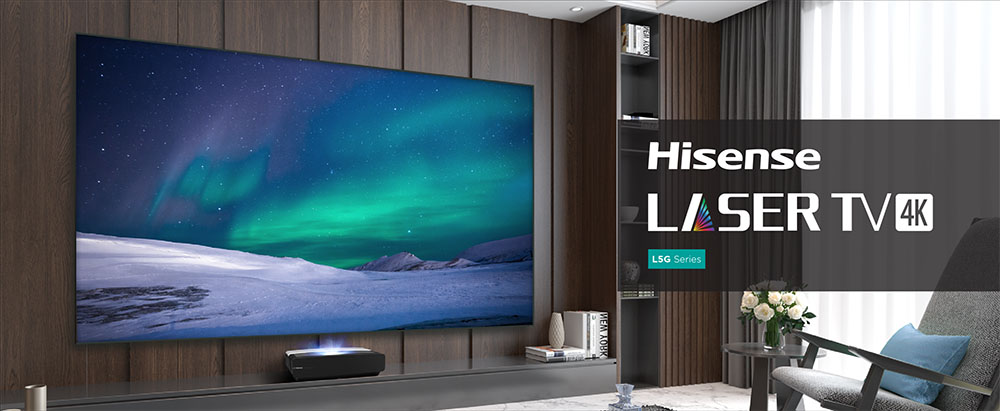
Hisense’s large TVs have revolutionized the entire home entertainment concept, with the 120” options being their biggest creation. The massive displays redefine immersion and size, giving users the most brilliant cinematic experience. These 120” Hisense TVs combine various technologies and features making them stand out from others.
This article will delve deeper into the Hisense TV biggest size options that enhance all audio and visual quality aspects, including vivid colors, life-like images, and unparalleled detail.
120” 4K Smart Laser TV
This smart TV offers all the conveniences of a regular smart TV but with movie theater immersions. The L5G is a part of the L5 series from Hisense. The short-throw projection technology included with this device allows the projector to be placed a few inches from the screen. The projected image is a 4K, bright, and four times bigger than what you would get from a 55-inch TV.
The L5G series has built-in features:
- 25,000-hour laser life
- Filmmaker mode
- Game mode
- Smart Android TV
- Dolby Atmos
This TV is one of the best ways to immerse yourself in big-screen entertainment without in-wall cable runs and ceiling mounts. You only need a TV stand and a few inches from the wall for the massive projection.
ALR

The Ambient Light Reject screen (ALR) is paired with this laser TV to eliminate the UST projector setup guesswork. Ultimately, you get the best picture regardless of the condition without necessarily dimming or switching off the lights.
Dolby Atmos

The Dolby Atmos (30W) sound gives cinematic outcomes that flow around you. If you’re an audiophile, you will love the L5G’s eARC support, giving you a full signal pass to any surround system.
Android

With the Android TV functionality, you can access content on the big screen from different apps. You can get them from the Google Play Store or get content from various streaming services for the best entertainment.
HDR Support

The L5G has 4K resolution and HDR 10 support. The peak brightness is set at 2700 Lumens, helping you to recreate a world of incredible detail and color. The focal length is fixed, delivering a uniform focus and the best picture clarity.
HDMI Ports

One thing you enjoy with this laser TV is that you don’t have to change the settings. The high-speed HDMI ports automatically detect a gaming console once connected and is the current input source. This makes the TV adjust the signal processing settings and the picture to optimize the gaming performance.
X-Fusion

The X-fusion laser engine gives a dynamic, life-like color range. The engine exceeds Rec.709. This standard for UHD 4K lasts long enough to handle over 25,000 hours of content. With the built-in Google Assistant, Bluetooth, Alexa, and Wi-Fi, the TV and voice remote can be easily integrated with any smart home system. You can create some of the best automation as per your desires.
With wireless connectivity and multiple ports, connecting external audio and video sources to the TV is easy. This is one of the most convenient features of the laser TV.
The 120l5 Ultra Short Throw Laser Cinema
This 120” laser TV option from Hisense has changed the home entertainment realm. Its breathtaking 4K ultra HD input gives crystal clear and stunning images. The massive screen can be enjoyed from any viewing angle (180 degrees).
UHD 4K

The enhanced color spectrum is one of the most outstanding things about this TV option. The images are true-to-life, made possible by the laser light source precision. It exceeds the Rec. 709 standard set for the UHD 4K color range. You notice brilliant color displays that have been improved incredibly compared to earlier versions.
HDR

This TV has a high dynamic range or HDR that opens contrast and color range that can only be compared to cinema standards. The vibrant and stunning pictures offer incredible depth and rich details.
X-Fusion

One thing you notice about this TV is that it adopts an X-Fusion laser light that features a lumen brightness of 27000. The luminance uniformity enjoyed here is over 85%, which explains the picture clarity regardless of the prevailing room brightness.
Gaming

A laser TV is one of the best options to capture details in fast-paced action games. The MEMC Technology has a microsecond level processor response time, 10 times faster than the OLED motion rate delivered. This makes it one of the best gaming screens to use.
DBX-TV

The screen isn’t the only thing that stands out. This laser TV gives an immersive sound experience. It has embedded speakers that release a 30W audio system. On this laser TV, the award-winning dbx-tv audio technology is used to improve the cinematic experience.
Android

The Android TV provides even more entertainment options. Thousands of movies and shows across streaming services can be accessed on this gadget. There’s also the option to let Google control the TV and recommend what you should watch. What’s more, your voice can control everything. Casting music, videos, and options from other devices to the TV is made possible by the built-in Chromecast. It’s important to note that Google Assistant isn’t available in all countries and languages. You have to find out more about this functionality before making your purchase.
The Short-throw Projector and Ports
The short-throw included with the screen has a minimalist design, which is relatively easy to install. The TV is lightweight and slim, allowing inconspicuous wireless hanging. This perfectly integrates into any lifestyle. The device has four HDMI ports to connect to video, audio systems, and other components.
Hisense 120″ L5f 4k Ultra HD Smart Laser TV
This is another 120-inch TV that redefines home entertainment, featuring an ambient light-rejecting screen and a console. It is an excellent option for live sports, movies, and live TV. The device lets you watch all the shows you love on an impressive, brighter, and bigger 4K screen.
Projector and Images
The projected images by the short throw laser are high quality and powered by more than 8 million pixels. Moving images are shown in deep detail, and the screen is built-in with anti-glare technology to let you enjoy all your shows in any lighting condition.
Smart TV Functionality
The laser TV has the same temperature calibrations as the Hisense ULED TV, providing detail and depth. The TV enables users to enjoy traditional smart TV functionalities because of the inclusion of VIDAA 4OS with built-in tuner and streaming to access free-to-air channels.
Dolby Atmos
The Dolby Atmos technology and the built-in speakers allow cinematic sounds. Combining this laser TV’s audio and image technology allows a larger-than-life experience without changing your space. The console can be conveniently installed on the tabletop near the screen and works incredibly well.
Revolutionize Your Home Entertainment With Hisense TV Biggest Size
The biggest TVs of today no longer equate to a bulky screen occupying a large part of your living space. The Hisense TV biggest sizes are great examples. The TV creator has transcended traditional TV limits and dimensions, introducing massive screens to open up an incredible visual journey. Combining design, Picture quality, and audio prowess, Hisense has introduced masterpieces that have taken viewership to a different level.
What’s your take on these Hisense TV models? Have you got one at home? Let us know in the comments section below.
Disclaimer: Some pages on this site may include an affiliate link. This does not effect our editorial in any way.


