Many people think they need to close apps on their iPhone 13 to improve the performance and battery life of their phone. In truth, you only need to close an open app when it’s unresponsive or glitchy.
If you’re not sure how to close apps on your iPhone 13, you’re in the right place. This article will explain everything you need to know.
How to Close Apps on Your iPhone 13
The App Switcher on your iPhone is a feature that allows you to view and switch from one recently opened app to another. It provides iPhone users with a convenient way to use different apps at once without having to go to the Home Screen.
The App Switcherlets you see all the apps you currently have open, you can keep track of them and switch between them easily.
Here is how you can close apps using the App Switcher.
- Launch the “App Switcher” on your iPhone 13 by swiping up from the bottom of the screen and pausing in the middle of the screen. The “App Switcher” will open, displaying all recently used apps.

- Swipe through the open apps to find the app (or apps) you want to close.

- Once you have located the app (or apps) you want to close, swipe the app card upwards to close it. You can do this by flicking the app card off towards the top edge of the screen.
- After closing the app, tap on the Home Screenor anywhere outside of the App Switcherto return to your “Home Screen.”


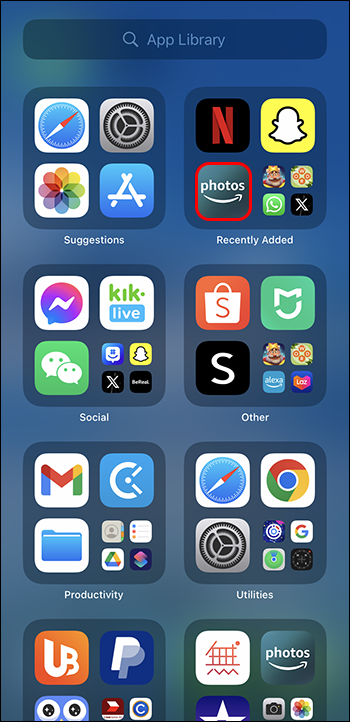
Using the App Library to Close Apps on your iPhone 13
The App Library on an iPhone, introduced with iOS 14, helps organize and categorize all your installed apps. It prevents your home screen from getting too cluttered, making it easier to find and open the apps you want. The App Library sorts apps into groups like “Suggestions” and “Recently Added,” so you can quickly find what you need without scrolling through multiple home screen pages.
Here is how you can close an app using the App Library:
- Go to the “Home Screen,” swipe left past all your Home Screenpages and you will find the “App Library.”
- Find the app you want to close in the “App Library.”
- Press and hold the app icon until all the icons start shaking.
- Tap the “-” sign on the app you want to close.
- A confirmation prompt will appear asking you if you want to remove the app from the “Home Screen.” Tap “Remove from Home Screen” to close the app.


Other Ways to Fix Frozen or Unresponsive Apps on Your iPhone 13
If an app is unresponsive or keeps freezing, you should try these steps to fix the issue.
- If closing and opening an unresponsive app doesn’t fix the issue, you should switch off your iPhone 13 and restart it.
- Check if there are updates available in the Apple store for the frozen or unresponsive app. Try updating the app to fix the issue.
- Your iPhone could be low on storage and it might be the reason an app keeps freezing or closing randomly. Try freeing up space on your iPhone by deleting pictures, videos, or apps you have no use for.
- Some apps accumulate temporary data over time, leading to performance issues. You fix the crashing or freezing issues by clearing the app’s cache or data.
- If you’ve tried the previous ways to fix an unresponsive and it’s crashing, you might need to delete it and redownload the app. But you should know some preinstalled apps on your iPhone can’t be deleted. You may lose your data stored on the app if you delete it.
When You Should Force Close Apps on Your iPhone 13
Imagine using your favorite app on your iPhone 13 and then it stops responding. Don’t panic and think your phone is broken. Closing apps on your iPhone is an easy way to fix unresponsive or frozen apps.
But before you go forcing apps to close, you need to know that the iOS of your iPhone 13 has built-in resources to manage multiple apps running in the background. For that reason, it’s more than capable of handling open apps without the speed, performance, or battery life of your device being affected.
The only time you should consider closing apps manually on your iPhone 13 is when an app is glitchy, unresponsive, or misbehaving.
FAQs
Is it necessary to close apps all the time on my iPhone 13?
No. The iOS is optimized to efficiently manage apps running in the background. You have multiple apps opened on your iPhone 13 without affecting the speed and battery life of your device.
Does closing apps improve the battery life of the iPhone 13?
The impact of closing apps manually on your iPhone 13 isn’t so huge on the battery life of the device. While closing apps may conserve some battery life by limiting background activity, it isn’t substantial. You can improve the battery life of your iPhone by managing settings like screen brightness and background app refresh.
How do I know if an app is unresponsive or frozen?
You’ll know if an app is frozen or unresponsive if it doesn’t respond. You can try closing the app and reopening it to see if it resolves the issue.
Will closing apps improve the performance of my iPhone 13?
Closing apps may fix unresponsive or frozen apps but it won’t necessarily improve the speed or performance of your iPhone 13. The iOS is designed to manage background apps effectively while running smoothly.
Can I force close multiple apps on my iPhone 13 at once?
No, you can’t. But you can force close multiple apps simultaneously on your iPhone 13. You can do this when you close apps with the App Switcher. Just swipe the apps you want to close individually.
Enjoy a Glitch-free iPhone 13 Experience
Knowing how to close apps is useful especially when dealing with glitchy, unresponsive, or frozen apps. While the iOS of your iPhone 13 handles apps efficiently, closing apps occasionally can come in handy. By using the App Switcheror the App Library,you can easily locate and close apps.
Have you ever needed to close any app on your iPhone 13? If so , did you use any of the methods featured in this article? Let us know in the comments section below.


Disclaimer: Some pages on this site may include an affiliate link. This does not effect our editorial in any way.


