Tech gurus and prophets have been predicting the death of the printed page for a long time. They believe that online technology will take over, or everyone will have a “paperless office,” or people and businesses will get managed in the cloud.
There’s no denying that there are fewer printers than there used to be. The rise of networks and ubiquitous Internet access has reduced the need for printed documents, or at least reduced the need for people to have a printer of their own. Furthermore, printers are a somewhat antiquated technology, and those who use them frequently have many difficulties that have yet to be updated.
Many processes and procedures still rely on printed information, but what has changed is that many people no longer have an inkjet or laser printer. People typically use tablets and smartphones now and don’t have a desktop machine at home or work with a standalone printer.
It isn’t just businesses that have moved away from using paper documents. Colleges and universities, high schools, and even middle schools around the globe have moved to digital learning, such as using laptops and tablets in class to replace printed documents and handouts. Turning in papers and other homework assignments is becoming an electronic process through sources like email, Web applications, and class-wide dropboxes.
Regardless of the ‘paperless’ trend, you may still have times when you need to have a printer. Here are some great sources to utilize, so you can get your documents, forms, proof of income, or verification information on paper and deliver them as required.
Where Can I Go To Print A Document?

Luckily, you don’t need to stress out. There are printers everywhere, and finding one that you can use is often as simple as doing a quick Google search. You can also use print-on-demand options, accessible just about everywhere you go. Here are some places to print a document.
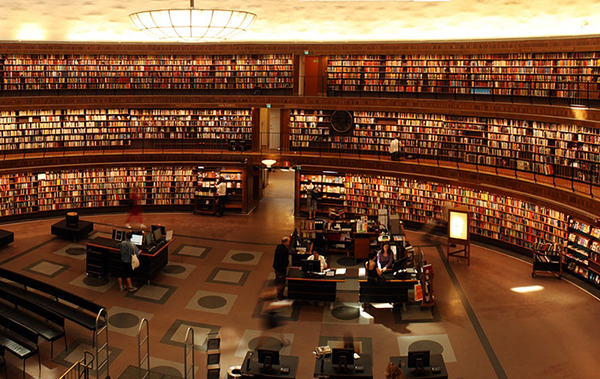
1. Use The Library to Print Documents
Libraries aren’t just for books! Libraries are open to the public and are the perfect resource for anyone looking for an easy way to print documents. While most people think of libraries simply as places to rent books and possibly DVDs, depending on your local selection, the truth is far more complicated. Libraries offer all sorts of services, depending on where you live, and one of those services is usually printing and computer access. If it isn’t free, it’s often cheap.

If you’re unsure whether your local library carries printing services, use this Google search to find your closest library, then visit their webpage. Look for a subsection or category for services or computer access. You can always call them too. Typically, libraries offer computer access for those who can’t print or use computers at home. Most libraries provide free use of PCs, and some don’t even require a library card to use them.
Printing access may or may not be free, but the costs are low per page. The expense can add up quickly when printing a bunch of documents, but for a five-page black and white paper, you’ll likely pay less than a dollar. Check with the library to see if you have to print using one of their computers or if they support wireless printing from your phone or laptop.
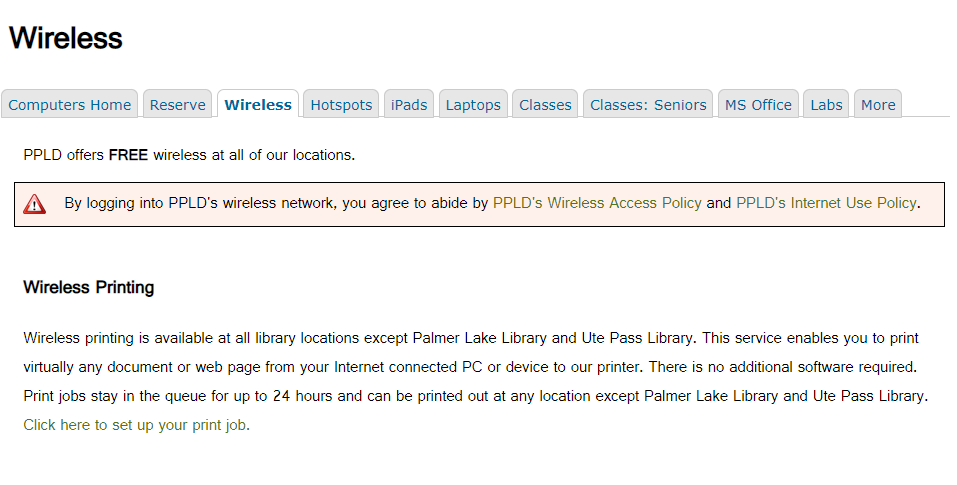
Sample library website:
Many libraries also offer scan and fax services for a small fee. Some libraries even have 3D printers available for rental. However, these printers are usually part of “maker” programs and require you to take classes and show proficiency with the technology before they will give you access to their expensive machines.
If you’re a student at a college or university, check out the library on your campus to print documents whenever you need an essay. Typically, your tuition comes with a printing quota that you can use towards printing documents while on campus. College campuses don’t place restrictions on what you can print, so whether you’re printing a paper for school or a shipping label to return that shirt you bought on Amazon that didn’t quite fit right, you’ll be good to go. If you aren’t a student at the school, you can most likely use the library resources for a small cost.
2. Use Copy and Print Stores to Print Documents
Though a dying breed, there are still dedicated stores around that provide copy and print services and offer supplies related to paper and other documents. This scenario does not include packaging and shipping stores like “The UPS Store” or “FedEx” stores. Copy and print stores are typically ‘mom-and-pop’ businesses, locally-owned in major and minor cities and occasionally throughout the suburbs in the United States.
You’ll want to search Google for copy and print stores nearby, though it may also bring up some of the other places on your list. Copy and print shops offer the advantage of precisely meeting the needs of people who require something printed and the disadvantage of premium prices for their services.

3. Use Shipping Stores to Print Documents
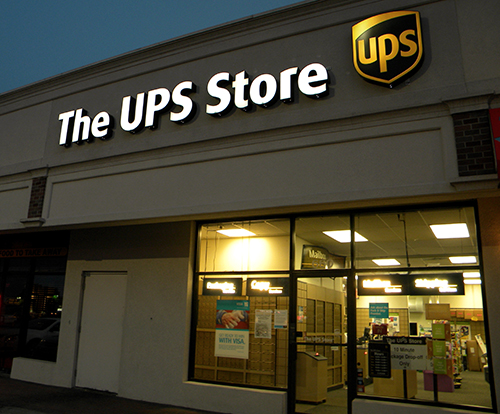
Have you ever dropped a package off at The UPS Store or a FedEx store? You may be surprised, but those businesses offer more than taking your Amazon returns and holiday gifts you’re sending. They also provide office services that may appeal to anyone trying to print a document before heading into work or school. Shipping stores almost always have a printing center.
Printing at The UPS Store
The UPS Store, for example, has more than 5,000 locations across the US, Puerto Rico, and Canada, and most of them offer copy and print services. According to their website, The UPS Store provides copies, printouts in black and white or color, single-sided or double-sided printing, multiple page sizes, and even lamination and binding for those that need an excellent report or essay. UPS also allows you to upload your documents online and gives you a printing estimate based on your need.
Once you’ve submitted your file, you get an estimated time (for smaller documents, this seems to be pretty short), and you can go pick it up from the store when you’re ready. The prices were pretty competitive in our testing, giving us a color print for around 40 cents per page and a black-and-white document for 15 cents per page.
Call your local UPS store to get their current prices. UPS offers many document file types for printing, including PDF, .doc, .jpeg, and even Photoshop and Illustrator documents.
Printing At FedEx Office Stores
FedEx offers services with their “FedEx Office” stores, formerly known as “Kinko’s,” which compete directly with “The UPS Store.” There are fewer FedEx Office locations globally, with FedEx’s website saying there are over 2,000 locations throughout the United States and abroad. Nevertheless, if you happen to live near a FedEx Office, they offer similar print and copying services to their close competition, which makes sense considering Kinko’s legacy. Documents can be picked up or shipped to your location, though sending them adds more cost.
Uploading documents to FedEx is easy, with support for multiple file types and even the option to upload straight from a cloud document service like “Google Drive” or “Dropbox.” If there’s one downside to using their service, it’s the price. Our test document was pretty small, containing a one-page paper in black and white, but it cost nearly 70 cents, a hefty increase over the 15 cents UPS would charge us. Regardless, It may vary depending on your location and competition. Call your FedEx Office store for pricing information. Still, it’s not too expensive, depending on the page count. If there’s a FedEx near you but not a UPS store, the decision is made for you anyway.
Those are the two big-name stores, but you’ll still want to look around to see if you can find a locally-owned shipping company that may also offer printing and copying services.
4. Use Apartment and Hotel Service Centers or Offices to Print Documents
Hotels and apartment complexes often have business service centers that offer copying, printing, scanning, and fax services to residents or guests. Ordinarily, these services are reserved for the people who live there.
However, the staff (at hotels in particular) are often delighted to let someone come in off the street with a quick print job in response to a polite request. If you live in an apartment complex, even if your complex doesn’t have a standalone business center, the rental office staff may be willing to print out the occasional document for a resident. It never hurts to ask!
5. Use Office Supply Retail Stores to Print Documents
Like UPS and FedEx printing opportunities, most major office supply stores provide printing services that may suit you just fine. Though stores like “Office Depot,” “OfficeMax” (which is owned by Office Depot), and “Staples” exist to sell paper, printers, and other similar printing materials, they offer all sorts of printing options for you to use at your disposal.
Printing at Office Depot/OfficeMax
Office Depot offers same-day printing pickup for most essential document, as long as you place an order before 2 PM local time on business days. Since they also provide mobile uploading through their iOS and Android apps, you don’t have to be on your computer to upload a document.
Prices through Office Depot and OfficeMax are pretty cheap. A double-sided page in black and white gave us an estimated cost of just 9 cents, beating even the library in our area. Even full-color pages were just 42 cents each when double-sided. It’s pretty easy to find an OfficeMax or Office Depot location near you, but you can also choose to have the product shipped to you for an additional cost.
While we’re focusing on document printing for the sake of this article, you can print out numerous types of projects using Office Depot’s printing software that you’ll find online.

Printing At Staples
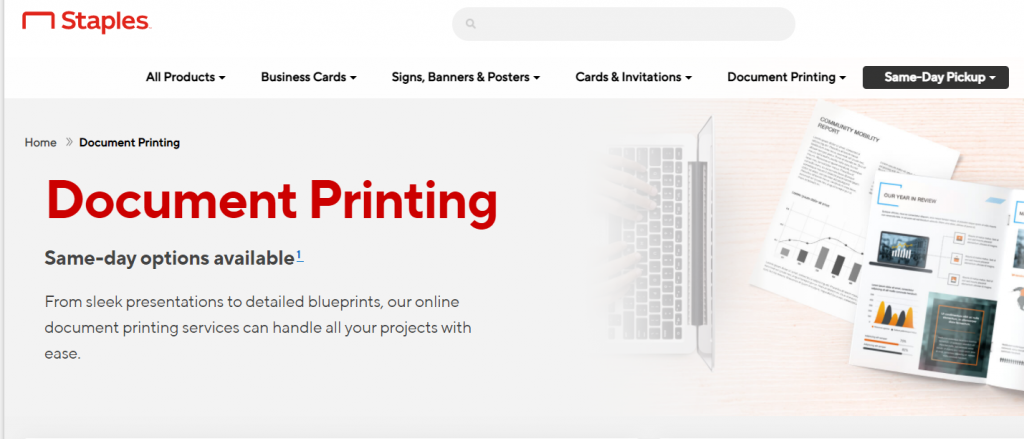
Like Office Depot/OfficeMax, Staples has online document uploading for easy pickup or shipment, offered at around 10 cents a page for black and white prints and about 50 cents per page for color prints. Call for pricing. Staples printing services are on pace with similar costs from libraries and direct competition like Office Depot.
The Staples desktop web app for uploading documents is pretty easy to use, and you can pick up your printouts within a couple of hours of submission.
6. Use Online Print Stores to Print Documents
If you aren’t in a rush to pick up your printp. As previously mentioned, several companies, including Office Depot and FedEx, ship your documents if you’re not near a physical location. Still, it’s also worth noting that online print stores may have lower prices or free shipping.
There’s no shortage of easy-to-use online print companies that you can find through Google. However, the one thing to note is that most online print stores get created for big projects that office supply stores or your local library can’t handle.
If you need 500 copies of a specific document, purchasing through an online print shop might be the way to go. You’ll end up paying real dollars, but each copy will only cost you a couple of cents because you’re purchasing in bulk. If you’re looking to buy a single copy of something, you might want to find a different source.
7. Use Pharmacies and Drug Stores to Print Documents
While pharmacies and drug stores around the world offer 1-hour photo solutions, what you might not know is that those same stores may offer document printing and copying. If you’re looking for a place to print your documents quickly, you might want to check out your local pharmacy to see if they have printing solutions that suit your needs.
Printing at CVS
If you don’t live near a mom-and-pop or locally-owned pharmacy, the national drug stores will help. One of the largest drugstore chains in the United States is CVS, and it offers copy and print services at more than 3,400 stores nationwide.
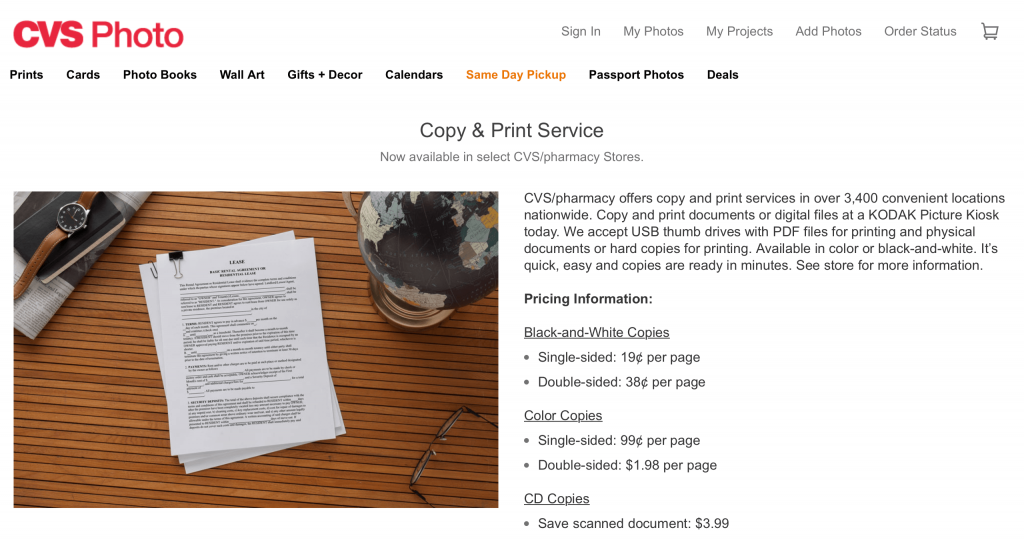
The downside is CVS doesn’t have a way to tell if a store has just photo printing or photo and document printing, so we recommend calling your local CVS to confirm their printing services.
To copy or print your documents at CVS, head to your local store and look for the “Kodak” kiosk. You’ll need to make sure you bring a USB drive with you that contains your document. It is the only way to print papers at CVS. Connect the flash drive to the Kodak kiosk, select document printing, and input your color choice and whether you want single or double-sided prints. Since everything gets done in the store, you don’t have to worry about picking up your documents at the right time.
Finally, the prices at CVS are a bit steep compared to the competition. We found costs at 19 cents per single-sided page for black and white copies and 38 cents per page for double-sided black and white copies. The color prices were higher than anything on this list, charging 99 cents for a single-sided color print and $1.98 for double-sided color prints. Call your local CVS store for current costs because location pricing can vary based on the area. It’s expensive, but you get quality printouts on quality paper, which may come in handy for archival purposes. If you need something printed quickly and you live down the street from a CVS that supports document printing, it might be your closest and fastest option.
8. Use PrintSpots Online Directory to Print Docs while Travelling
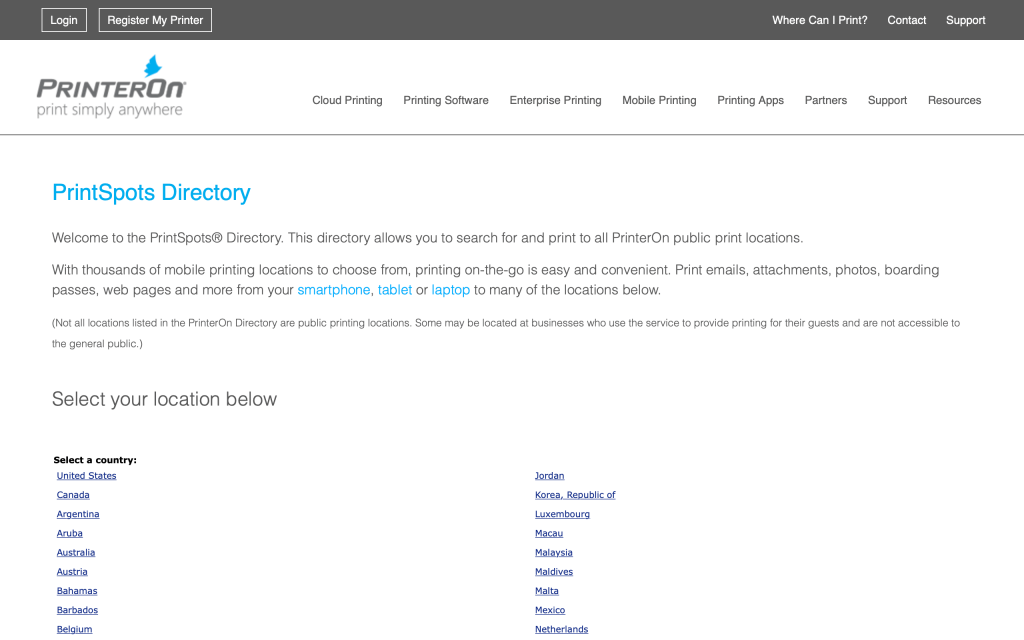
Of particular use to travelers, the PrintSpots directory of public printing spots is a valuable site to bookmark. Although the listings primarily focus on hotels and libraries, the site is still beneficial if you aren’t familiar with an area or don’t have time to call around to many hotels. The details are all there on one page. The listings display locations with PrinterOn Inc. services.
9. Use a Bank to Print Documents
When you’re in a crunch and need a printout fast, your local bank may be the answer to your needs. Along with a notary, you should be able to find someone who might print something off for you there. Not every bank employee will be willing to take time out of their day to print off a few pages for you, but it isn’t unheard of either. After all, you give them your business, so it’s worth asking, even if they want to charge you.
In closing, not every idea on this list will work for you. If you don’t have a nearby office supply store or your local pharmacy doesn’t offer document printing, then you might be out of luck when it comes to those options. Likewise, online print stores can be slow to deliver, and if you need something same-day, that cancels out the idea.
In the long run, of course, one or two options on this list not being available doesn’t mean you can’t gain access to one of the others. An ideal solution happens to be using your local library, where prices are typically fair, and printing can be done quickly and in real time. Most libraries have access to printers for their town’s residents, which means you’re never going to be in a situation where printing isn’t an option. If you live in a suburb or metropolitan area, you might not have a nearby library. Therefore, finding a shipping store like The UPS Store, an office supplies store like Office Depot, or even a pharmacy or drug store like CVS will make it easy to print your documents when you need them.
Printing without a Printer FAQs
Is it safe to print personal information on public-shared printers?
One common question about public access printers is, “are these methods safe?” Ultimately, no. If you’re accessing a shared computer, it’s best to avoid printing anything with your financial or personal information. Hackers can potentially grab the data sent to popular Wi-Fi-connected printers. When it comes to local public printers, the data gets processed on the PC, which is also obtainable during processing, whether through cache or a Wi-Fi transmission event.
In both public sharing scenarios, it’s probably better to ask a friend, family member, or trusted co-worker for help. Worst-case scenario, you can find a printer for around $50 on Amazon and a ream of paper for a few dollars. If you have no other options, it’s better to shell out the cost than compromise your social security number or banking information. But then again, the risk depends on the information on the printout. Printing a blank application or a response receipt generally poses no threat.
Is it safe to print personal information from retail stores or office services?
Generally speaking, it is safe to use local retailers or office service stores to print personal information, but it is never a guarantee. You could get a disgruntled or distrustful employee, but many stores have security cameras to help protect the customers and the employees.
Aside from employee relations, These places use shredding services for their business paperwork and other identifiable paperwork, including misprints or extra pages printed for the consumer. Many office stores or printing companies also have a shredder by the printer that they’ll use for bad printouts and such.
Lastly, you potentially risk a customer looking over your shoulder when in a retail space.
In any case, it is always best to remain at the printing station until you receive your papers (if you can).


Disclaimer: Some pages on this site may include an affiliate link. This does not effect our editorial in any way.
