Disclaimer: Some pages on this site may include an affiliate link. This does not effect our editorial in any way.
Device Links
The arrival of the fourth season of Yellowstone left American fans excited to continue following the Kevin Costner-led drama and pick up where the shocking Season 3 finale left off.
For fans located across the pond, the latest season of the Paramount Network series might be slightly delayed. Despite this, British fans will still be able to access the show and avoid missing out (although online spoilers may not be so easily avoided).
This was a significant improvement from 2018, when the show was available exclusively in the U.S.
Are you out of the country and want to catch up on the ongoings of the Dutton family? This article will be exploring how Yellowstone fans located in the U.K. can gain access to the show.
How to Watch Yellowstone in the U.K. on a Firestick?
Since its arrival in 2018, Yellowstone quickly became one of the most highly anticipated shows in the world. Unfortunately, the award-winning, neo-Western show is not yet available on any streaming services or broadcasters in the U.K.
However, if you’re in the U.K. and are desperate to get your fix, there is a way to gain access through Amazon Firestick. However, users are required to take a few extra steps before watching the show for free.
Signing Up for Peacock
Peacock, a U.S.-based free streaming service, offers users over 13,000 hours of viewing content. For U.S.-based viewers, signing up for Peacock is a straightforward process – all that’s required is an email address:
- Head to the Peacock website and select “Sign Up.”

- Enter your email address and create a password.
Users can also sign up for Peacock Premium to gain access to even more shows. However, this requires a monthly payment of $4.99. It’s also worth noting that this version is only accessible to those who have American credit cards. Yellowstone fans need not worry, though, as the series is available to viewers using the free version.
Before U.K. viewers try signing up for Peacock, however, they will first need to change their location by signing up with ExpressVPN:
- Head to the ExpressVPN website.

- Navigate to the “Get Started” button in the top-right corner of the page.
- Next, you’ll need to choose between a one-month ($12.95 per month), six-month ($9.99 per month), or twelve-month ($6.67 per month) subscription plan.
- Type your email address out in the required field.
- Choose a payment method. The methods available include PayPal, credit card, Bitcoin, and more.
- Once payment is complete, you will need to set up a password.
- Finally, you will be directed to a page where you can finish downloading ExpressVPN.


It’s also worth noting that users who have access to Sky and NOW TV in the U.K. will be able to access Peacock from the U.K. for free.
Once you’ve changed your location successfully, the next step is to add Peacock to your Amazon Firestick:
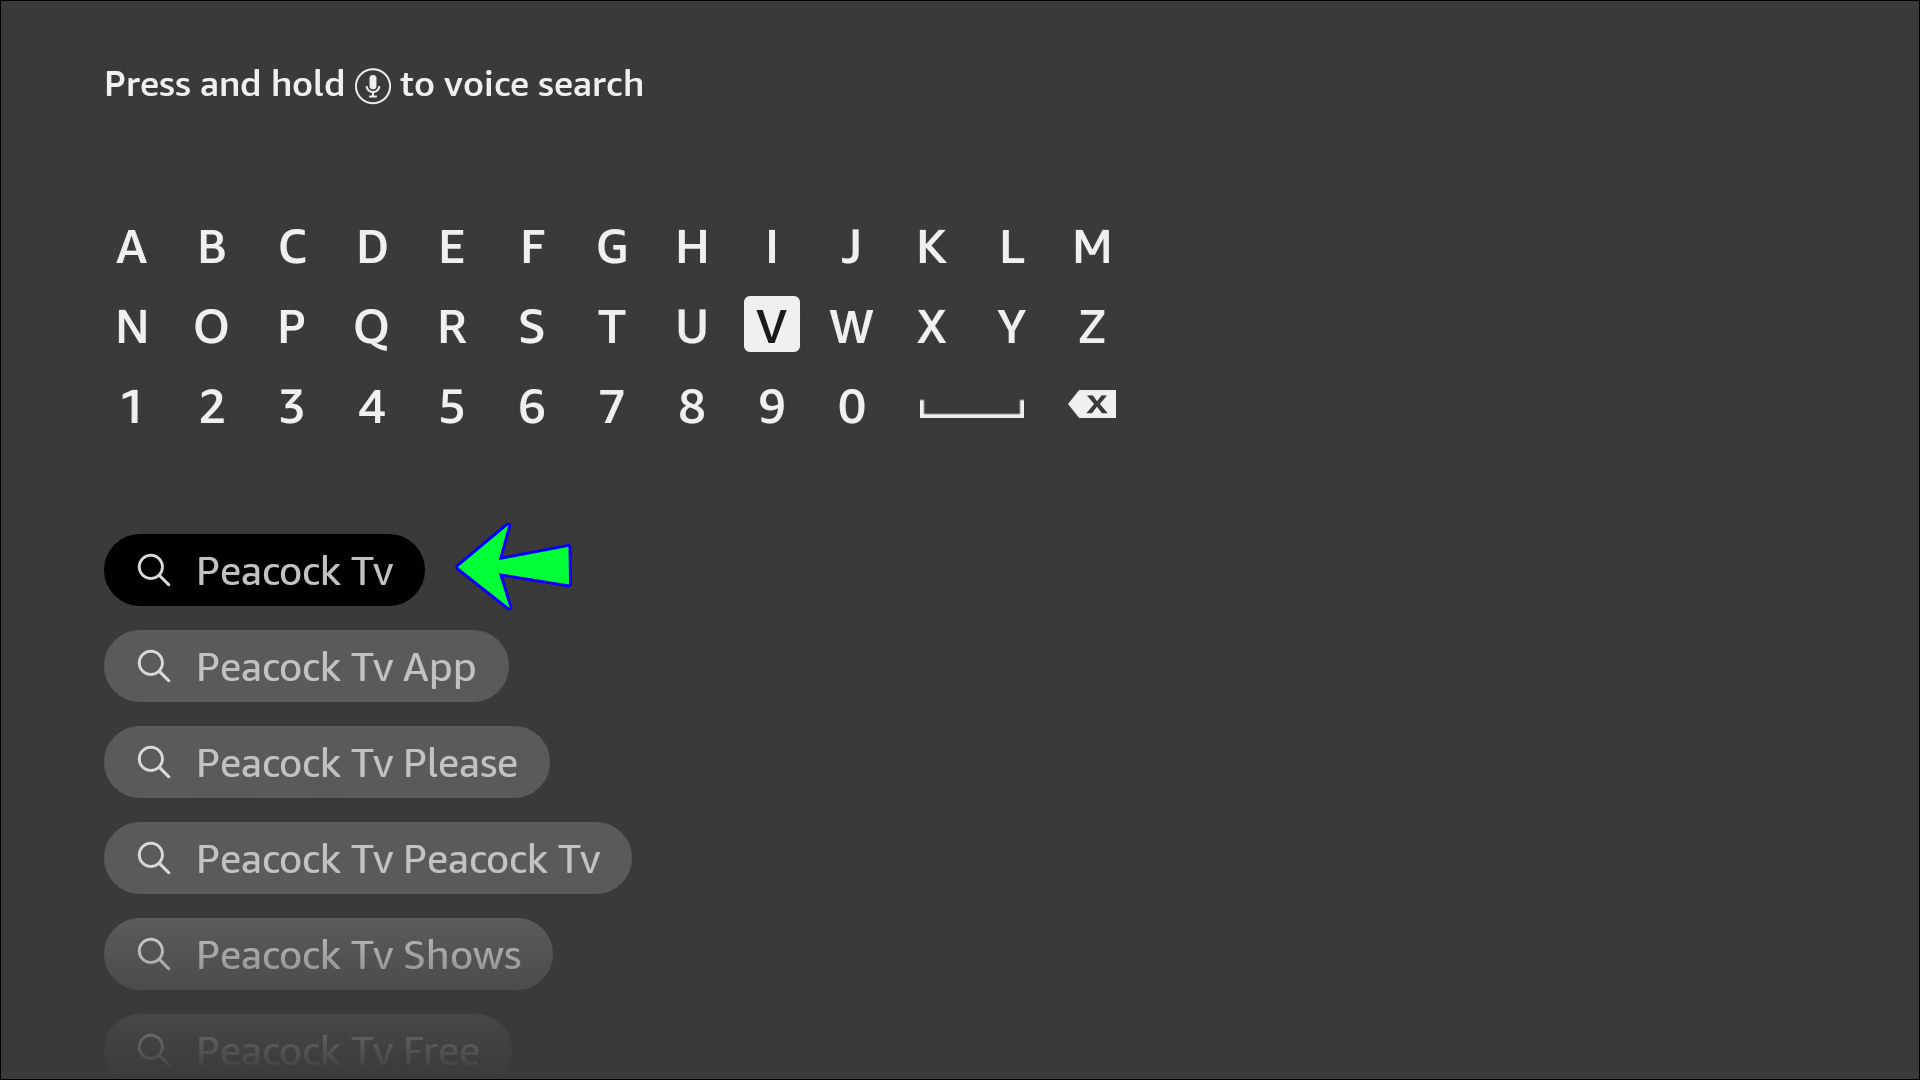
- Log in to Firestick and click on “Find,” then “Search” from the homepage.
- Type “Peacock TV” in the search bar or use the voice option on the Firestick remote.
- From the list that appears, choose “Peacock TV,” then “Download.”
- Once the download is complete, open the app and start streaming immediately.

It’s also possible to buy the show’s first few seasons on Amazon Prime for £1.89 per episode, or £12.99 per season.
How to Watch Yellowstone in the U.K. on a Roku
Roku provides users with a simple way of accessing movies and TV shows. In the U.K., Roku users have access to a host of apps and streaming services, including Netflix, Prime Video, NOW, Disney+, and more.
British users can install a vpn on the router level to gain access to out of country content.
- Press the “Home” button on your Roku remote to access the home screen.
- Head to “Search” and type “Peacock TV.” Pick the “Peacock TV” option from the list that appears.
- Next, select “Add Channel.”
- Once installed, head back to the home page to access it.


How to Watch Yellowstone in the U.K. on a PC
If you want to watch Yellowstone on your PC, the first thing you need to do is change your location. By signing up for ExpressVPN, you can change the PC’s IP address to an American one. Once complete, users will be able to view Yellowstone successfully.
- Head to the ExpressVPN website.
- Navigate to the “Get Started” button in the top-right corner of the page.
- Next, you’ll need to choose between three subscription plans: one-month ($12.95 monthly), six-month ($9.99 monthly), or twelve-month ($6.67 monthly).
- Type your email address out in the required field.
- Pay via PayPal, credit card, Bitcoin, etc.
- You will need to set up a password once your payment is processed.
- Finish downloading ExpressVPN on the next page.


How to Watch Yellowstone in the U.K. on an iPhone
Perhaps you’re going to be on a plane ride or car trip and want some entertainment. Having access to your favorite shows on your iPhone can make time go by a little faster.
Before all else, you’ll need to set up a VPN account on a computer. Once you’ve done so, you’ll be able to access it via your iPhone. Here’s how:
- From your “Home” screen, go to “Settings.”
- Tap on “General.”
- Next, choose “VPN,” then select “Add VPN Configuration.”
- Tap on where it says “Type.” Select your VPN type from IKEv2, IPSec, or L2TP
- Enter the details of your VPN provider.
- Tap “Done” to save your settings.


Once the VPN is activated, users can then use Peacock TV to watch Yellowstone.
- From the home screen, head to Safari and go to the Peacock website.
- Once signed up, head to the App Store to download the Peacock app.
- When the download is complete, log in to the app using your Peacock credentials.
- You can then stream Yellowstone on your iPhone.

How to Watch Yellowstone in the U.K. on an Android Device
Like the iPhone, Android users will first need to sign up to a VPN account on a computer before gaining access on their mobile device. When they’ve completed that, they will need to use their VPN information.
The next step is to download the VPN app using the Google Play Store. You’ll then be required to connect to the VPN, which is a relatively simple process:
- From your Android’s “Home” screen, go to “Settings.”
- Next, tap “Network and Internet,” then “Advanced,” then “VPN.”
- Select the “+” button in the top-right of the page to add the VPN information from your administrator.
- Choose “Save.”


Following this, you’ll be able to access Yellowstone by creating a Peacock account.
- From the home screen, open your browser and go to the Peacock website.
- Once signed up, head to the Google Play Store (or chosen App Store) to download the Peacock app.
- When the download is complete, log in to the app using your Peacock credentials.
- You’ll then be able to stream Yellowstone from your Android device.

Don’t Miss Out
With its gripping Western theme, Yellowstone has captured the hearts of many. A staggering 2.7 million viewers tuned in for the Season 4 premiere.
Whether you’ve moved to the U.K. or are just visiting, knowing how to access your favorite TV shows is a helpful hack. We hope that this article showed you just what to do.
Have you tried watching Yellowstone from the U.K.? How did you find the process? We’d love to hear about your experience. Don’t hesitate to leave a comment below.
Related Posts
 How to Change Netflix Region and Watch Any Netflix Country (Every Device)
 What Countries Can You Watch Disney Plus In? Wherever You Want
 How To Fix “This Video Is Currently Unavailable to Watch in Your Location”
 How to Watch BBC iPlayer in the USA or Abroad
 How to Change your Location and Watch HBO Max Anywhere
 How to Watch Disney Plus in a Different Country
 How to Change your Location or Local Stations in Hulu and Watch Outside the US
 What Countries Can You Watch Hulu In? Anywhere With a Workaround
Disclaimer: Some pages on this site may include an affiliate link. This does not effect our editorial in any way.


