As technology continues to grow, so does the way we can use it. In recent years, mirroring has become an increasingly popular trend. From flicking through pictures to playing videos or music, this feature can be extremely useful.
Have you ever wondered how to share your iPad screen to your Samsung TV? If so, you’re in luck. In this article, we’ll be taking you through the steps towards successfully mirroring your iPad onto your Samsung TV.
Mirror iPad to Samsung TV Using Airplay
Perhaps the most popular way to share your iPad screen to your Samsung TV is through Airplay. And it’s no wonder. This method is quick and extremely straightforward. Before anything, you must ensure that both your iPad and Samsung TV are connected to the same internet.
To mirror your iPad using this technique, simply follow these steps:
- On your iPad, launch the content you wish to mirror.
- On your screen, you should see the Airplay icon (this looks like a screen with a triangle in the center).
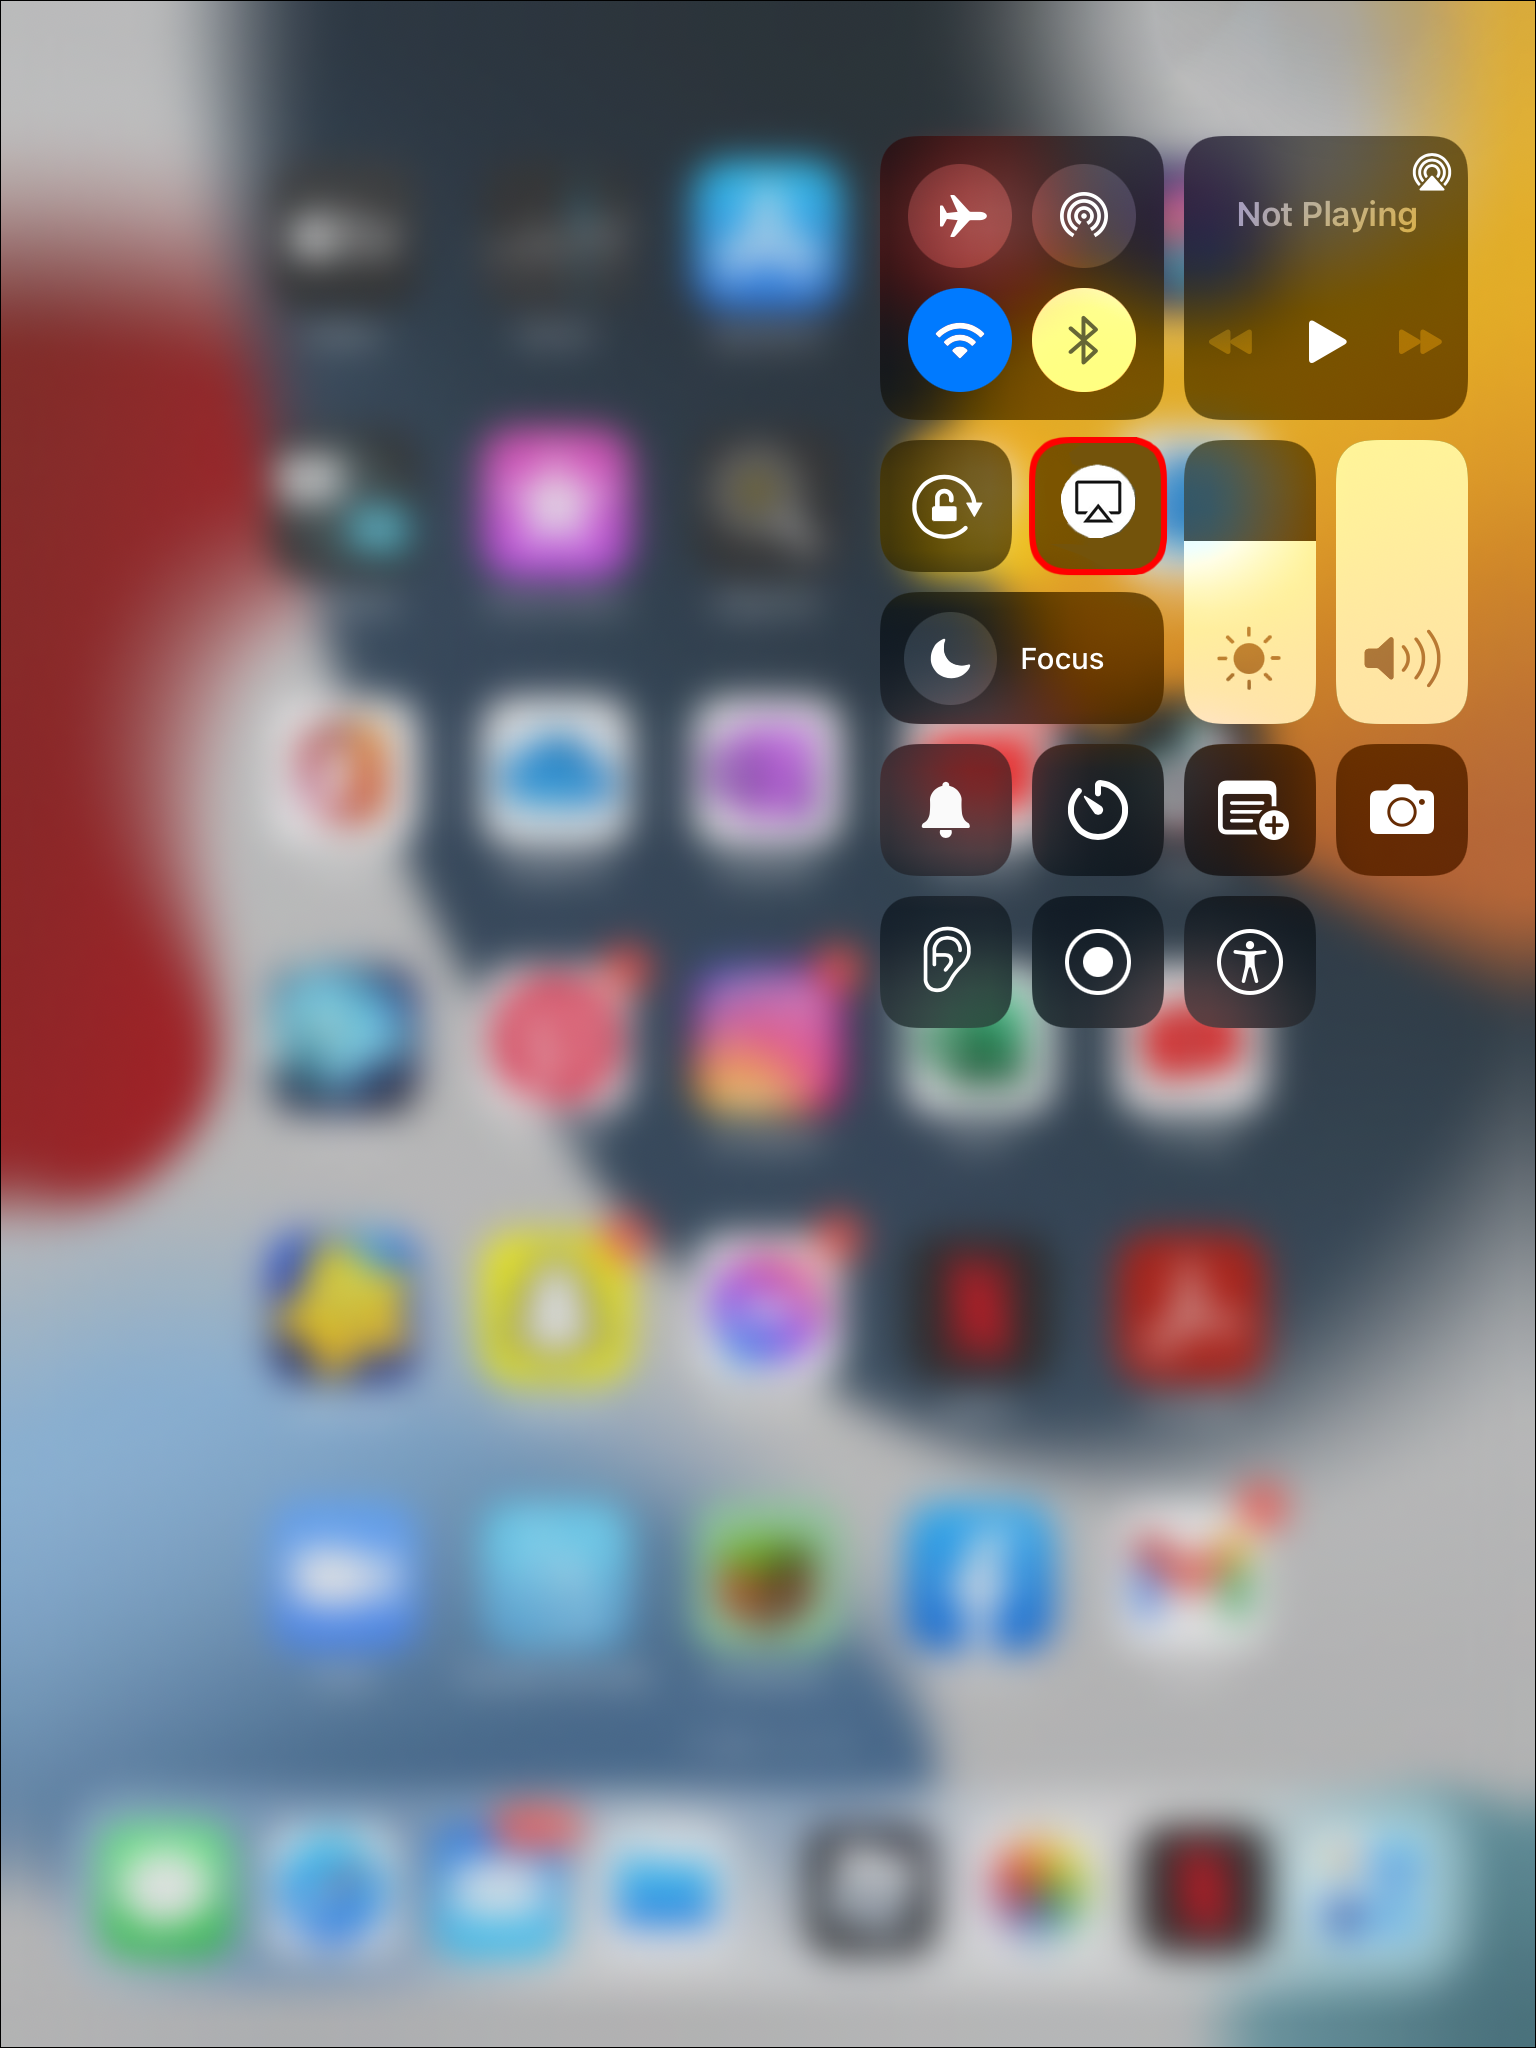
- Tap on the icon and select Samsung TV from the list of available options that appear.

- The content from your iPad should start streaming to your Samsung TV.

Mirror iPad to Samsung TV by Connecting a Cable
If you prefer a more traditional approach, it’s possible to mirror your iPad to your Samsung TV using an adapter cable. Before starting, make sure that you have access to the correct cable for your device. Once you have the necessary equipment, the process is relatively simple. Here’s what you will need to do:
- Find the correct adapter for your iPad and Samsung TV.
- Using the lightning port, choose Connect Your iPad.
- Connect one end of your cable to the Samsung TV and the other to your iPad.
- Once the connection is established, the content from your iPad will be visible on your TV screen.


Mirror iPad to Samsung TV by Screen Mirroring
Another way to cast your iPad screen onto your Samsung TV is to use screen mirroring. This technique is like Airplay, as it is entirely wireless. However, this option does require you to download an app in order to be used. The great thing is that this app is entirely free to use and quick to install. Once this is done, you will need to do the following in order to connect your iPad to your Samsung TV:
- Ensure that you are using the same Wi-Fi connection on both your TV and iPad.
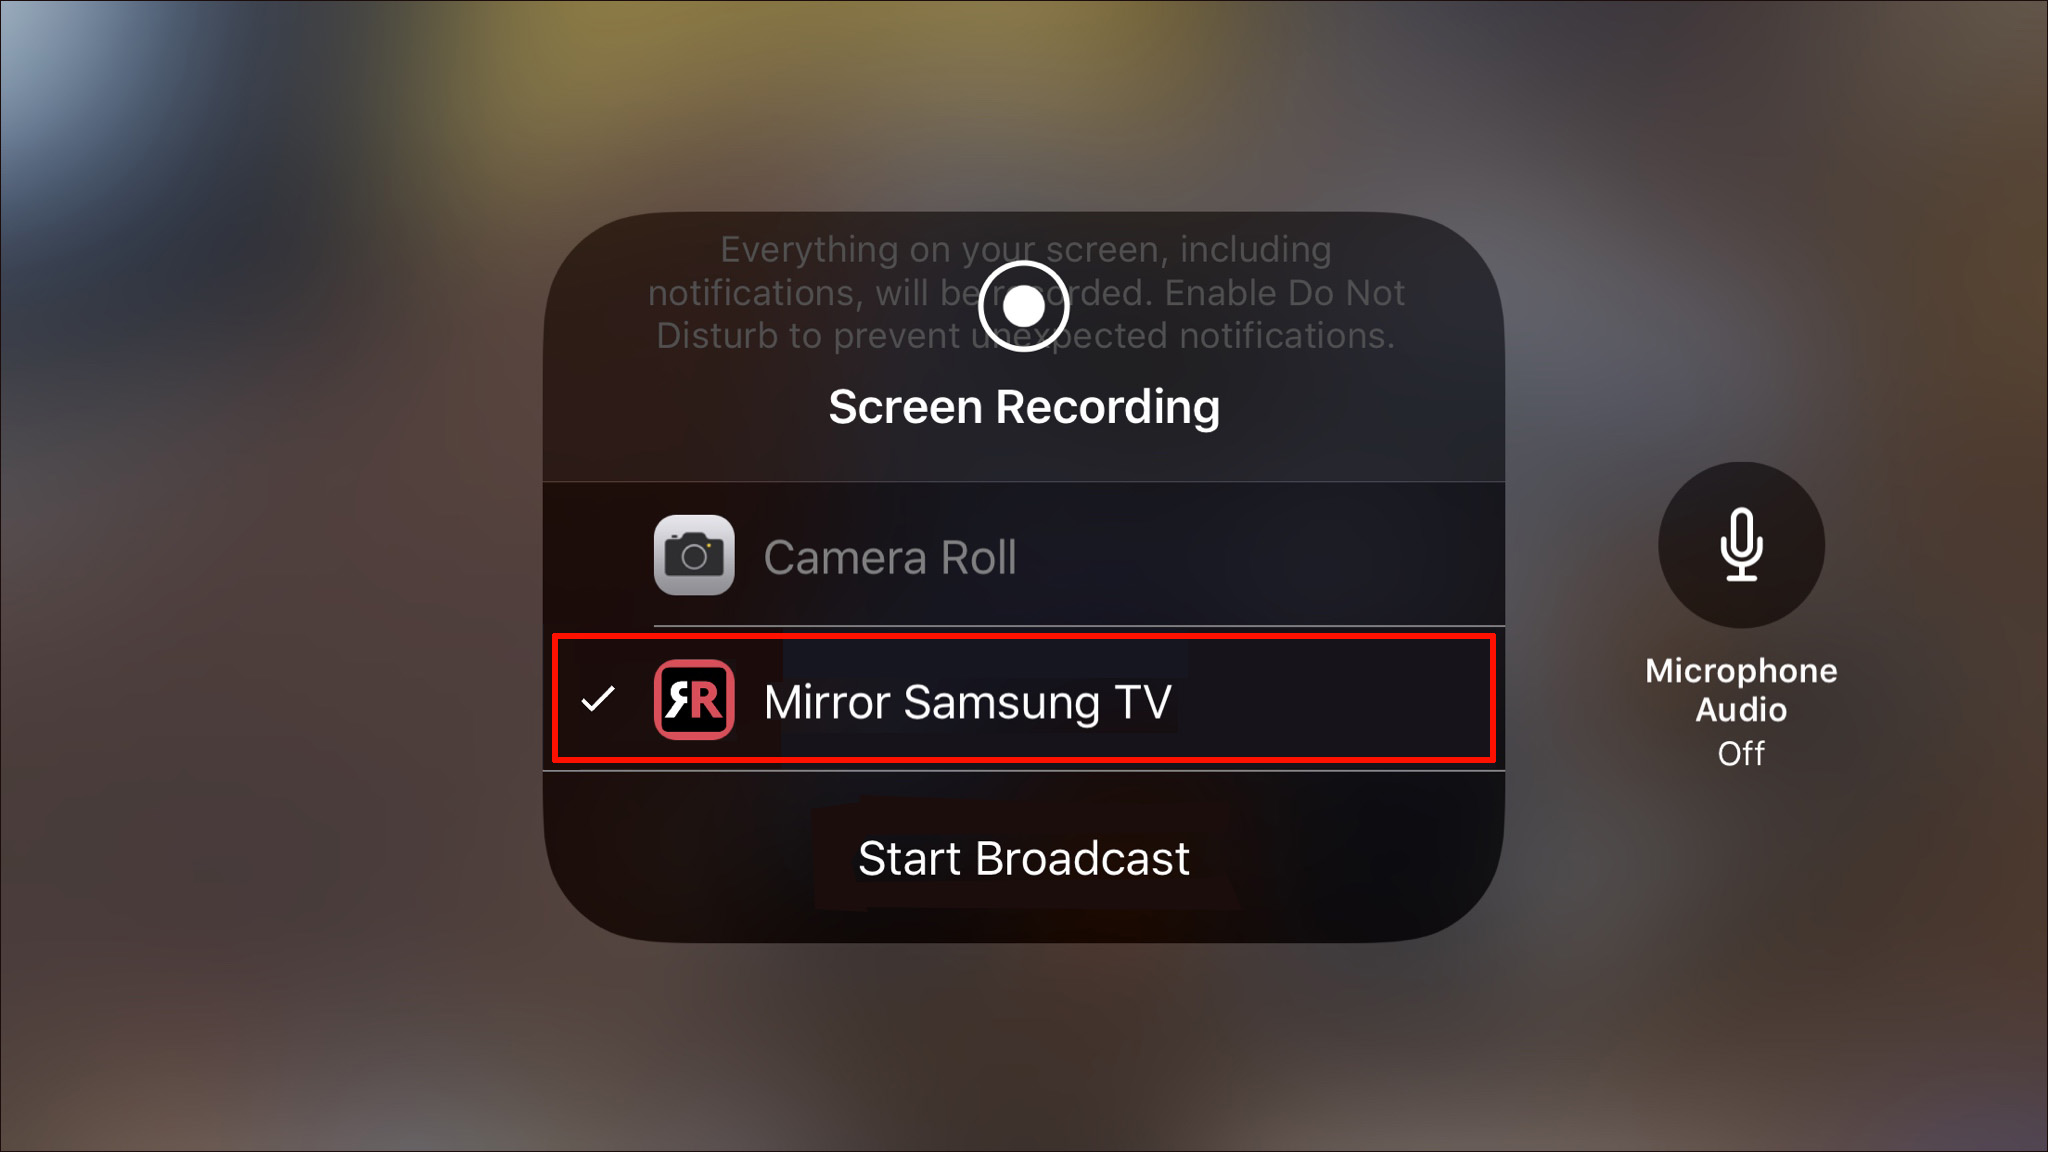
- Swipe up on your iPad and select “Screen Mirroring” from the control panel.
- From the available devices that appear, select your Samsung TV.
- The content from your iPad should then automatically begin broadcasting on your TV.


Mirror iPad to Samsung TV by Using Google Chromecast
Chromecast is another extremely popular choice for mirroring your iPad onto your TV screen. This easy method only requires you to have access to a Google Chromecast Dongle. Typically, prices for this range between $20 to $50. If this is your preferred method, once you have the Chromecast dongle in place, here’s what you will need to do:
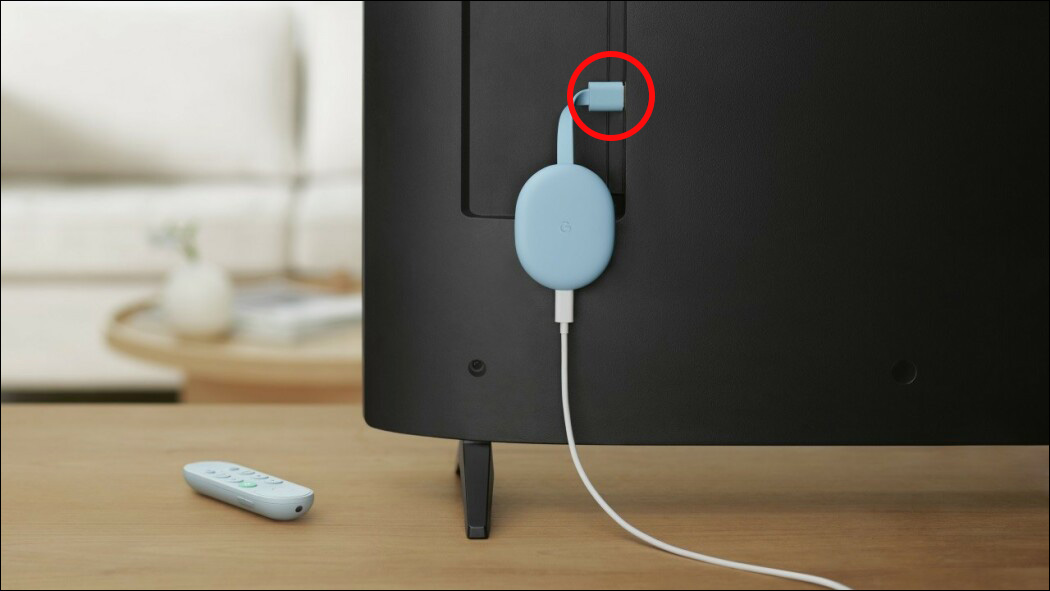
- Find the HDMI slot on your Samsung TV and plug your Chromecast dongle into it.
- Next, connect the power adapter of your Chromecast to the socket dedicated to switching on your TV.
- Turn on your TV.
- You will see an option appear for the HDMI slot you attached your Chromecast cable to.
- From your iPad, install the Google Home app.
- Once this is done, follow the on-screen instructions to complete the installation.


Some FAQs
Why won’t my iPad screen mirror my Samsung TV?
If your iPad is failing to mirror your TV, it’s worth checking your internet connection. It’s important that your iPad and Samsung TV are connected to the same Wi-Fi network. If the connection is working, try switching the Wi-Fi off and back on again.
Can I mirror my iPad onto my Samsung TV without Wi-Fi?
It is only possible to mirror your iPad screen to your TV by using cables and the right adapter. Additionally, you can also use a Chromecast dongle to establish the connection without having to use Wi-Fi.
Do all Samsung TVs have the ability to mirror screens?
The ability to mirror screens is only available on Samsung TVs that can provide a Wi-Fi connection. However, if your Samsung TV does not have this feature, you can use alternatives such as cables or a Chromecast dongle in order to broadcast your content.
Are all iPads capable of screen mirroring?
All iOS products that are running iOS 4.2 or above have Airplay built into them. If you are using an older version, it is still possible to mirror your iPad screen using either cables, Chromecast, or a third-party screen mirroring app.
Why is Airplay not showing up on my iPad?
In order for Airplay to work, both your iPad and TV must be switched on and near each other. If you are attempting to use Airplay on an Apple TV, make sure that the TV is not in “Sleep” mode.
Why does my screen mirroring keep turning off?
If you find that your screen mirroring is being faulty, check to see if your iPad battery is running low. If your device is fully charged, then you may have a bug in your OS. If the issue keeps occurring, try doing a factory reset. This should help remove any potential bugs that may be on your device.
Mirror, Mirror
Technology has certainly come a long way. With just a few taps, you can transfer content directly onto your TV screen with no wires or hassle involved. That said, if you prefer using wires or are having difficulty with a wireless connection, it is possible to mirror your iPad using cables.
Mirroring content from your iPad comes with a host of benefits. Instead of focusing on a small screen, you can avoid eye strain by viewing your content on the big screen.
We hope that this article has helped you better understand how to connect your iPad and Samsung TV.
Have you tried mirroring your iPad to a Samsung TV? If so, which method did you use? Were there any complications? Let us know your thoughts in the comments section below.
Related Posts
Disclaimer: Some pages on this site may include an affiliate link. This does not effect our editorial in any way.
![How to Manage Subtitles for CBS All Access [All Major Devices]](https://www.alphr.com/wp-content/uploads/2020/06/How-to-Manage-Subtitles-for-CBS-All-Access-All-Major-Devices-302x190.jpg)