Everyone’s had their fair share of issues finding a website’s publication or launch date. Some must obtain published dates for a school essay, while others must prepare a work presentation. In addition, some people want to find out how old the content is.
This article explains the various ways to discover a web page’s first published date. Note that the information you find may not be 100% accurate in many situations.
Seven Options to Finding a Page’s Original Publish Date
There are many ways to find more information about a web page, including its launch date. We’ve listed seven methods below. Some will give you the exact date, while others will quickly give you an approximate date. Let’s review each one.
1. Check the Website and URL to find the Published Date
The simplest method to identify when an article was initially published is by looking at the website. An online article often includes the date it was first published or last updated. Note that not all websites have published and edited dates. Most dates get inserted by the publisher or administrator. Regardless, if nothing else delivers the necessary information, it is a good option.
When looking for the published and edited dates, they usually appear at the beginning or end of an article. Alternatively, you can look for a copyright date, which appears at the very bottom of the website. Note, however, that not all websites have this and that the copyright date only shows the year of the whole website’s creation or its last update.

Remember that the URL might contain the answer before looking at other, more complex methods. Some sites like keeping their articles tidy by putting their publish date in the URL.
2. Use Google to Find the Published Date
In most cases, Google shows the publication date next to each search result. However, if this is not the case for you, here’s what you can do to find the publication date of a specific webpage:
- Go to “Google“ and type “inurl:” in the search box.

- Now, copy and paste the page’s URL right next to “inurl:” and press “Enter” or click the “magnifying glass” (Google Search).

- In the URL box at the top (not the search box in Google), add “&as_qdr=y15” to the end of the URL, then press “Enter.” A date should now appear in the page results.

3. Check the Source Code to Find the Page’s Published Date
The source code helps discover many different website details, including the code used, the date published, and the links to images, as most of this info is unavailable otherwise. Here’s how to open the source code and potentially find the publication date.
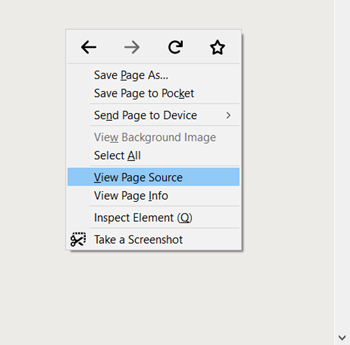
- Right-click and select “View Page Source” on the page you want to view. The default shortcut for this option is “Ctrl + U” on Windows and “Command + U” on Mac.

- The website’s source code appears in a new tab in your web browser. Press “Ctrl + F” on Windows or “Command + F” on Mac to open the “Find” function.
- Type “publish” in the find box to find the publish date.

- The terms you’re looking for are “datePublished,” “publishdate,” “published_time,” etc. You can use the ”Find” function again if needed. You can also search for “dateModified” to find out when the website was last updated. The year should be listed first, then the month, and then the date.
4. Use ‘Carbon Dating the Web’ to Find a Page’s Published Date
A free online service called “Carbon Dating the Web” helps find the approximate date of a website launch. It’s free and easy to use, but estimating the date takes quite some time. This tool had a success rate of 75% when its developers tested it on pages with a known creation date.

People who cite websites a lot may also benefit from the option to install the program locally.
5. Use The Wayback Machine to Find a Webpage’s Original Published Date
The Wayback Machine is a tool that keeps track of existing sites over time and stores the pages (snapshots) and information in its database. It was released in 2001 but has been around since 1996. It allows you to explore the history of more than 366 billion websites. Although this does not represent the original published date, the snapshots may display one on the page. If nothing else, the earliest URL capture gives you an idea of how old the webpage is. Here’s how to use the Wayback Machine to view published dates possibly.
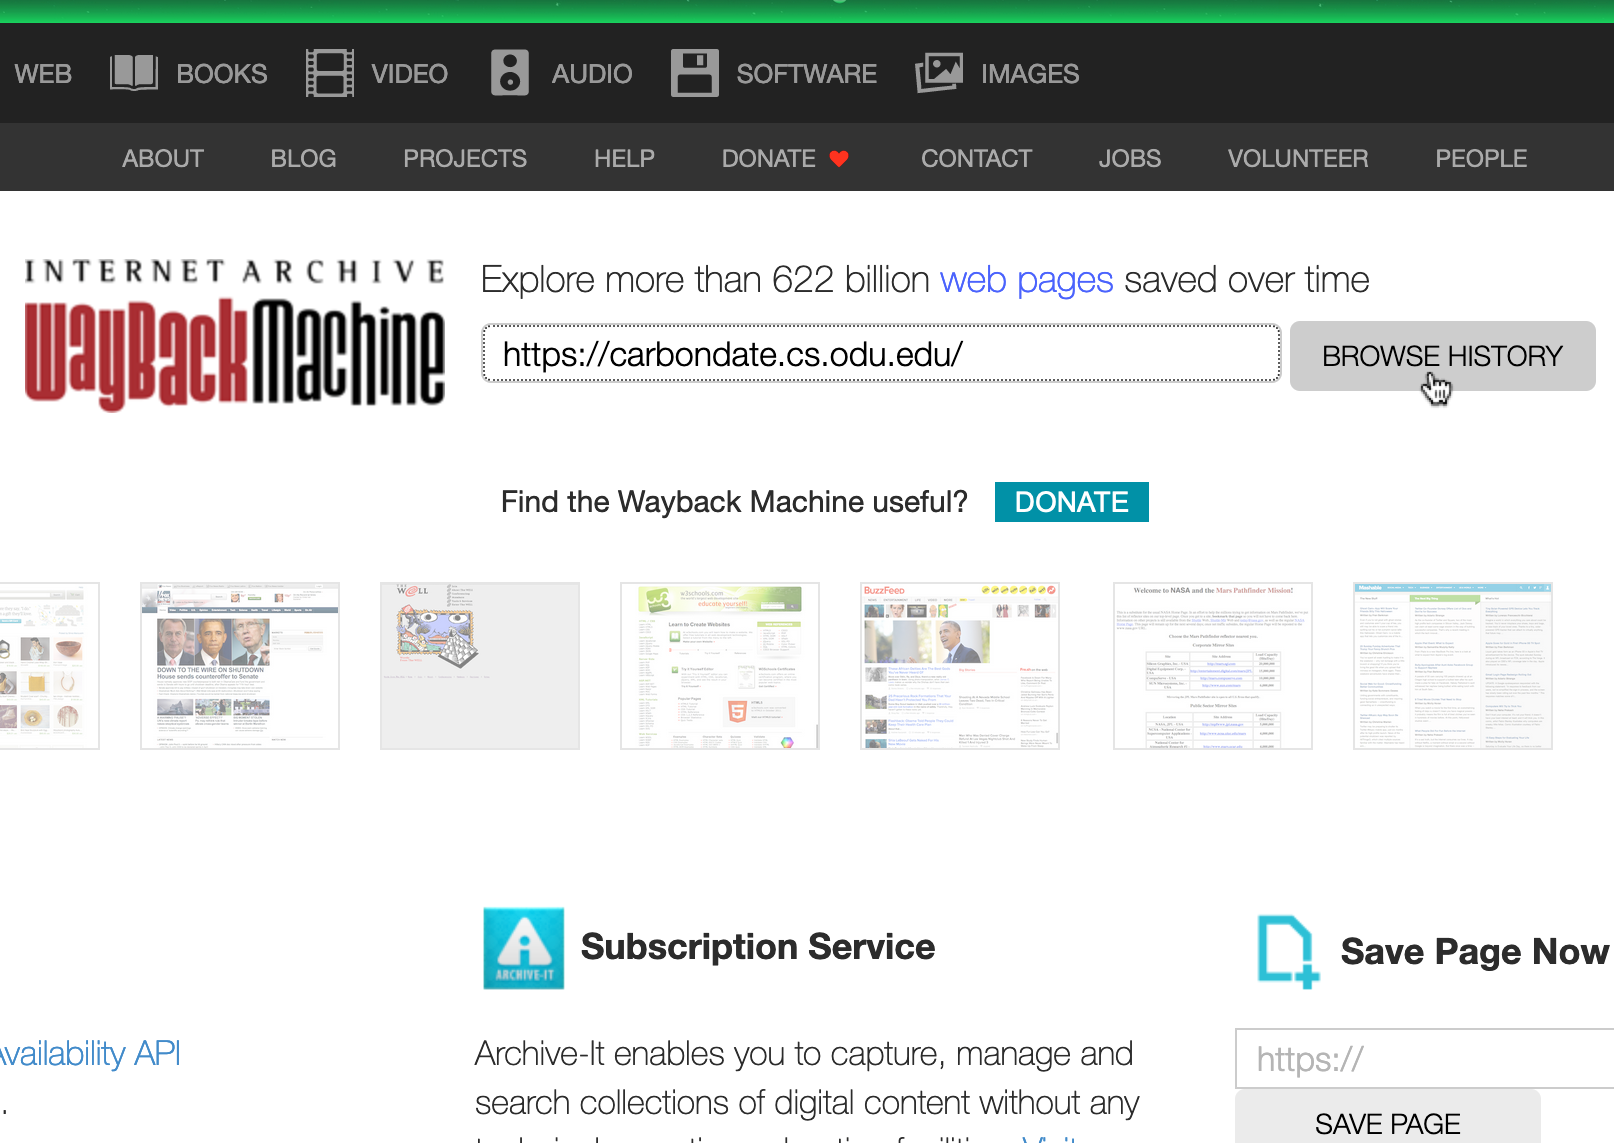
- Go to the “Wayback Machine website.”

- Type or paste the desired URL into the search box. Click the “Browse History” button or press “Enter.”

- If the search succeeds, you’ll see how many times the Wayback Machine saved the site’s current state and the date it did it, represented by colored dots behind the days of each snapshot.

- In the timeline towards the top, click on the earliest year with marks, which indicates that snapshots were taken.

- Hover over the earliest marked (colored dot) date to view snapshot details. This is the earliest snapshot taken of the webpage.

- Click on the earliest time listed (often, just one gets displayed) to view the snapshot of the page. Look for any information on the published date.

6. Whois Database Search
The ‘ Whois ‘ database is another helpful tool that will help you find a website’s publication date. Along with the website’s launch date, you can also see a lot of other information, like who published the site and the location. To use WhoIs, do this:
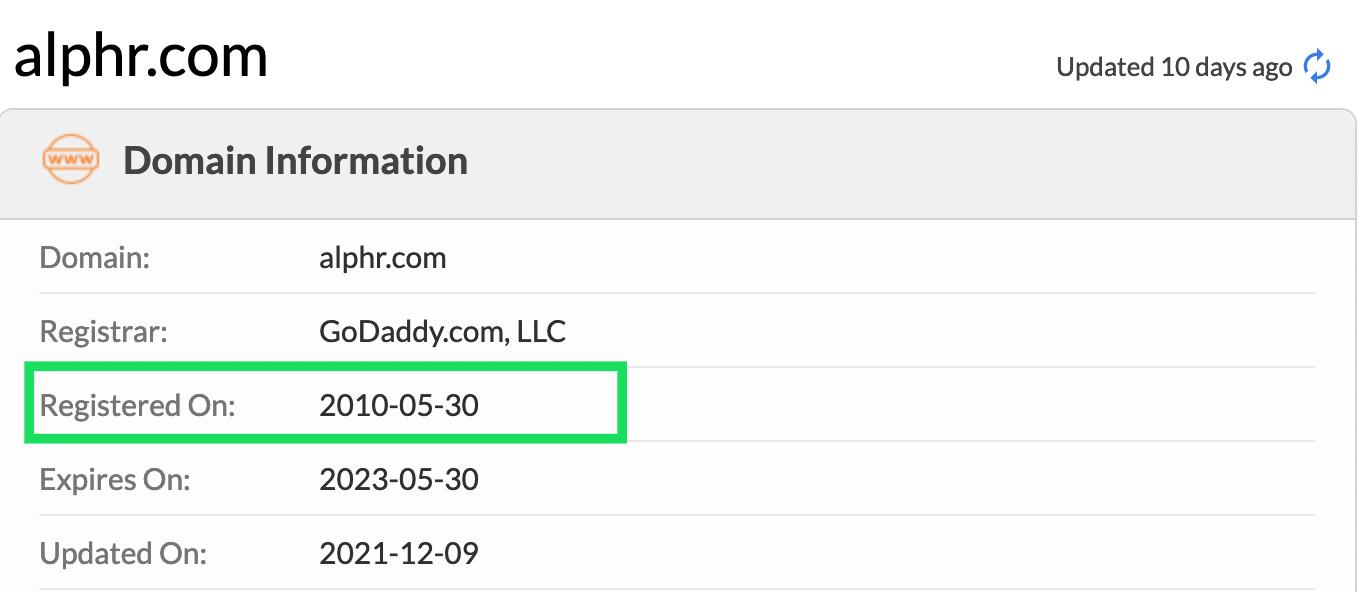
- Visit the “Whois database,” copy the website’s URL, paste the website’s URL into the search bar, then click “Search.”

- Scroll down and look for the “Registered On” date.

7. Check the Comments to Find the Page’s Originally Published Date
Before losing all hope, try checking the comments. The webpage’s comments may help you get the approximate date or at least see that a particular website existed in the period when the comment was posted. Readers begin commenting reasonably early when a new article or webpage is published.
Sure, comments often get managed by an administrator, as in approved or denied, but this gives you a rough idea of how old the webpage is.
Frequently Asked Questions
You’ve probably heard that everything online is accessible to the public forever. Publication dates shouldn’t be any different. Here are some more answers to questions you may have.
What do I do if I can’t find the publication date?
If you are writing a research paper and can’t even get an approximate publish date, consider using the “(n.d.)” notation, which stands for “no date.” This notation is usually acceptable as long as you attempt to find the date beforehand. Otherwise, if you need a publish date, you can use the earliest date you found using any of the above processes.
What is the difference between the published date and the updated date?
Some websites will show you two different dates. A published date is the one that reflects the day the website was launched. If a website is regularly maintained, you will see an Updated Date. This date will show you the last time someone made changes.
In closing, the most accurate method of finding a webpage’s originally published date is finding the information posted on the page, which often appears with the word “Published” or Created.” The other methods aren’t nearly as precise but can provide a reasonable estimate if the site lacks details. If all else fails, use the ‘no date’ notation or mention the date of your last visit.
Disclaimer: Some pages on this site may include an affiliate link. This does not effect our editorial in any way.


