Device Links
Notion is an excellent tool for boosting your productivity. This app offers an all-in-one solution for managing all sorts of aspects of your work or personal life. Many people rely on it to stay on top of their daily tasks in a coherent and organized manner. The best part is that you can customize Notion so that it suits your individual needs.
If you work with Notion tables and databases regularly, there will be times where you’ll want to sum all the values in your column. But how do you do this?
Fortunately, we have the answer for you. In this article, we’ll be discussing how to sum a column in notion no matter your device.
Keep on reading to learn more.
How to Sum a Column in Notion on a PC
If you are using Notion on your PC, you’ll be pleased to hear that summing a column is a relatively straightforward process. Just follow these steps:
- Launch Notion and navigate to the table/database you wish to use.
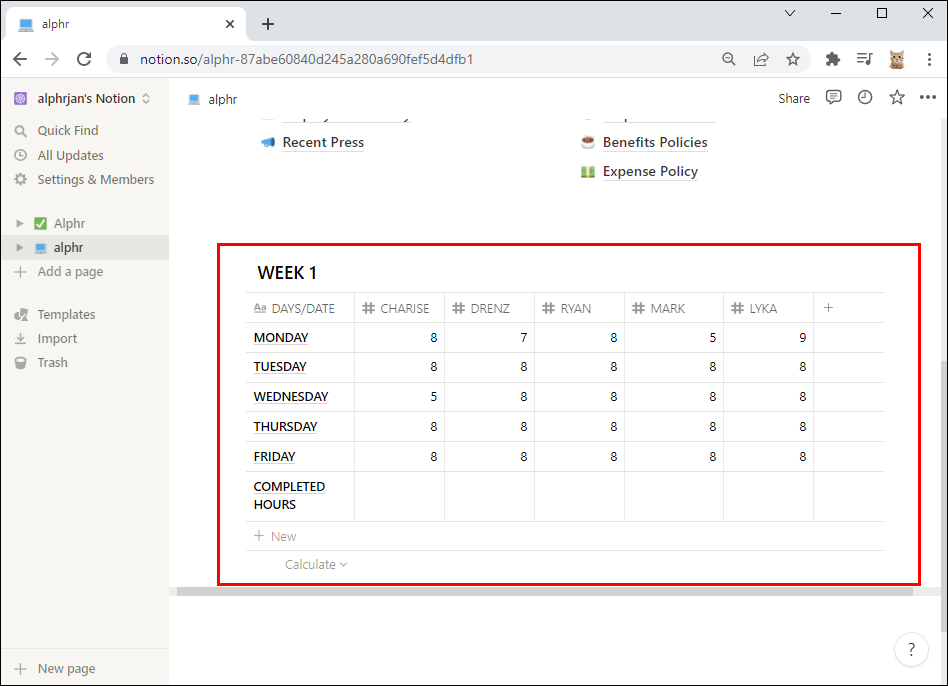
- Head to the column with the values that you want summed up.

- Using your mouse, hover over the space below the final row aligned with your column.
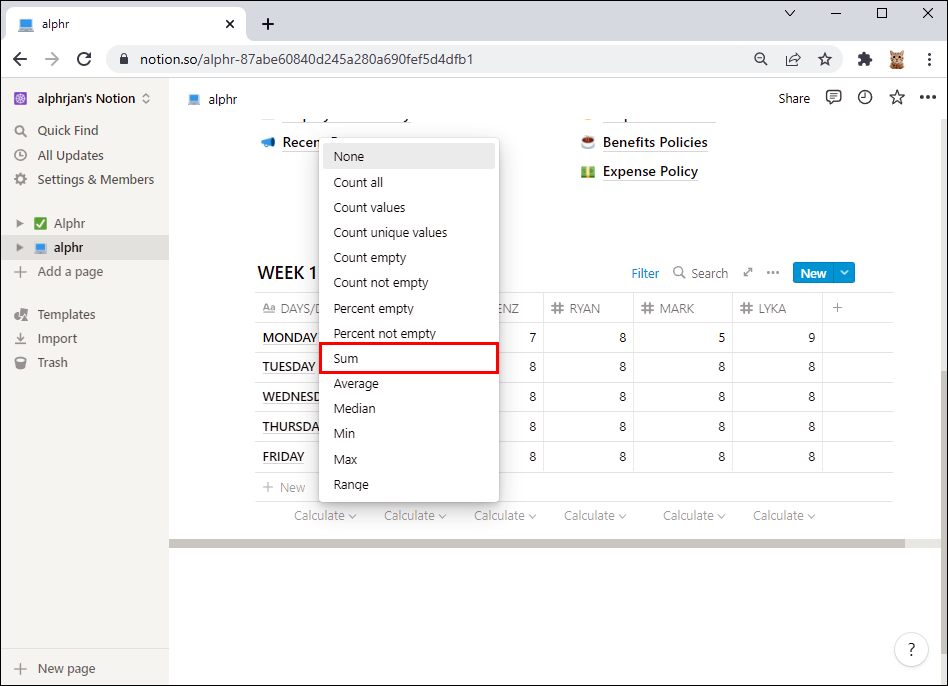
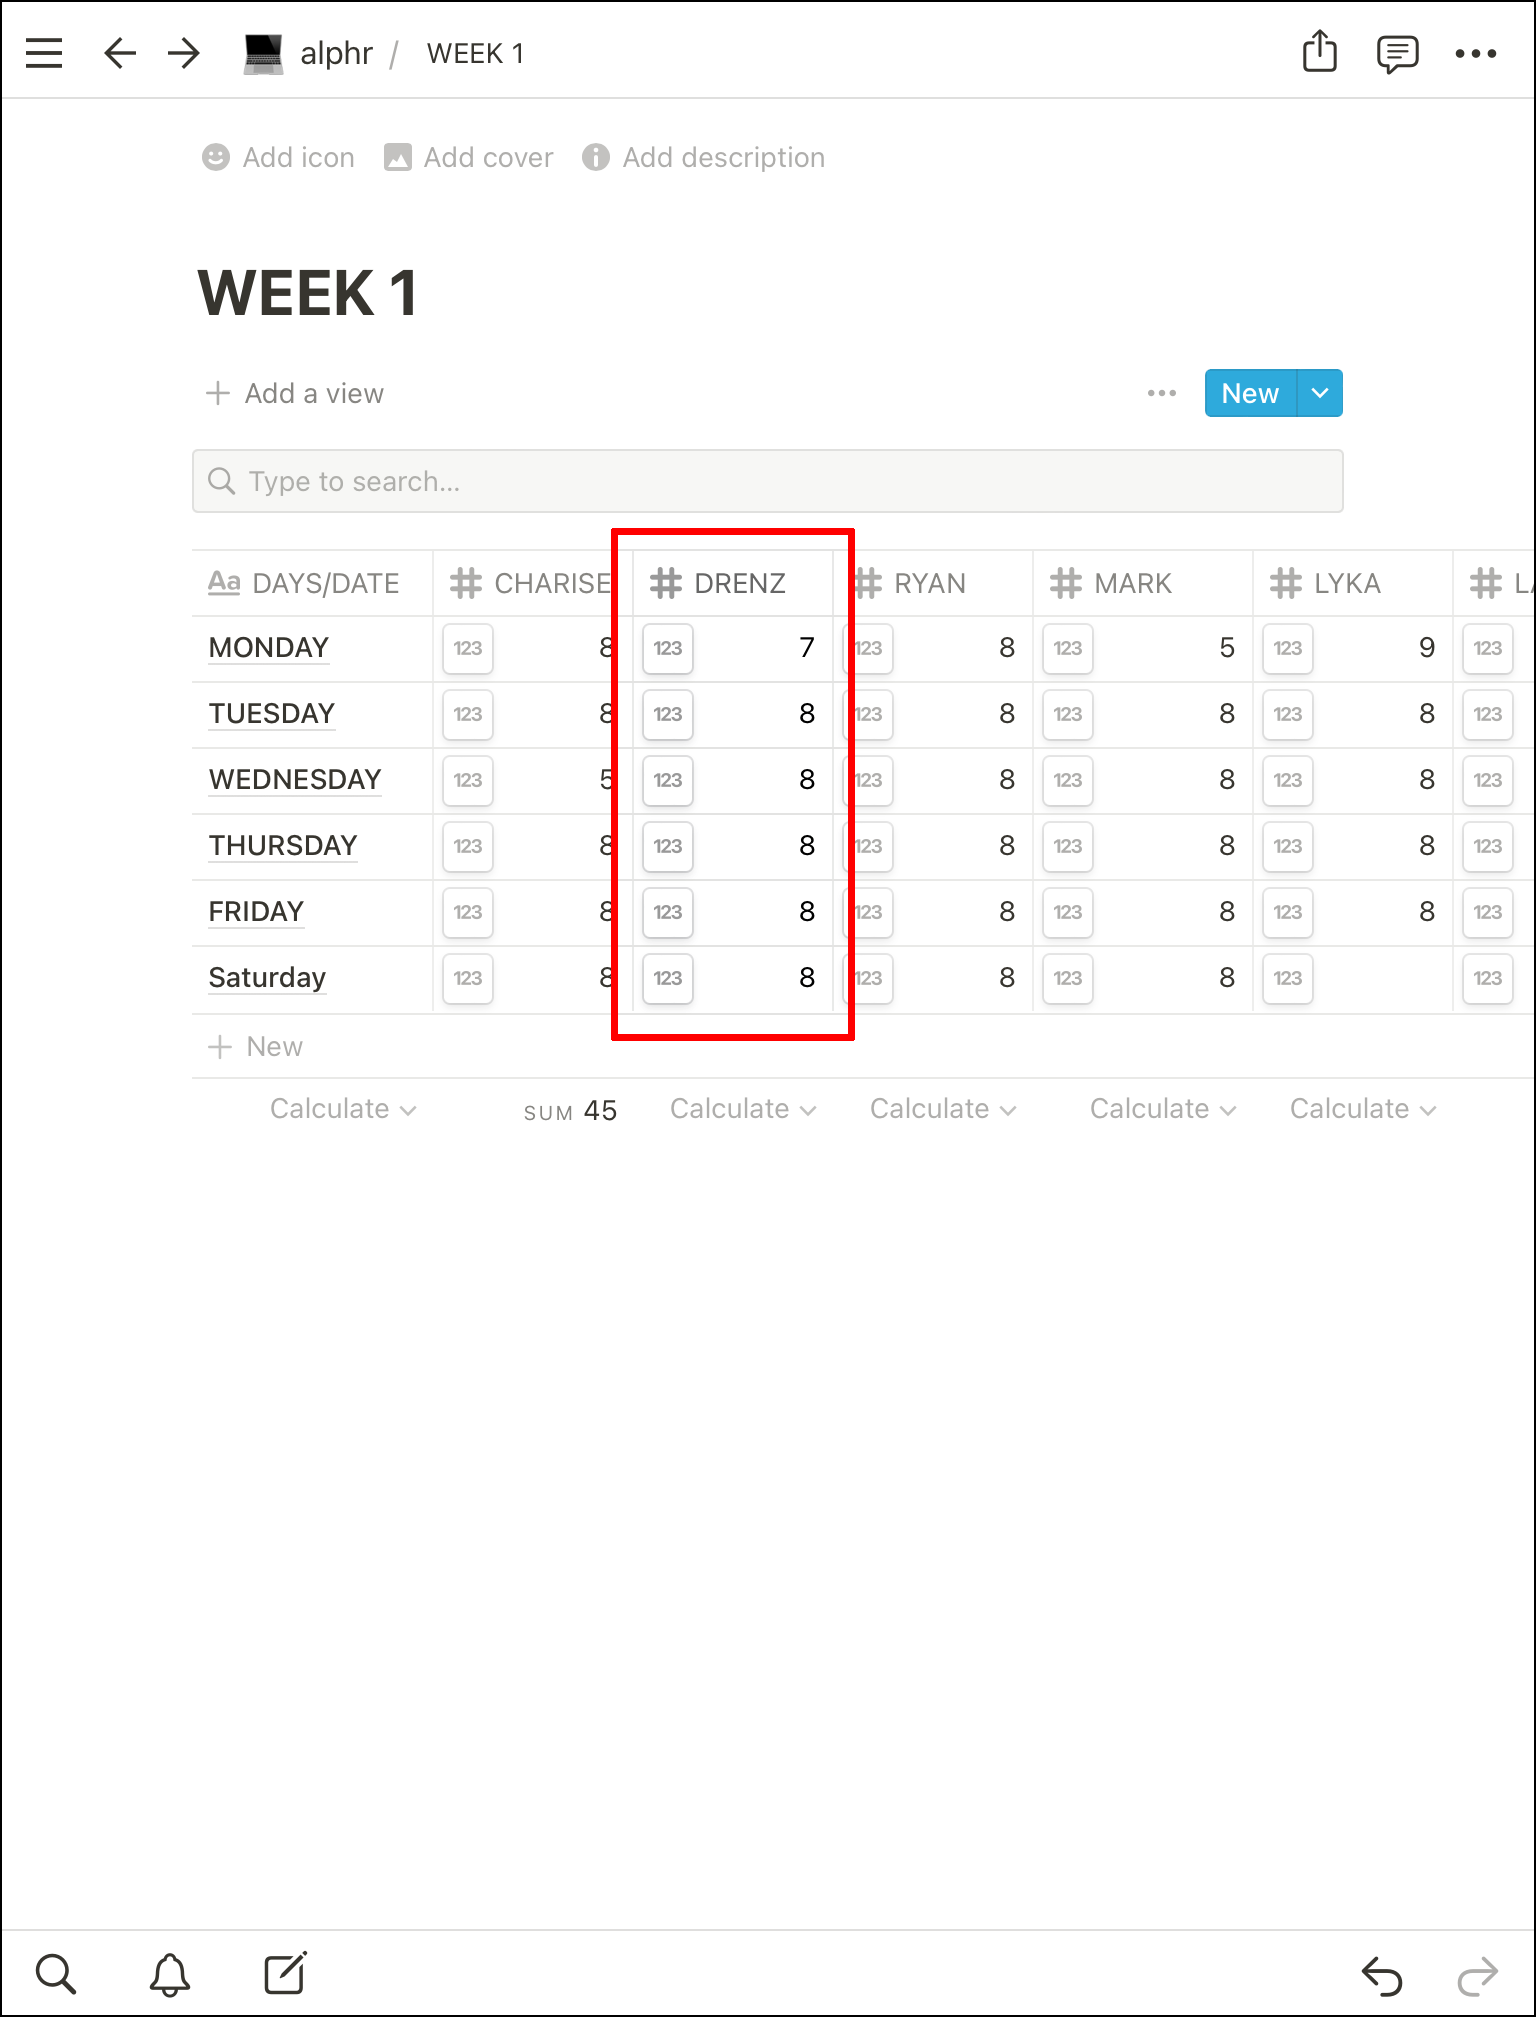
- You should see “Calculate” appear. Click this.
- From the drop-down menu which appears, select “Sum” from the list of options.
- At the bottom of your existing column, you should now see a “Sum” showing the sum of your existing values.


How to Sum a Column in Notion on an iPhone
Accessing columns on mobile devices hasn’t always been a thing. Fortunately, these days you can enjoy the privilege of summing up important columns wherever you may be. First, you will need to download the Notion app. Once this is complete, simply follow these steps:
- Once you’ve launched Notion, select “New.”
- Next, you’ll need to choose your template.
- From there, head to the column that you wish to find the sum of the values for.
- Tap on the “Calculate” option at the bottom of the column.
- The total sum of your column values will then appear at the bottom of the existing column.


How to Sum a Column in Notion on an Android
If you’re using Notion on an Android device, the process is simple. All you need to do is download the app onto your device. From there, follow the steps below:
- Open the Notion app on your Android device.
- At the bottom of your screen choose the option that says “New.”
- Now you’ll need to choose your preferred template.
- From there, open the column that you would like to calculate the sum for.
- At the very bottom of the column, you will see the option for “Calculate.”
- At the bottom of your existing column, you’ll now be able to see the total sum of the values in your column.


How to Sum a Column in Notion on an iPad
If you have used Notion on an iPhone, then doing so on an iPad should be a piece of cake. The first step is to download the Notion app on your device. From there, follow the below steps in order to successfully sum a column in Notion on your iPad:
- In Notion select “New” at the bottom of your page.
- From there, pick a template.
- Next, navigate your way to the column you wish to sum the values for.
- Tap on the option to “Calculate” your column at the bottom of the screen.
- A complete sum of your column values will then show up at the bottom of your existing column.


Some FAQs
How do I add a new column in Notion on my desktop?
To add a new column in Notion, simply follow these steps:
1. In Notion, create a new page or open an existing one.
2. From your keyboard, press the “Shift” key and highlight all the content you want to appear in your second column.
3. Next, click and drag the highlighted content to where you would like the new column to appear.
4. Release your hold of the mouse to secure your second column in place.
Can I create a column within a column on Notion?
Yes. To do so, you simply need to drag one of the blocks to either the left or right side of another block. When done, release your mouse and the job is done.
How can I copy and paste a column in Notion?
To copy and paste a column in Notion successfully, follow the below steps:
1. Launch Notion.
2. Select the table you would like copied
3. Next, click on the three dots at the top of the page in order to access your options.
4. Hit the option to “Copy Link.”
5. Navigate your way to the file where you would like your table pasted.
6. On your keyboard, select “Cmd+ V” to complete the process.
7. Select “Create Linked Database.”
How do I separate columns in Notion?
You can separate columns in Notion by hovering your mouse over the left-hand margin where your text starts. Next, select the “+” icon in order to add a new content block. Head to the “Basic Block” section and scroll until you see “Divider.” Clicking on this option will create a horizontal line to visually separate your columns in Notion.
What should you include in Notion?
Notion gives users a considerable amount of creative freedom when it comes to the way they wish to use it. This means you can organize your pages in practically any way. This includes calendars, kanban boards, databases, notes, and more. Users have the ability to organize their work and personal lives in the way that works best for their individual needs.
How do I change margins in Notion?
To change margins in Notion, select the three dotted icon located in the upper right corner of the page. From the drop-down menu that appears, select “Default.” Finally, you will need to toggle on “Full Width” to successfully alter your margins in Notion.
How do I delete a space in Notion?
To delete a space in Notion, select “Settings & Members” from the sidebar located on the left-hand side of your screen. Beneath the section titled “Workspace” click on “Settings.” From there, scroll down until you see the section for “Danger Zone” and choose “Delete Entire Workspace.”
How can I customize my Notion page on my desktop?
Customizing your Notion page is a straightforward process. All you need to do is select the three dotted icon at the top left-hand corner of your page. From there, choose the option to “Customize Page” from the list that appears.
Get Your Notion in Motion
Notion offers users a great way of boosting their productivity. Many people praise the app for its ability to organize their lives in a coherent and creative way that suits them. Calculating sums individually can be a time-consuming process so knowing how to sum a column can be vital to your productivity.
We hope that this article has given you a better understanding on how to successfully sum a column in Notion.
Are you a regular Notion user? Have you tried summing columns? Were you successful? Let us know more about your experience in the comments section below.


Disclaimer: Some pages on this site may include an affiliate link. This does not effect our editorial in any way.


