There will be some moments in your life when you’re going to want to know the specific coordinates for a given location. Maybe you’re out hiking, and you’ve gotten lost from the group, or perhaps you’ve just gotten into an accident. Perhaps, you want to send your location to a friend to meet up. Whatever the reason, it’s always good to know how to pinpoint your location with Satellite-grade accuracy.
Don’t fret, though. There are a couple of ways to obtain your coordinates on your iPhone. Just keep on reading to find out how.
How to Find Your GPS Coordinates on an iPhone
There are multiple ways to see your GPS coordinate on your iPhone. You can use built-in options or third-party services. We’ll review them all so you can choose the option that best fits your needs.
“Hey, Siri!”
Siri is Apple’s super helpful assistant. You can access her for many things as long as you have an internet connection. Not only is Siri helpful, but she’s also quick and incredibly wise.
The easiest way to find out your GPS coordinates on an iPhone is to say, “Hey Siri, what are my GPS coordinates?” You can also ask, “Hey Siri, what’s my current location.”
Now, a map will pop up with your address and your Longitute and Latitude at the bottom.

If Siri fails to respond when you say “Hey Siri,” hold the Siri button (right side of your phone) on newer models and the home button on older models to wake her up. However, if Siri doesn’t respond at all, or she gives you an error message, your internet connection may be poor.
If Siri isn’t working for you, there are other places you can find your coordinates on an iPhone.
Using the Compass
Your iPhone does have a built-in Compass. What’s great about your iPhone’s Compass is that it will work regardless of your internet connection. However, before using this feature, you’ll need to enable it in the Settings on your iPhone.
Here’s how to enable your compass:
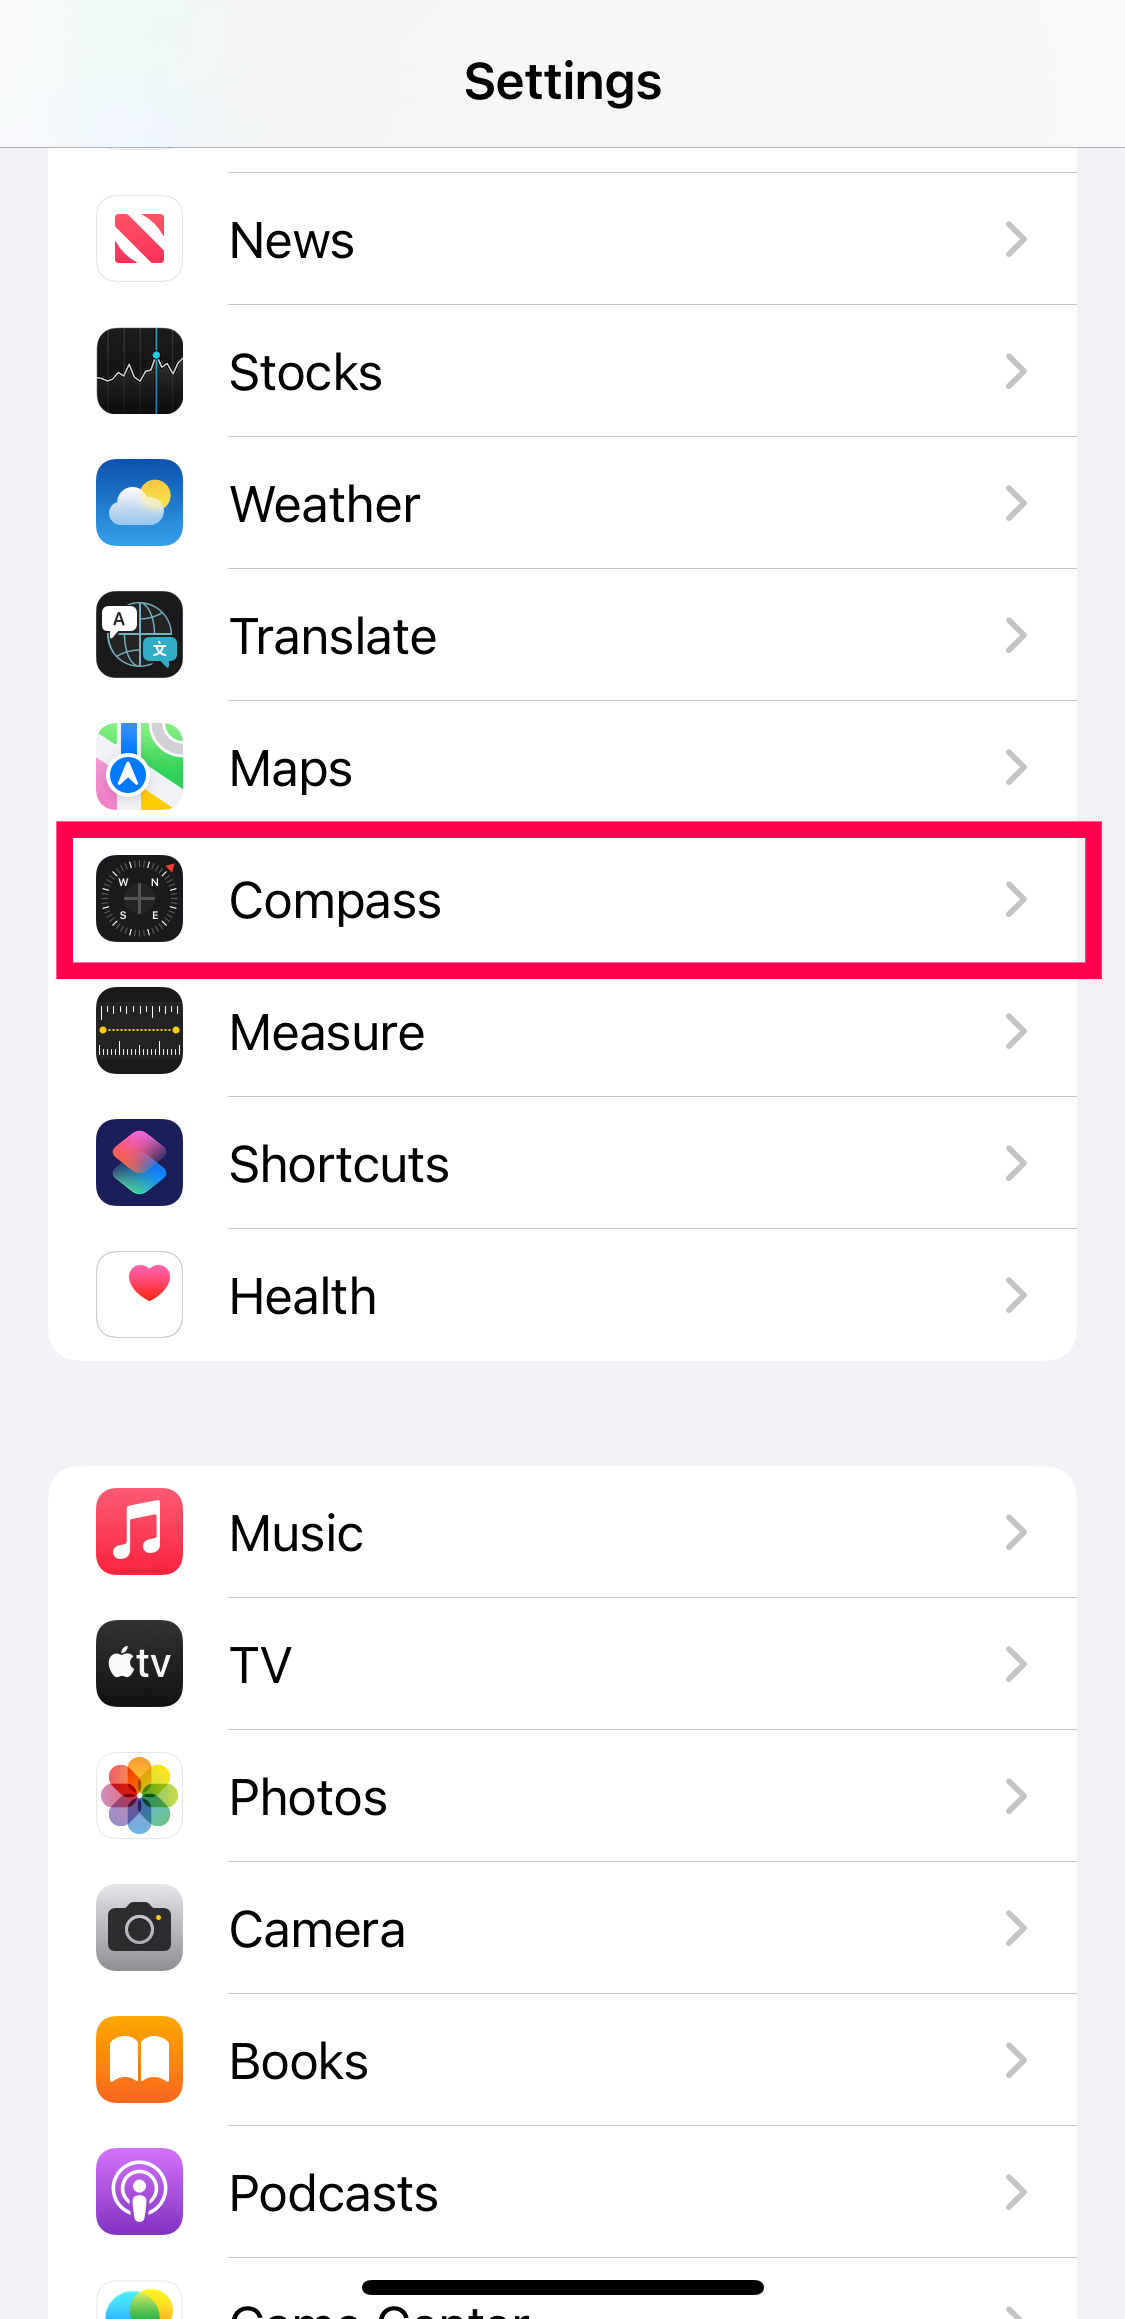
- Open the Settings on your iPhone and tap on Compass.

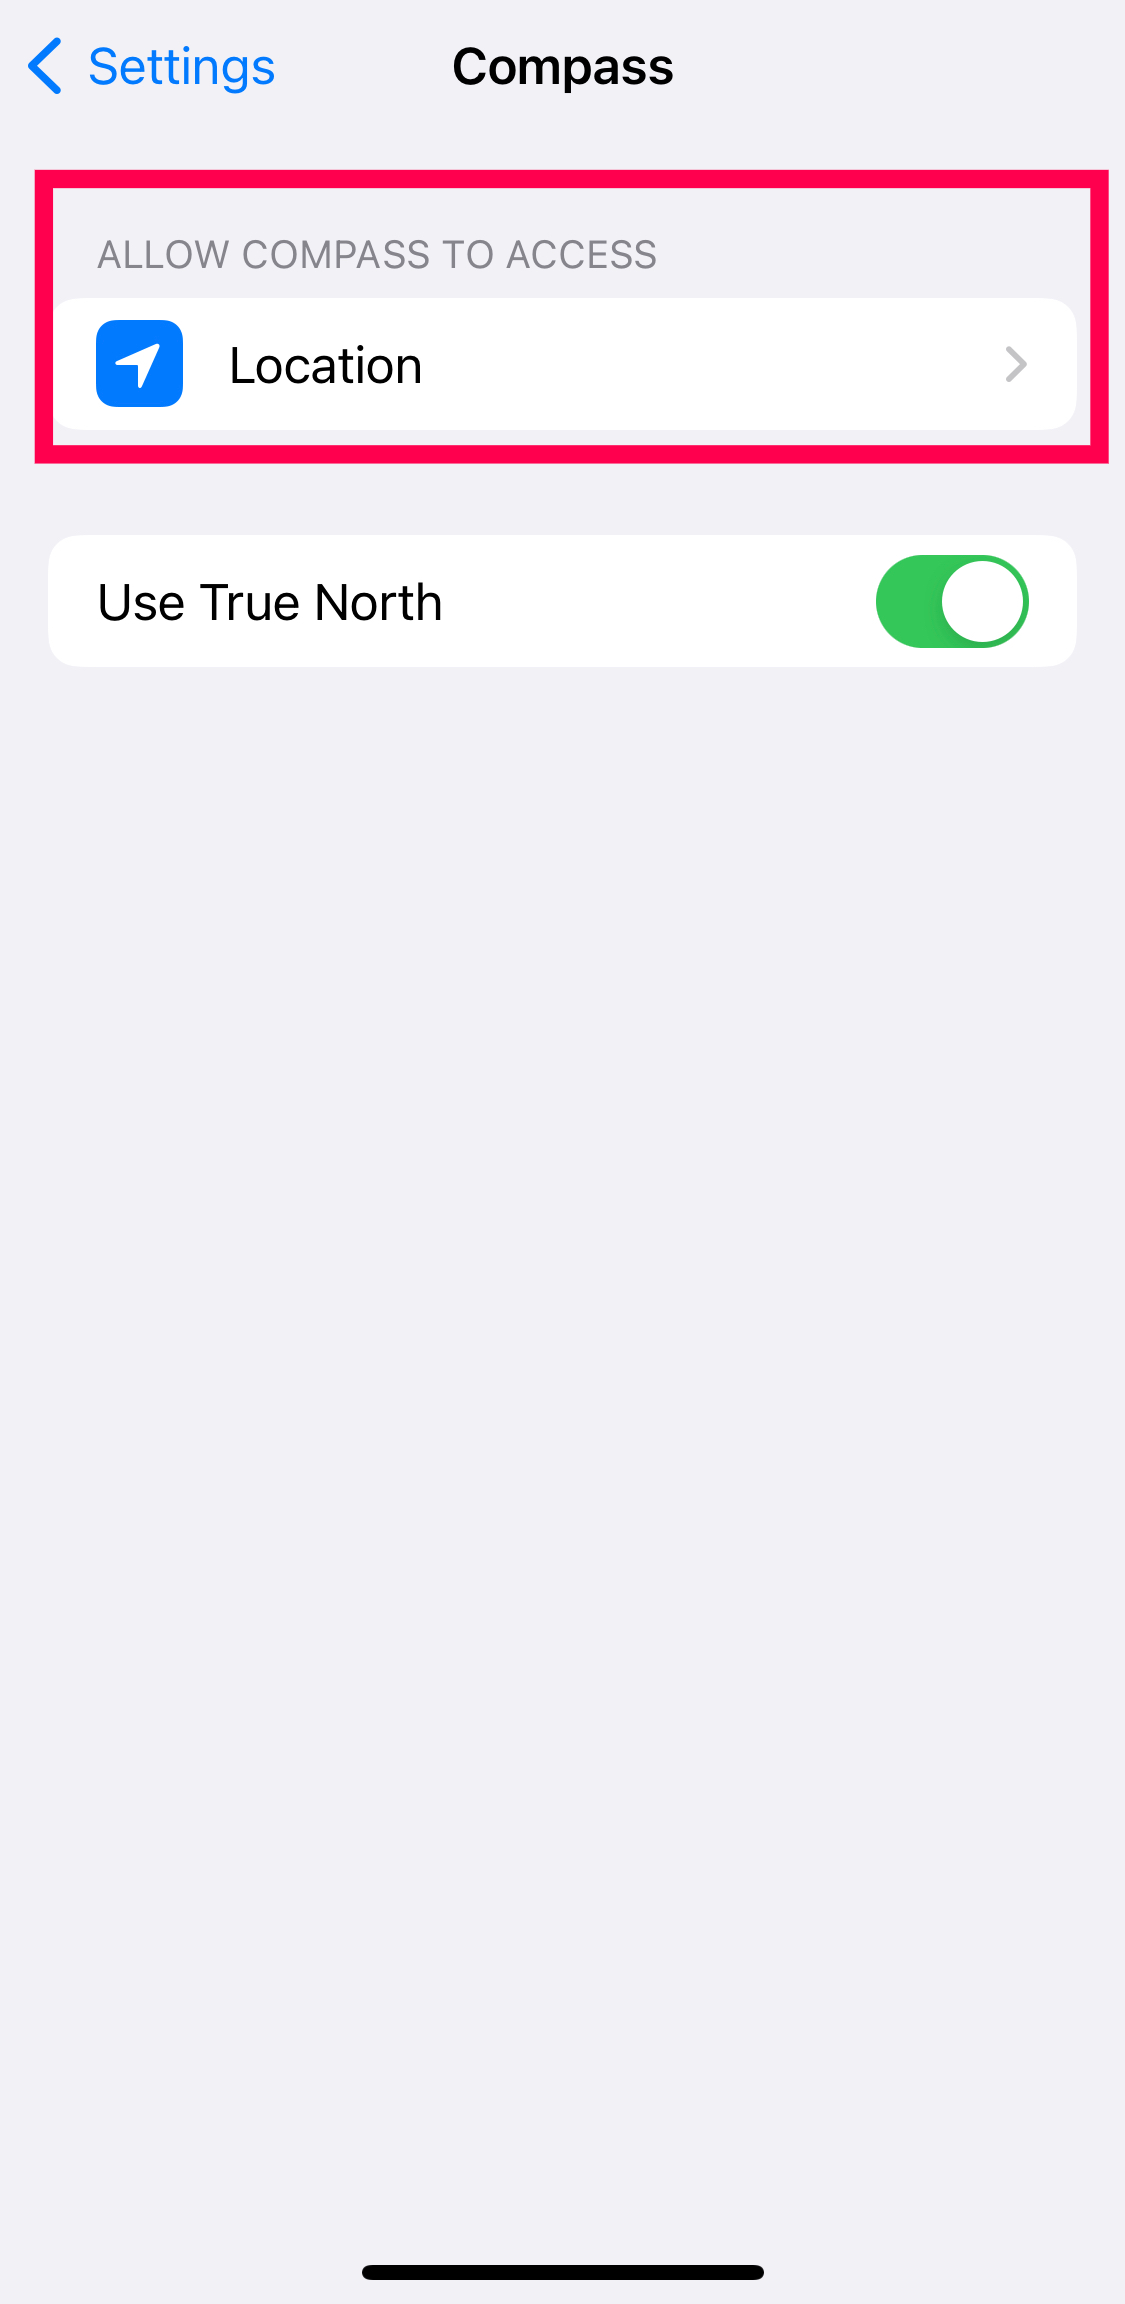
- Tap on Location.
- Now, enable your location preference and toggle on the switch next to Precise Location.

Once that’s done, you can go directly to the Compass app, where it will show your current location and the current GPS coordinates.
You can also tap on the compass to hold your original position while you move around. The iPhone’s Compass is truly a great feature for anyone who likes to wander.

Using Apple Maps
There’s no lack of native sources for your GPS coordinates on an iPhone. Aside from the two options above, you can also use Apple Maps to give you the Longitude and Latitude of your current location.

To do this, open Apple Maps and tap your location. Then, scroll down and view your coordinates. Siri pretty much gives you the exact same information but with fewer steps.
Third-Party Options
If, for whatever reason, none of the above work for you, there are more options. Both Google Maps and Waze offer GPS coordinates for iPhones.
Google Maps
Most people use Google Maps — it’s just the best navigation tool on the App Store, hands down. They have an extensive amount of data from cities to relatively unpopulated areas. If you’re looking to use Google Maps to obtain GPS coordinates, you have two options for doing so.
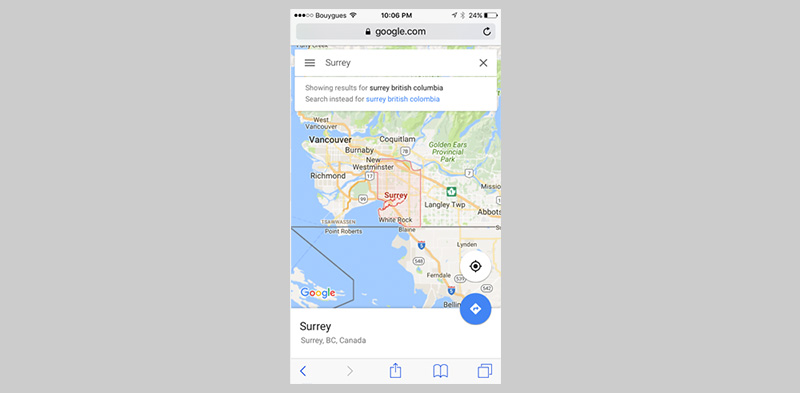
- If you go to maps.google.com and type the address you’re looking for, it’ll load with the address and possibly a street view shot of the place. But if you look up at the address bar, it’ll show you the coordinates within the URL. The coordinates will be seen after a series of words, for example, www.google.com/maps/place/surrey+british+colombia+canada/@22.164554.-43.845236.
If you’re trying to get the coordinates from a location that doesn’t show up on Google Maps, if you right-click on the screen, an option will pop up that’ll say, “What’s here?” If you click that, it’ll show you the coordinates of that location instead.
Now, you can also turn off your GPS locator if you’re not using it. To do that, you go into “location service” in “settings.” You can tap on the indicator beside “location services” to turn it off or on. Make sure you save your settings, and then you’ll be all set.
Waze for iPhone
Another popular option for iPhone users is the Waze navigation app. Although this app doesn’t show the Longitude and Latitude of your current location at first glance, you can easily enable the function by doing this:
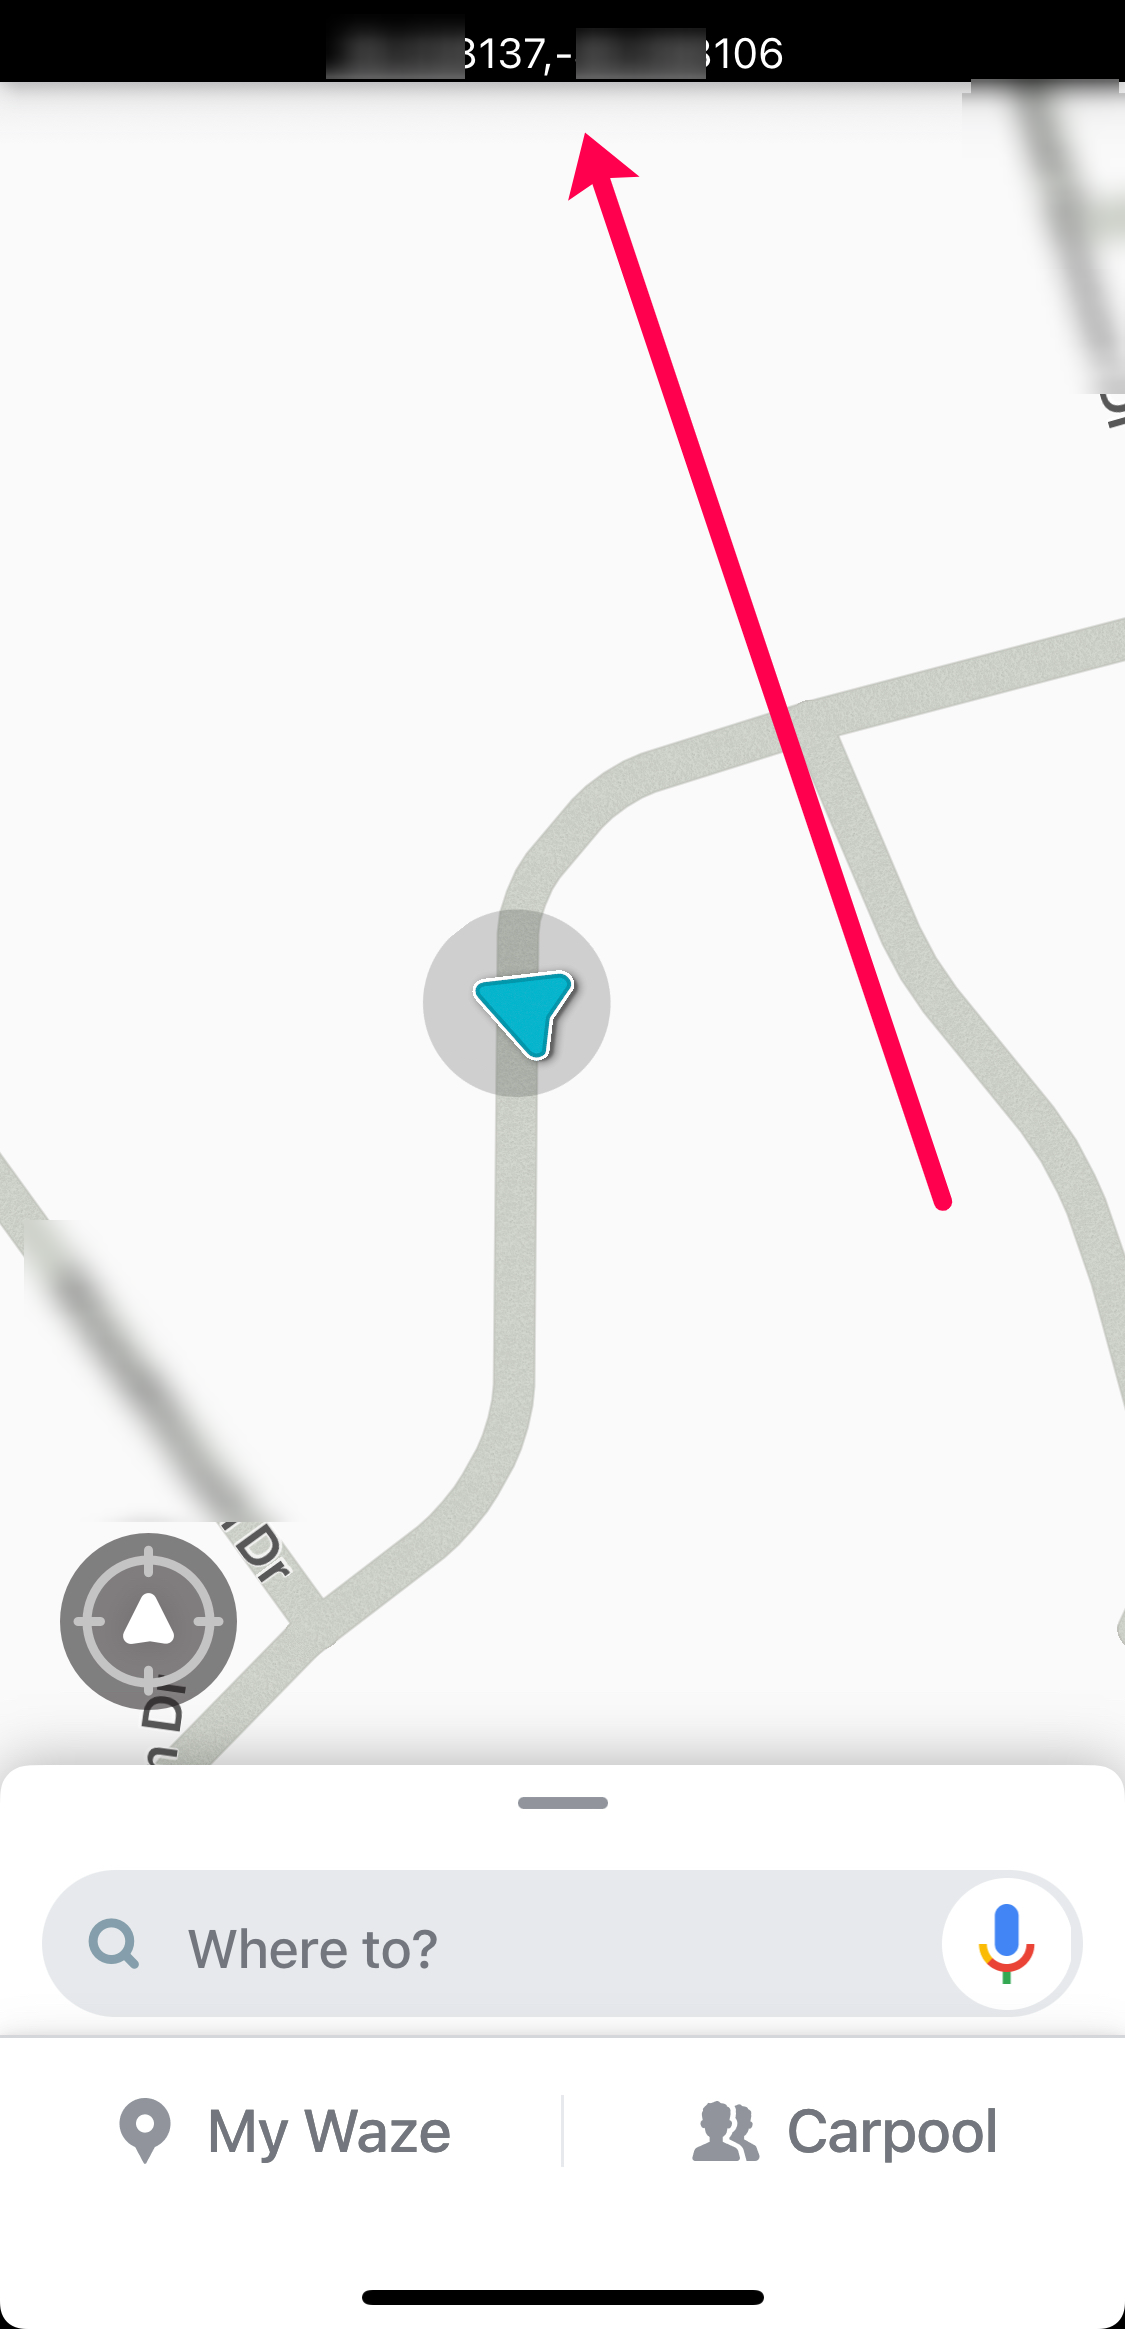
- Open Waze and tap on the Search box. Then, type ##coords and hit enter.
- Next, tap OK in the dialogue box that appears.
- Now, your coordinates will appear at the top of the screen.


Enabling this feature is definitely recommended if you prefer to use a third-party navigation app.
Frequently Asked Questions
Here are some more answers to help you find your friends or share your location.
Can I see my phone’s coordinates using Find my iPhone?
If you aren’t with your phone, it can be rather difficult to get the Longitude and Latitude using iCloud or Find my iPhone. Although you may get an address, the service doesn’t offer the exact coordinates.
How accurate is Apple’s coordinate function?
It’s pretty accurate, but you wouldn’t want to use it to go sailing without having a backup plan. Essentially, the technology relies on both the hardware and the software of your device, meaning if one is off, the entire system is off.
You do need to calibrate your iPhone’s compass every once in a while, and if you don’t have a proper network connection, who knows if it’s really accurate?
Who knew there were all these different ways to find your GPS coordinates on your iPhone. The next time you are lost or your friend needs to find you, simply use one of these practical and quick methods to retrieve your coordinates. Regardless of which one you use, whether it’s Google Maps, Compass, or Waze, you’ll be happy to know that each offers its users their precise location. So, don’t worry, you’ll never get lost again using these apps.


Disclaimer: Some pages on this site may include an affiliate link. This does not effect our editorial in any way.