What if you realized that you actually needed to see or refer to an old message after you had already deleted it? Whether there were some important links in the message, some photos you didn’t save, or any number of other things, you may think you are out of luck.
When you move to delete a message or conversation on your iPhone, it is not actually deleted right then and there (similar to how your pictures aren’t completely deleted right away). Instead, your messages are just marked for deletion, which still makes them inaccessible and invisible to us.
The deleted texts still exist on our phones for a short time until the files are removed permanently. Now that you know a bit more about what happens when you delete a message, let’s look at the ways to get them back.
How to Recover Texts on an iPhone
Your ability to recover any deleted messages is heavily dependent on a few factors, from the timeframe that you deleted them to the backups that you’ve performed in the past. It may or may not be possible to recover those messages or any of their content.
Recover Messages From an iCloud Backup
One of the first things to try is to recover your messages from an iCloud backup. The only drawback to this is that you’ll need to factory reset your device and then restore it.
To avoid losing any other important data on your phone, first check to ensure that your messages are backing up to iCloud. Here’s how:
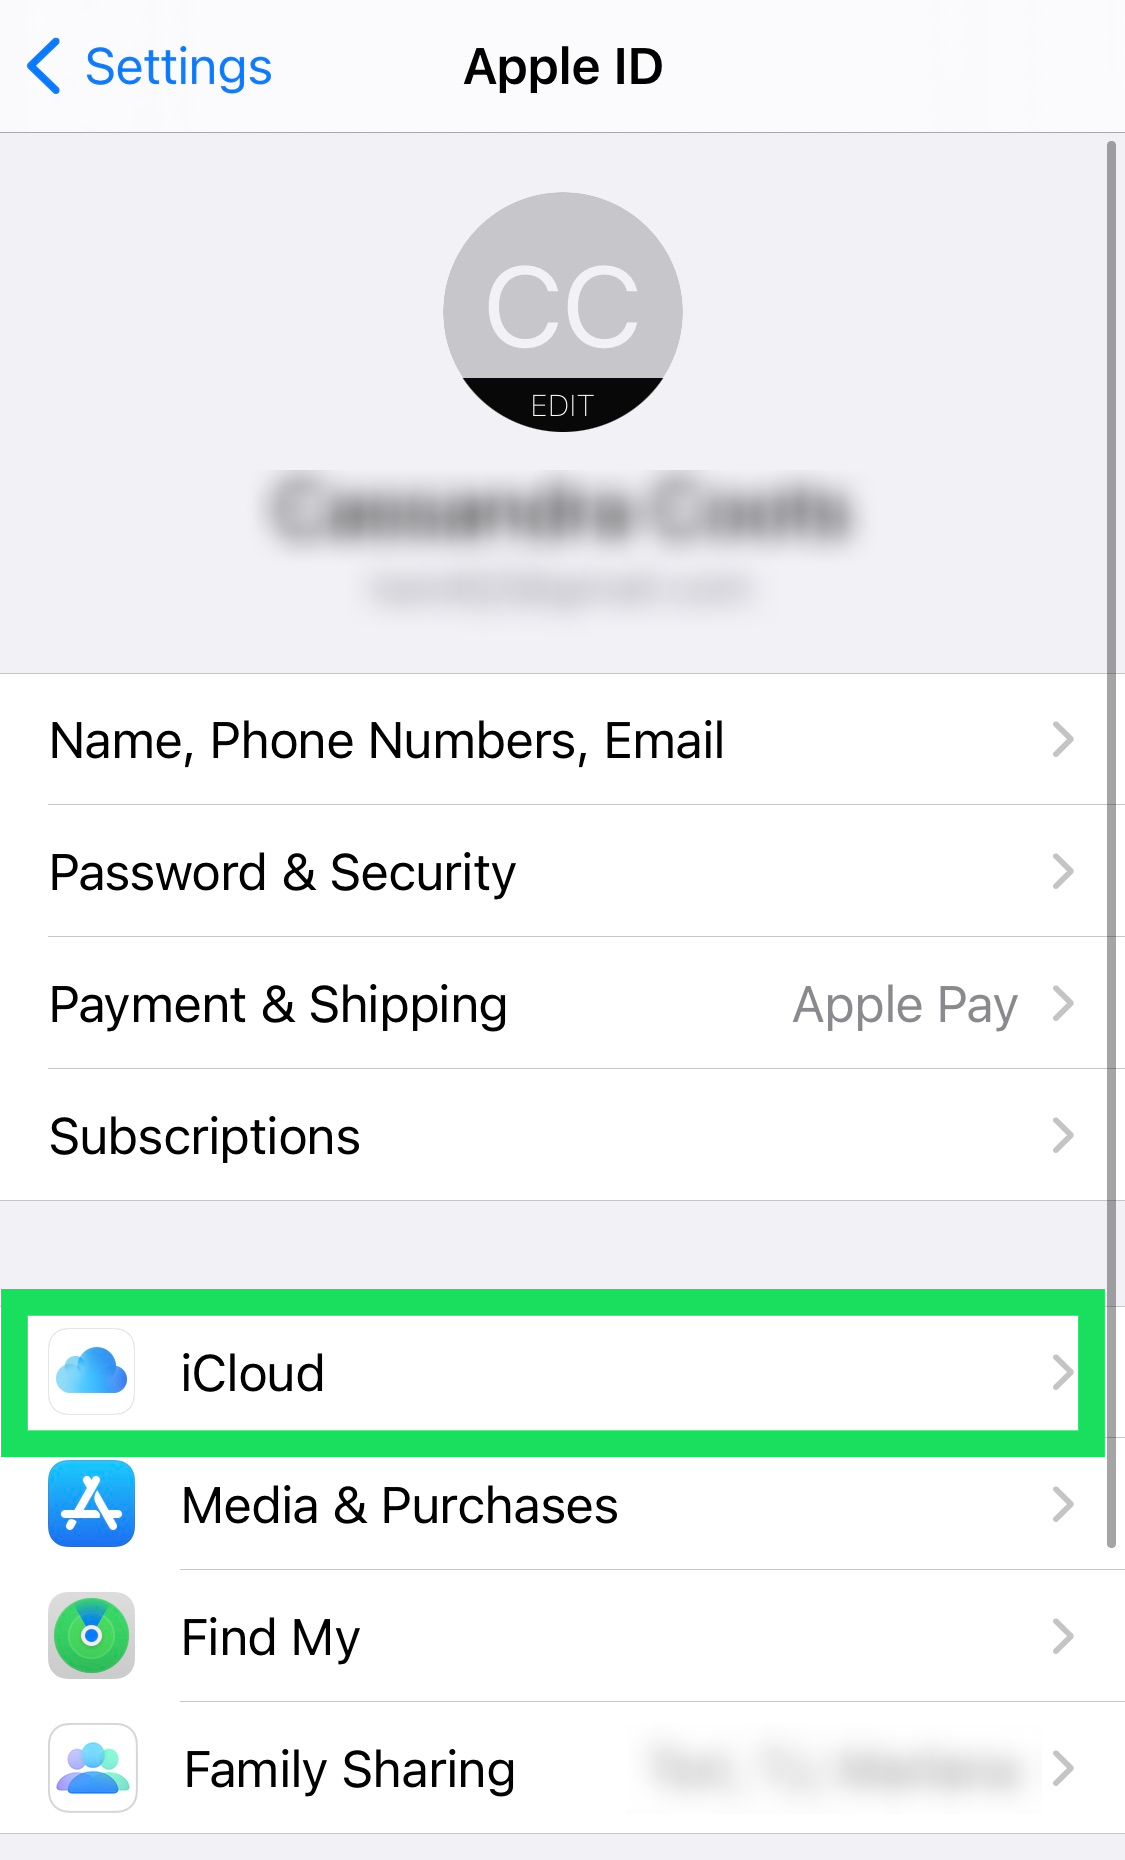
- Go to Settings on your iPhone and tap on your name at the top.

- Next, tap on iCloud.

- Check that the toggle switch next to Messages is on.
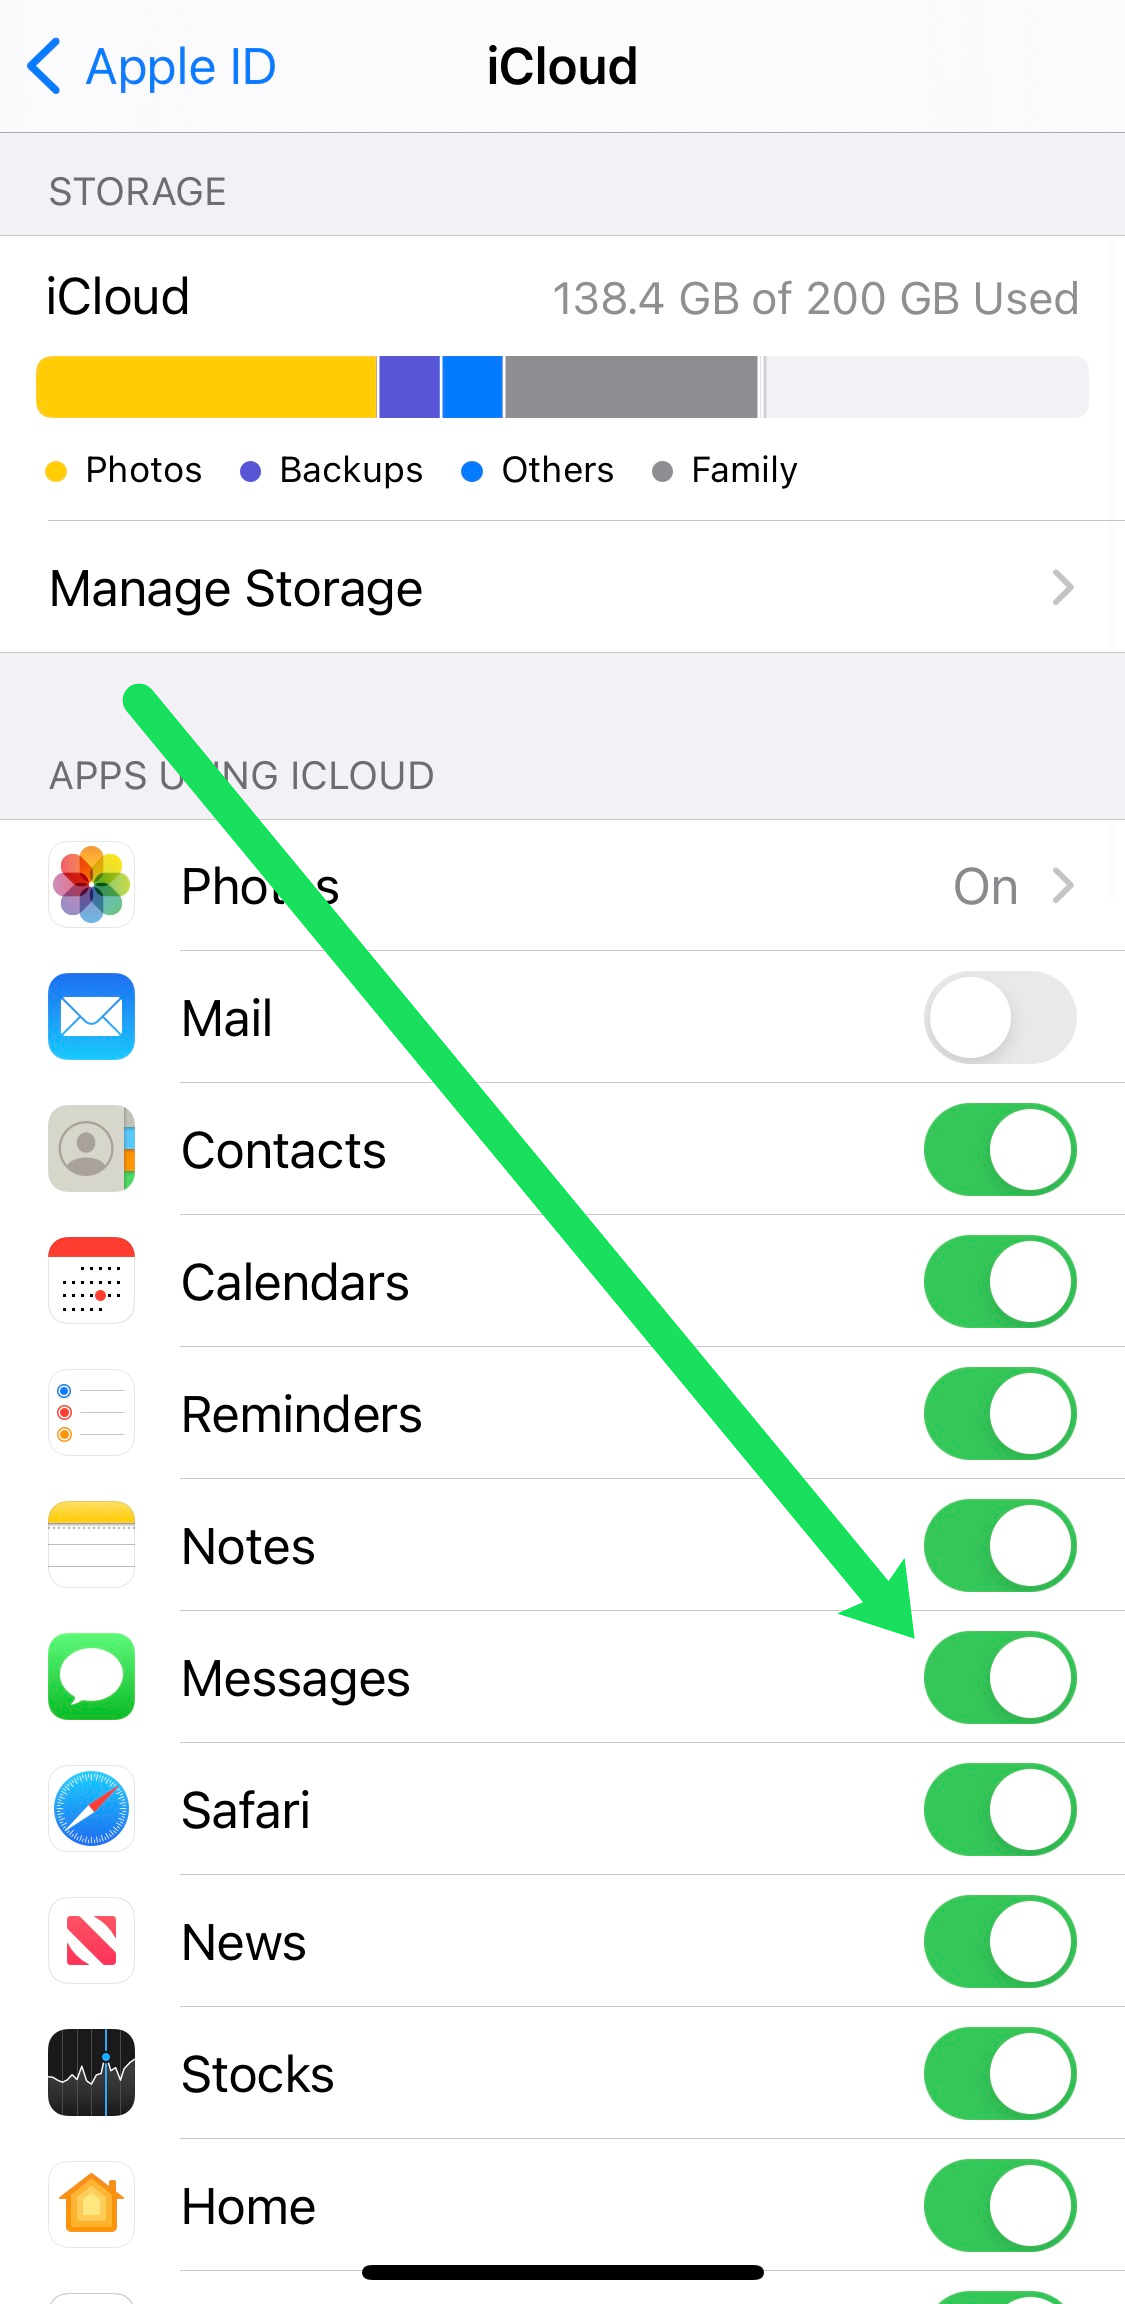
If your messages have been saved in a recent backup, you will see the amount in Gigabytes under the Manage Storage option.

After you’ve verified that your messages are saved in the Cloud, you can proceed to reset your device. Here’s how:
- Open the Settings on your iPhone and tap on General.
- Scroll down and tap on Reset.
- Tap Erase all content and settings.
- After your phone is erased, it will power down, then power up again. Follow the prompts and connect it to WiFi. Select the option to Restore from iCloud Backup.


You will then need to sign in with your Apple ID and password.
Disclaimer: Before performing a factory reset, ensure that your data is backed up to prevent losing any more important information. Also, verify that you can log into your Apple account to avoid being locked out.
Recover Messages From an iTunes Backup

If your operator doesn’t support messages backup, or it didn’t work for you for one reason or another, this is the next method you should try. Again though, this will only work if your messages are backed up. This basically works like you would restore any lost data from an iTunes backup.
- Connect your phone to your computer and either wait for iTunes to pop up or manually bring the program up yourself.
- You will see your phone in the box in the bar near the top of iTunes, and if you click on it, it will take you to your phone’s information page.
- From here, simply select Restore Backup. It should take your phone back to how it was when you last backed it up.


Check Your Other Apple Devices
If all of your messages disappeared from one device, they might still be available on another one. Check any macOS devices, tablets, or other phones for your missing messages.
Thanks to Apple’s phenomenal integration setup, your missing messages may be on another device. Even an older one. If they are there, do a backup to iCloud or iTunes to recover them later.
Use Recovery Software
If you’ve tried the methods above and still haven’t recovered your messages, there is one more thing to try. A simple Google search will show multiple websites claiming to recover deleted messages, photos, and other data. However, this is a “buyer beware” recommendation.
It is a good idea to refer to online reviews for the different options in this space until you find one that works for you. A number of these might cost you a few dollars, so make sure you do your research and use the one you deem most trustworthy. Even if the apps are trustworthy and work for most, that is no guarantee they will work for you.
Hopefully, if you give these methods a try, at least one of them will help save your deleted messages. If not, there is really nothing more you can do except use it as a lesson to examine messages on your phone before deleting them closely.
Data recovery services will need to access all data, files, and information on your device. This means that you will subject yourself to some security risks using these services. Another thing to consider is that some data recovery services charge a fee but may not deliver. Fortunately, we have tried these services and compiled our list of recommendations here.

When you find the right service (and we do recommend researching before using it), you will likely need a computer (Mac or PC) to use the software. The service will recover any small tidbits of data left over after deletion and present the information in downloadable files. Assuming your messages are still stored somewhere in your phone’s memory, these services will be successful.
Frequently Asked Questions
This section will answer more of your questions about restoring deleted messages.
Can I get my texts from my cell phone carrier?
In most cases, no. And there’s a good reason for that. Although your carrier probably does store your messages on a server somewhere if they’re ever needed for law enforcement, most employees won’t have access to them. Your texts are your private messages, and therefore it isn’t likely that someone would be able to access them, even someone who works for a cell phone carrier.
Based on experience, there isn’t even an option in the employee’s system to review text messages, let alone send them to you. However, it may be possible for you to obtain your text messages through a subpoena and court hearing in some cases.
Are deleted messages gone permanently?
In most cases, yes. If you delete your messages and there is no backup, your messages are certainly gone for casual everyday users. But, in some situations, they may be recovered by law enforcement or another agency.
Related Posts
 How To Recover Deleted Messages in Facebook Messenger
 How to Recover Deleted Messages from a Samsung Phone
 How to Recover Deleted WhatsApp Messages
 How To Recover Deleted Messages in Facebook
 How to Recover Deleted App Data on iPhone
 How to Recover Deleted Messages from Instagram
 How to Recover Deleted Contacts on the iPhone
 How to Recover Deleted Location History on iPhone
Disclaimer: Some pages on this site may include an affiliate link. This does not effect our editorial in any way.