Gaming
Xbox
Nintendo
PlayStation
Twitch
Discord
Minecraft
Steam
PC & Mobile
Android
iPhone
Chromebook
Windows
Mac
Google Sheets
Zoom
Google Meet
Google Photos
Microsoft Teams
Zoho
Social Media
Facebook
Instagram
TikTok
Twitter
SnapChat
WhatsApp
Telegram
Messenger
Internet
VPNs
Alexa
Google Photos
iCloud
Paypal
Notion
Entertainment
Chromecast
Fire TVs
Roku
Netflix
Spotify
Kodi
Disney+
Gadgets
Smart Home
Echo
Google Home
iPad
Kindle Fire
Vizio TVs
Samsung TVs
VPNs
Kodi
Xbox
On a Router
Android
Firestick
About Us
Search
Home
Internet
Google Photos
Google Photos Tutorials & How-Tos
Posted by Tom Arah on September 7, 2010
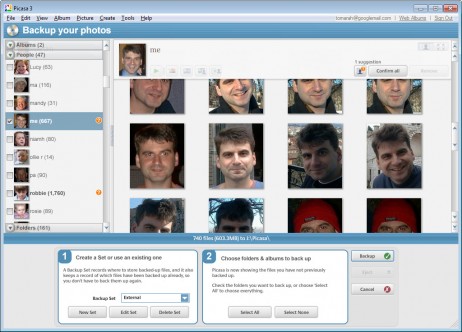
Google Picasa: the best way to back up your photos
1
2

 Posted by Tom Arah on September 7, 2010