WordPress is a content management system that allows users to build websites and manage content for their websites. For one reason or the other, you may want to have another copy of a page. It could be to work on it without affecting the original content, or you want to use the template on another page without creating it again.
Whatever the case, there are different ways to duplicate a page on WordPress. This guide will show you how.
You can copy a page on WordPress manually or using a plugin. However, the process for duplicating a page through Settings would depend on whether you are using a plugin-enabled site or one without. If you want to copy a page through Settings on a plugin-enabled site, you must install Jetpack to duplicate a page.
Let’s first look at how to copy a page manually before you blog on WordPress.
How to Copy a Page Manually on WordPress
This method also depends on whether you use the Block or Classic Editor. Recent versions of WordPress come with the Block Editor, but some users still prefer the Classic Editor. Follow the steps below to duplicate a page based on your editor.
Block Editor
- Open your WordPress website dashboard.
- Select Pages from the left-hand menu bar and click on the relevant page to open it.

- Choose the three-dot menu icon at the top-right corner of the editor, then scroll down and click Copy All Blocks to copy all the page content to your clipboard.

- Select All Pages at the menu bar to return to all pages, then click Add New Page at the top of the screen to open a new editor.
- Right-click and then select Paste from the options.
- Alternatively, place your cursor at the beginning of the page and press CTRL + V on a PC or CMD + V on Mac.
- Name the page in the Add title section and click Save draft.


Classic Editor
- Open your website’s WordPress dashboard.
- Choose Pages from the menu bar at the left-hand side of the screen and click on the page you want copied to open it.
- Place your cursor on any page part and press CTRL + A on PC or CMD + A on Mac on your keyboard to highlight the entire content.
- Right-click on the page and choose Copy from the options to copy all the page content to your clipboard.
- Go back to All Pages at the menu bar, and click Add New Page at the top of the screen to open a new editor.
- Right-click and then choose Paste. Alternatively, place your cursor at the beginning of the page and press CTRL + V on a PC or CMD + V on Mac.
- Name the page in the Add title section and click Save Draft.


How to Copy a Page in WordPress on Sites Without Plugins
This is the method to copy a page if you’re using the free version of WordPress.com, which does not support plugins.
- Go to your website dashboard.
- Click Pages on the left side of your screen, select the three-dot menu icon in the right-hand corner of the post or page you want to duplicate, and choose Copy Page.
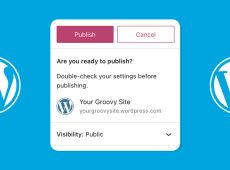
- This will open a WordPress Editor with a new post containing the duplicated content. Modify the title and click Save Draft or Publish.


Note that you can use this same method to copy posts. Just go to Posts instead of Pages in step 2.
How to Copy a Page on a Plugin-Enabled WordPress Site
WordPress has two distinct platforms: WordPress.com and WordPress.org. The former is a hosting platform with a free version that does not support installing plugins, while the latter is self-hosted. So, you can only use plugins on websites built on WordPress.org or by upgrading to a paid plan on WordPress.com.
For websites with plugins, the most straightforward way to copy pages is to do it manually. But if you want a more automated process, you must install and activate Jetpack, a plugin that provides several useful automated modules.
Install Jetpack
- Open your WordPress dashboard and select Plugins from the menu bar.
- Click Add New Plugin at the top of the page.
- Type Jetpack at the Search Plugin search bar and wait for results.
- You’ll see different options; select the one By Automatic by clicking Install Now beside it.
- Click the Jetpack Activate button.


Follow the instructions to install the plugin on your website, and you’re good to go. If you already have Jetpack, skip the above steps and go to the next.
Enable the Option to Copy
- Click Jetpack on your WordPress dashboard, then click Finish Setting up Jetpack.
- Select Connect your user account, and follow the steps to complete the setup.
- Hover on Jetpack on your WordPress dashboard and click Settings.
- Select Writing and turn on the Enable the option to copy entire posts and pages, including tags and settings toggle.


Copy a Page
- Open your website Dashboard.
- Click Pages on the left side of your dashboard, hover over the relevant page title to bring up the menu, and click Copy from the options below the page title.

A new editor will be opened with all the elements contained in the original page.
How to Duplicate a WordPress Page with a Plugin
You can also duplicate a page using a plugin. There are different plugins for duplicating on WordPress, and as expected, they all have different features that make them stand out. But for this article, we will explain copying a post using the Duplicate Page plugin.
The first thing to do is to install the plugin. You should install it following the same steps we used to install the Jetpack plugin. After installation, follow the steps below.
- Select Pages from your menu bar.
- Find the relevant page and hover over it. Click Duplicate This from the options in the menu that pops up.

This plugin works for duplicating pages and posts. And you can either copy them one by one or use bulk action to duplicate multiple pages.
Additionally, note that no matter what method is used, you can go to the copied page and edit it. However, you must edit the URL before publishing because two resources cannot have the same URL on the internet.
Also, for SEO purposes, publishing two pages or posts with the same content will likely flag your site for plagiarism. And that will not bode well for you with search engine crawlers when ranking your site.
Duplicating WordPress Pages Made Easy
WordPress supports different methods to duplicate a page or post on your website. Now, you don’t have to start from scratch whenever you want to create similar pages or posts. You can get your duplicated page within minutes using any of the abovementioned methods. This is the advantage many Content Management Systems have.
Now that you know how to copy or duplicate a page, you might want to learn how to change the default WordPress theme.
FAQs
Can I copy a page from one WordPress site to another?
Yes, this is possible, but the process is different. You will have to use the Export option under Tools in your WordPress dashboard.
Can you duplicate a WordPress site?
Yes, it is possible to duplicate a site, but you should not that the process is entirely different from copying a page or post. However, just like with copying a page, you may use WordPress plugins to make the process easier.
Related Posts
 WordPress: How to Link to Another Page
 WordPress: How to Add a Post to a Page
 How to Set a Default Theme in WordPress
 How to Change a WordPress Theme Name
 How to Change Your WordPress Username
 WordPress: How to Check and Update the PHP Version
 WordPress: How to Edit the Header
 How to Add Google Maps in WordPress
 WordPress: How to Add Widgets
Disclaimer: Some pages on this site may include an affiliate link. This does not effect our editorial in any way.