Venmo is a transaction platform with social media features that make the experience smoother and more organic. However, you’ll sometimes need proof of payment. In fact, it is always your best bet to have it saved somewhere, just to be safe.
One of the great things about Venmo is the ability to go back and view previous transactions. Whether someone sent you money or you made a purchase, having this option available could help you when filing taxes, showing proof of purchase, and more.
You can find your proof of payment by checking out your Venmo payment history. This article will show you a few ways to view your Transaction History on Venmo. We’ll also give you a few other helpful tips along the way.
How to View Transaction History on Venmo: Mobile App
Most users prefer the mobile version of Venmo. It’s easy to navigate and you can access it anywhere. If you need to access your Venmo transaction history using the mobile app, follow these steps:
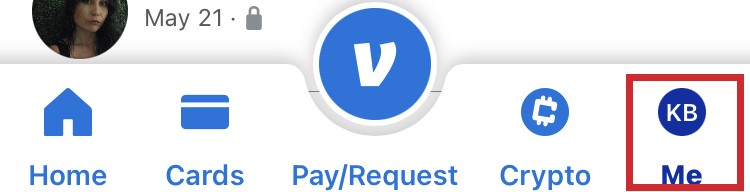
- Launch the Venmo app and tap on the Me icon in the lower right-hand corner.
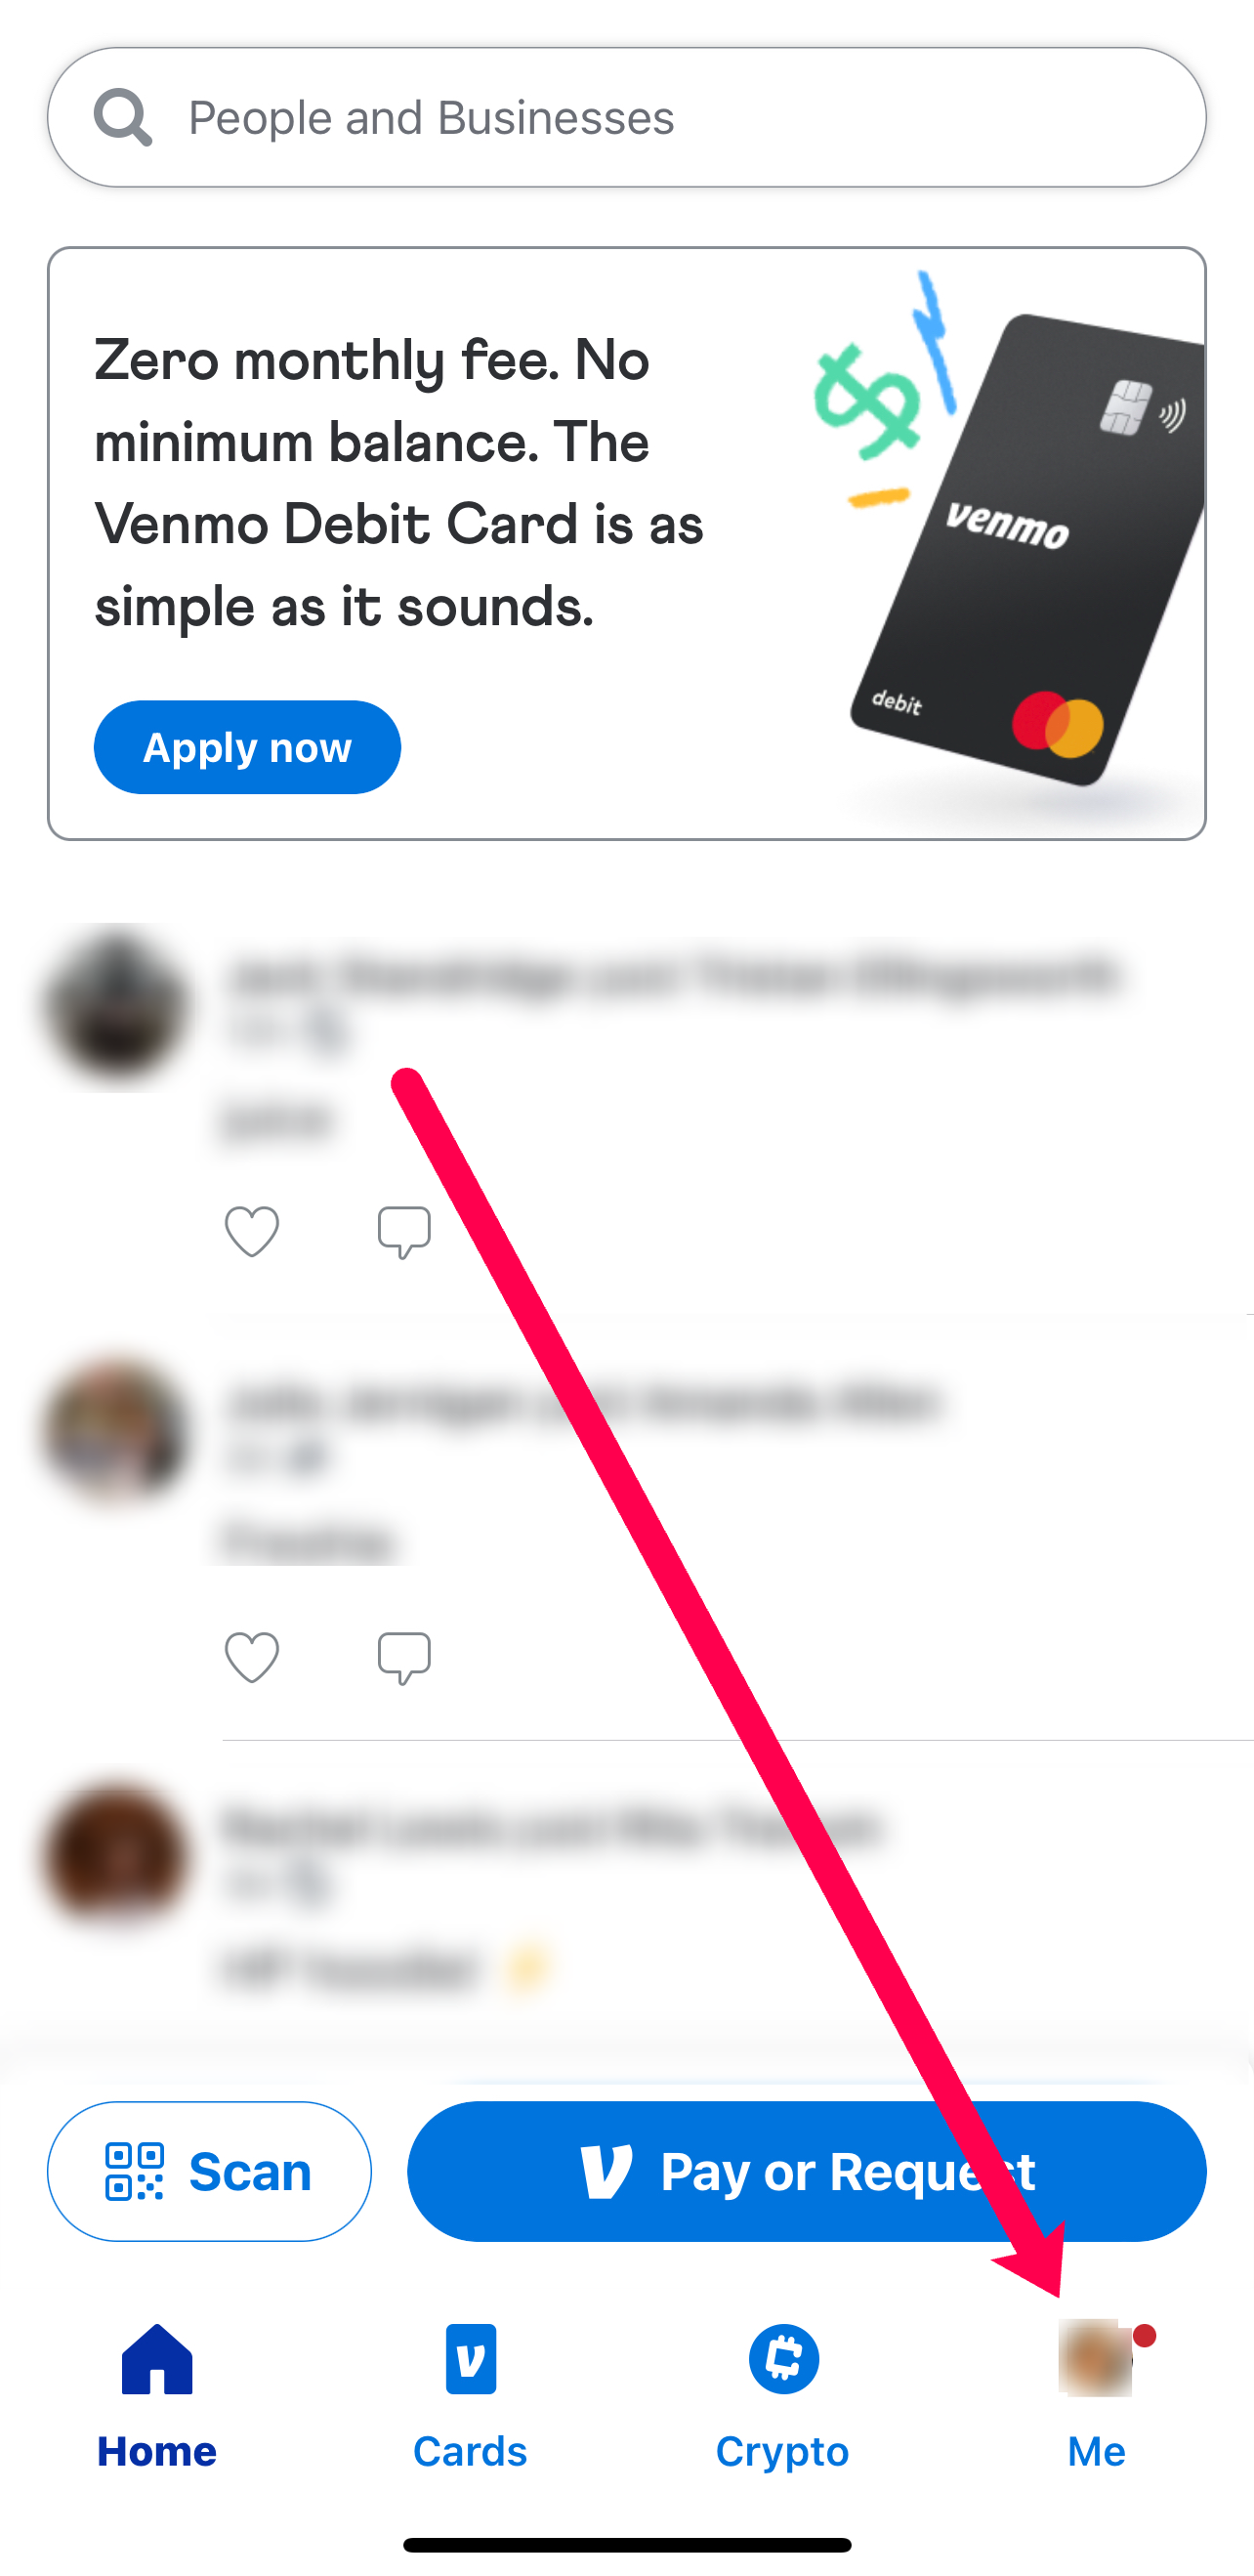
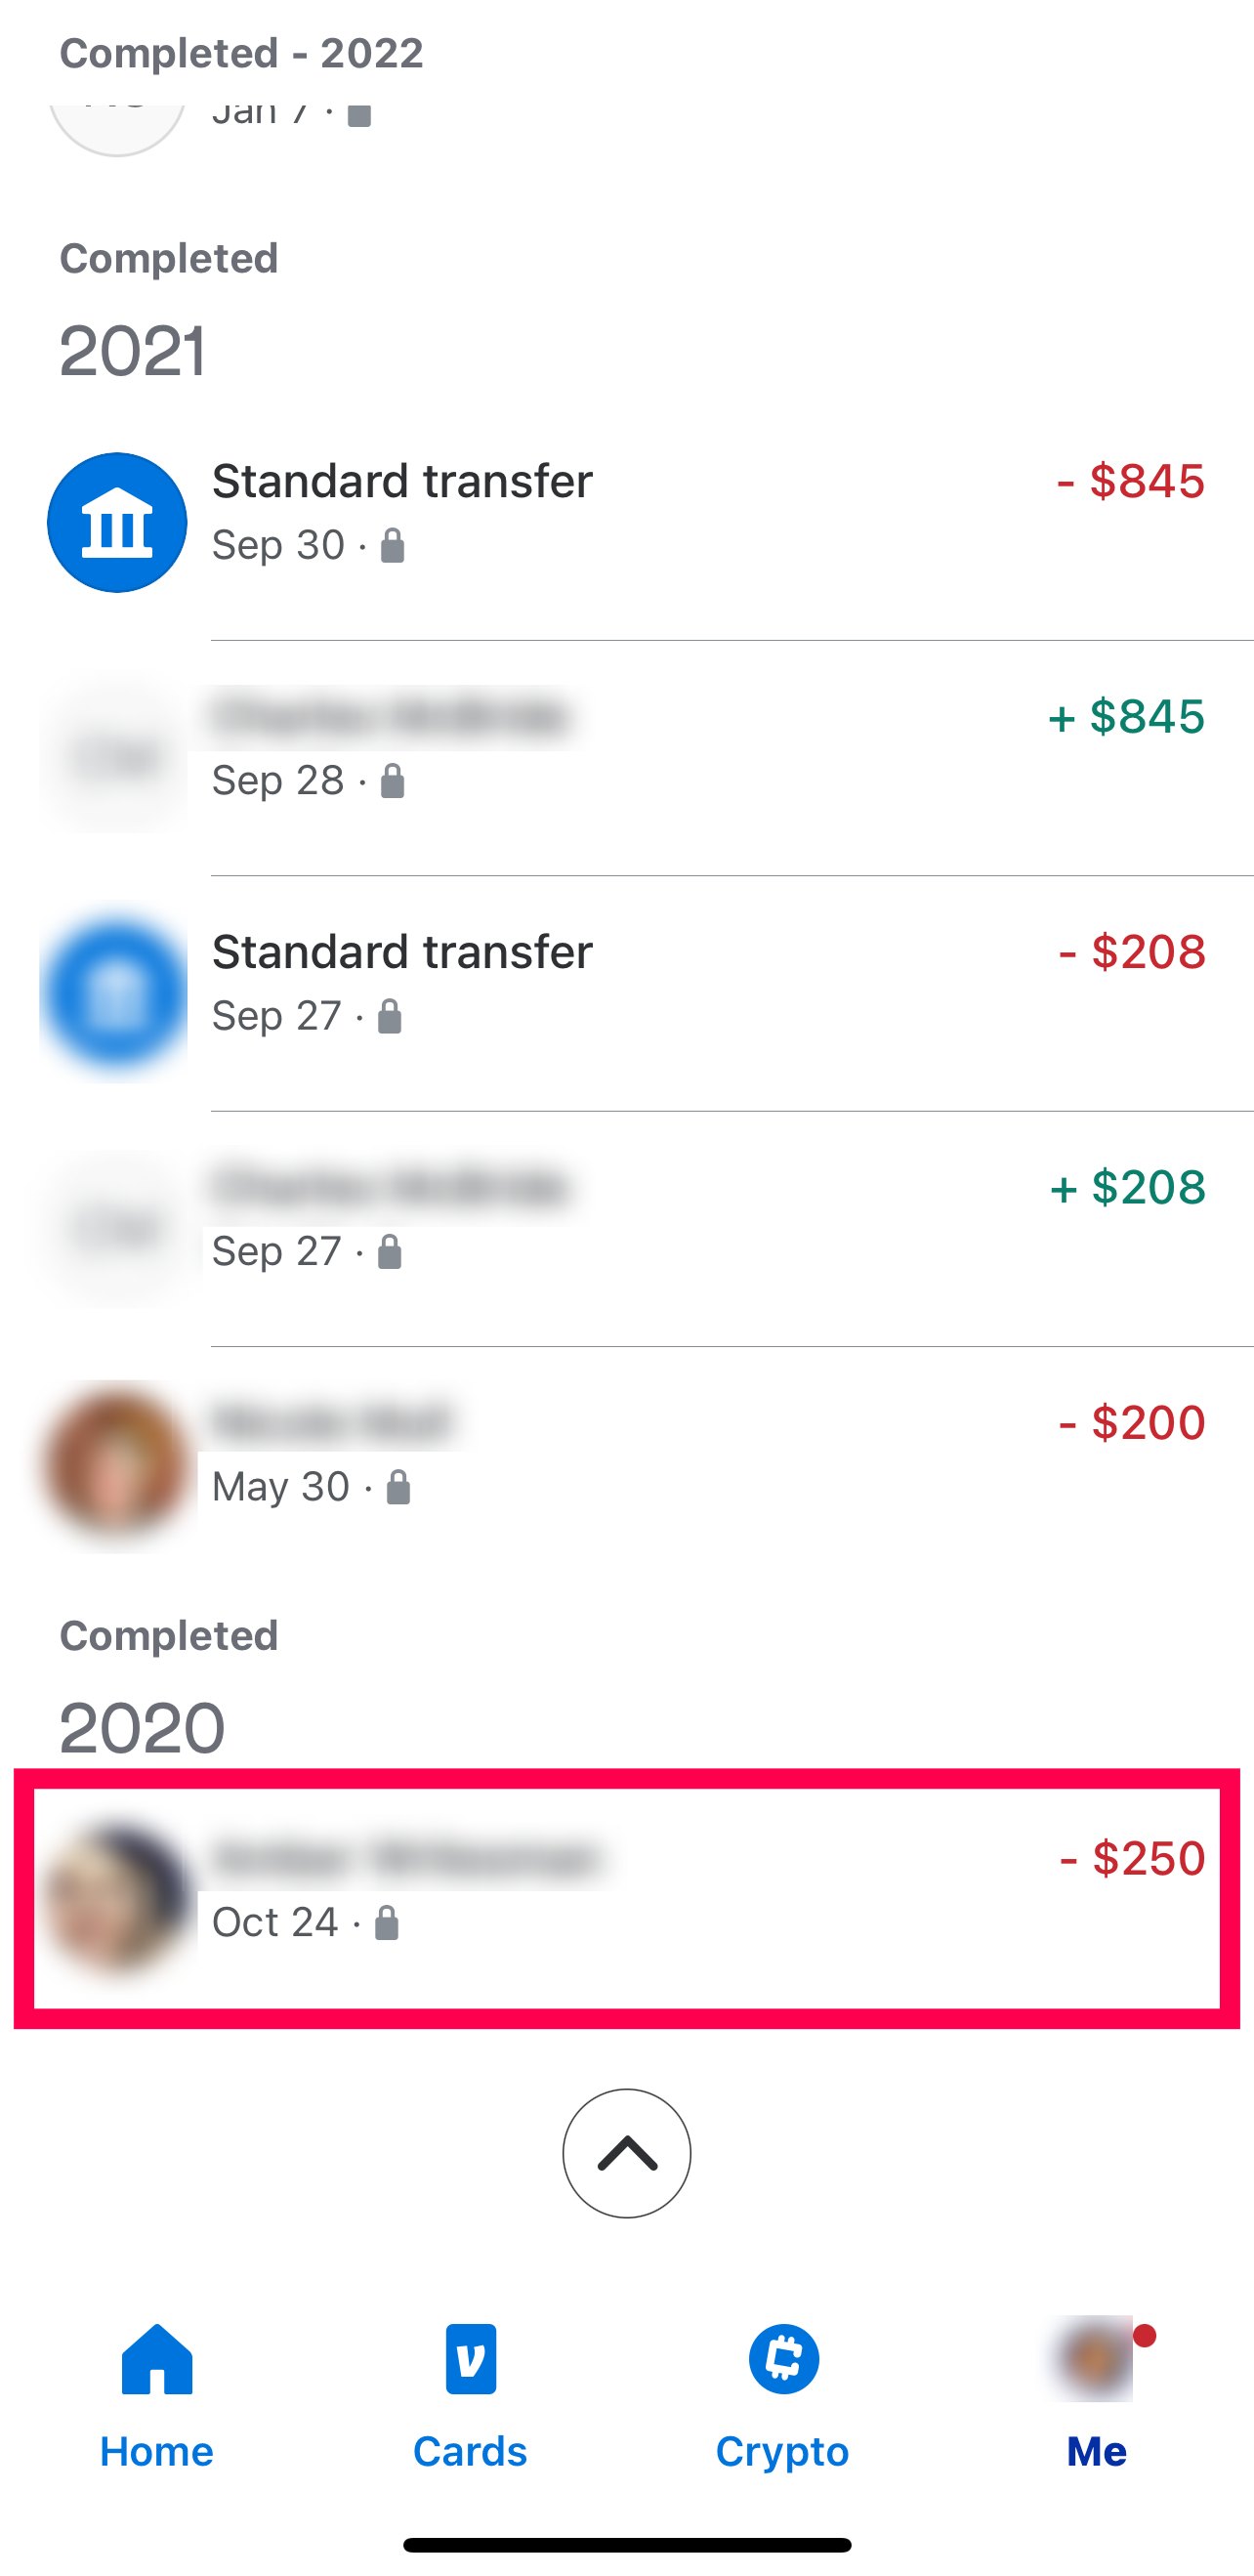
- Scroll down the page to review your transaction history.
Note: The red transactions are those you sent to someone else or deposited into your bank account.

- Click on a transaction to reveal more details.
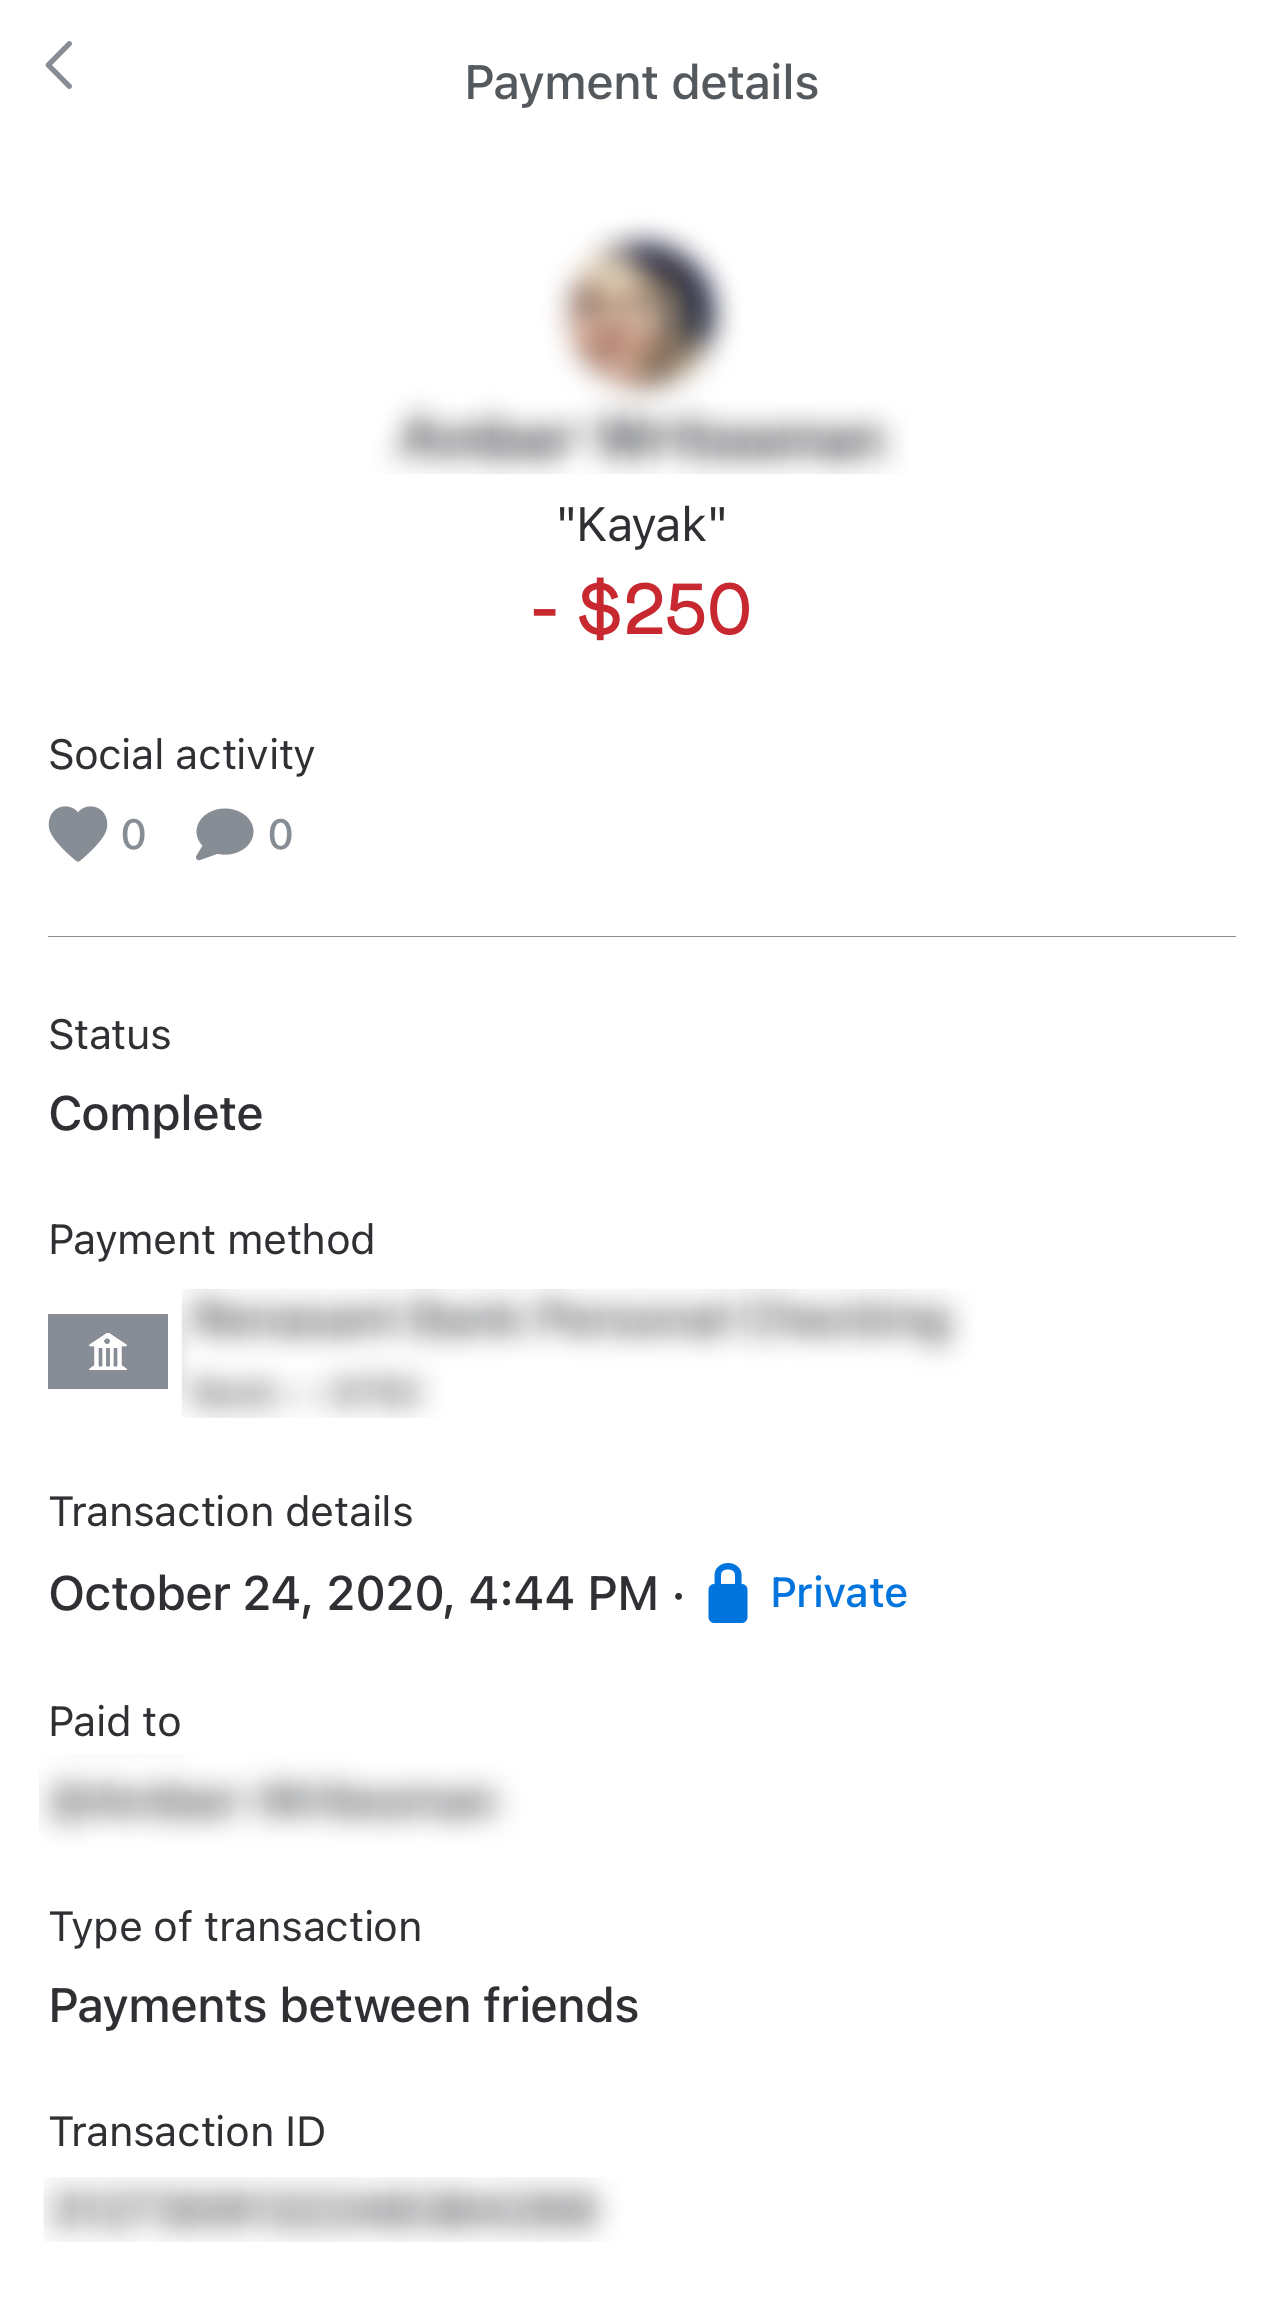
As mentioned previously, this is one of the easier methods to view your transaction history on Venmo. However, there are a few more ways too.
How to View Venmo Transaction History: Web Browser
If you prefer Venmo’s web version, you can check your transaction history in a few short steps. Here’s what to do:
- Visit the Venmo website and click the three horizontal lines in the upper right-hand corner.
- Click Sign in at the bottom.
- Click on the Person icon at the top.
- View your transaction history on the left.


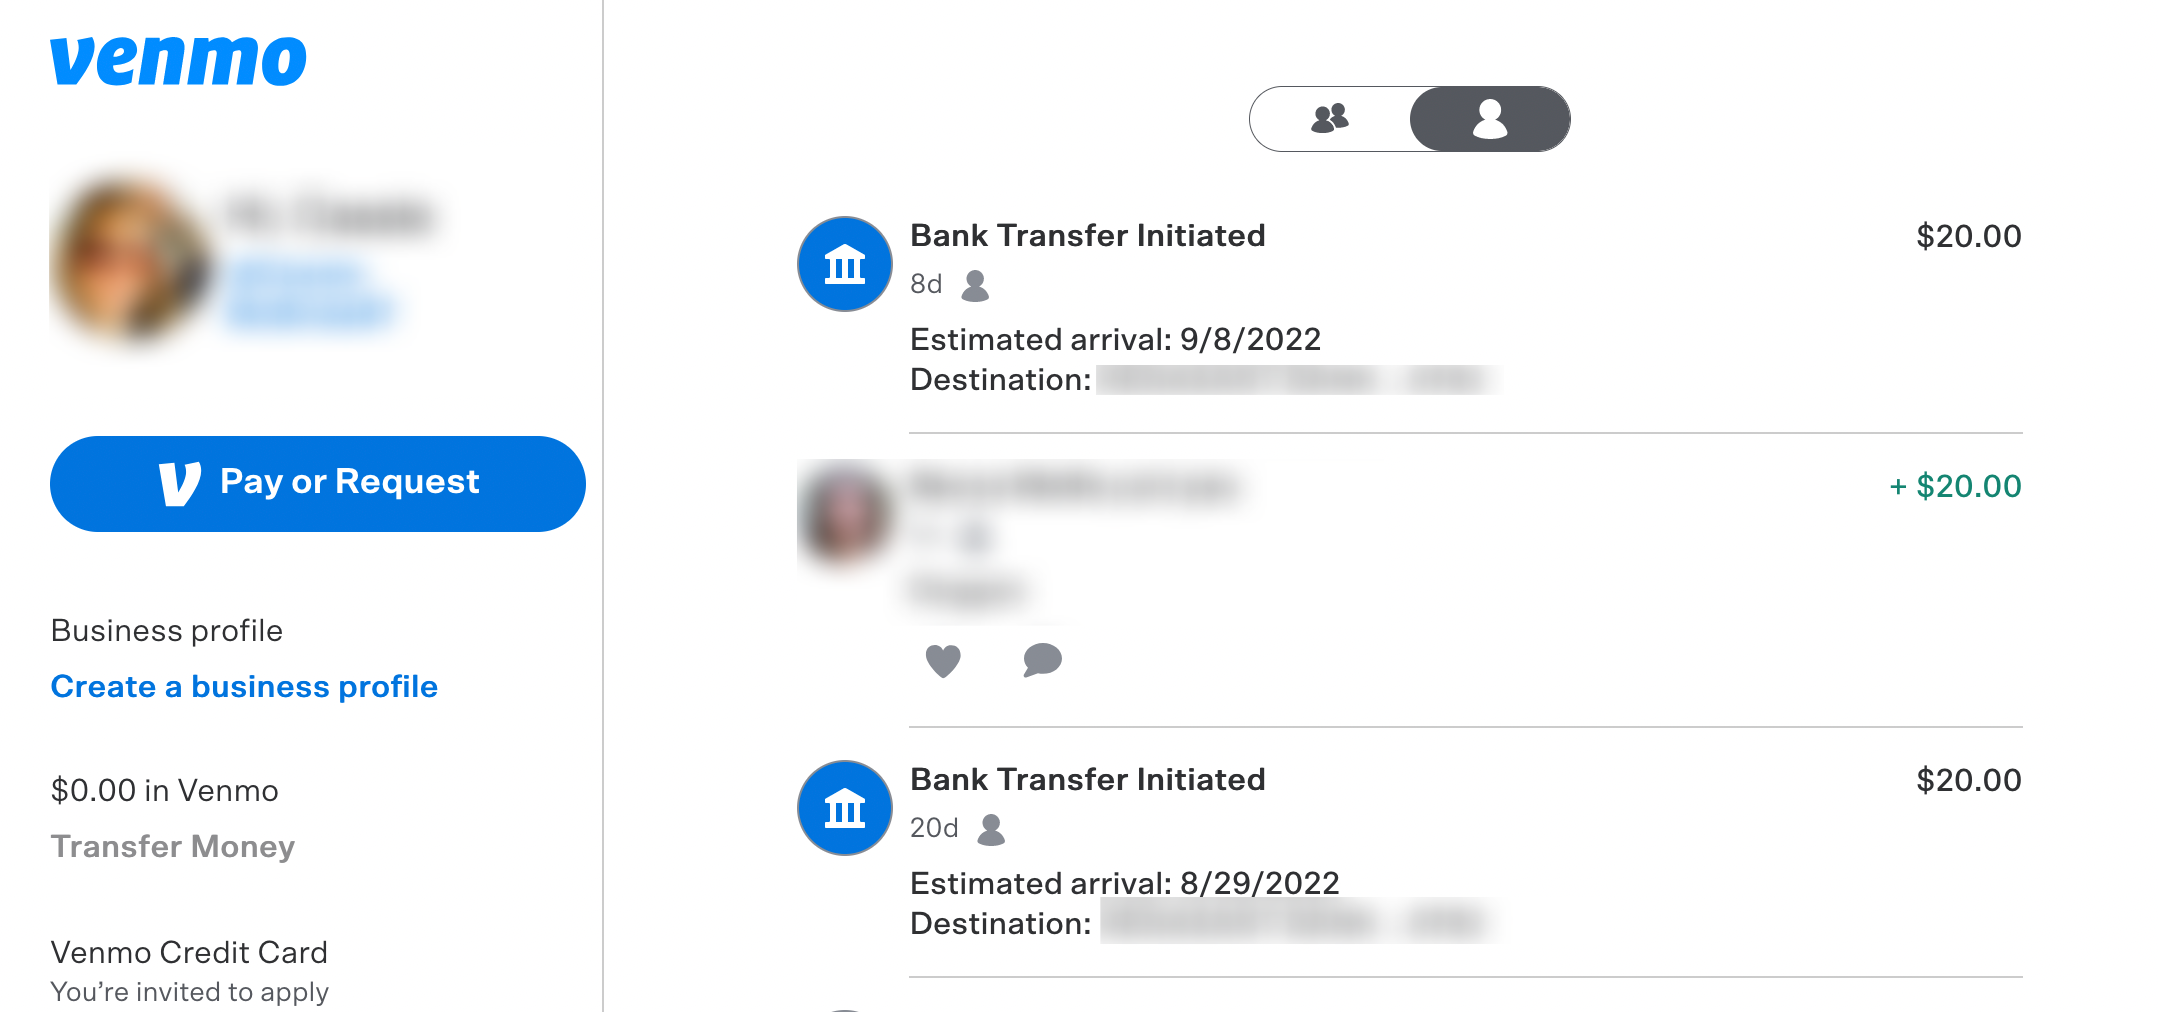
Scroll through the list viewing your transaction history.
Download Venmo Statements
Depending on how you use Venmo, you may need to collect information for your taxes. Fortunately, the company offers a quick and easy statment you can download. You can also filter by dates to ensure you get exactly what you need for this fiscal year.
Here’s what to do:
- Log into Venmo on a web browser.
- Click on Statements in the left corner.
- Filter the dates you’d for which you’d like to retrieve the statement.
- Click Download CSV.


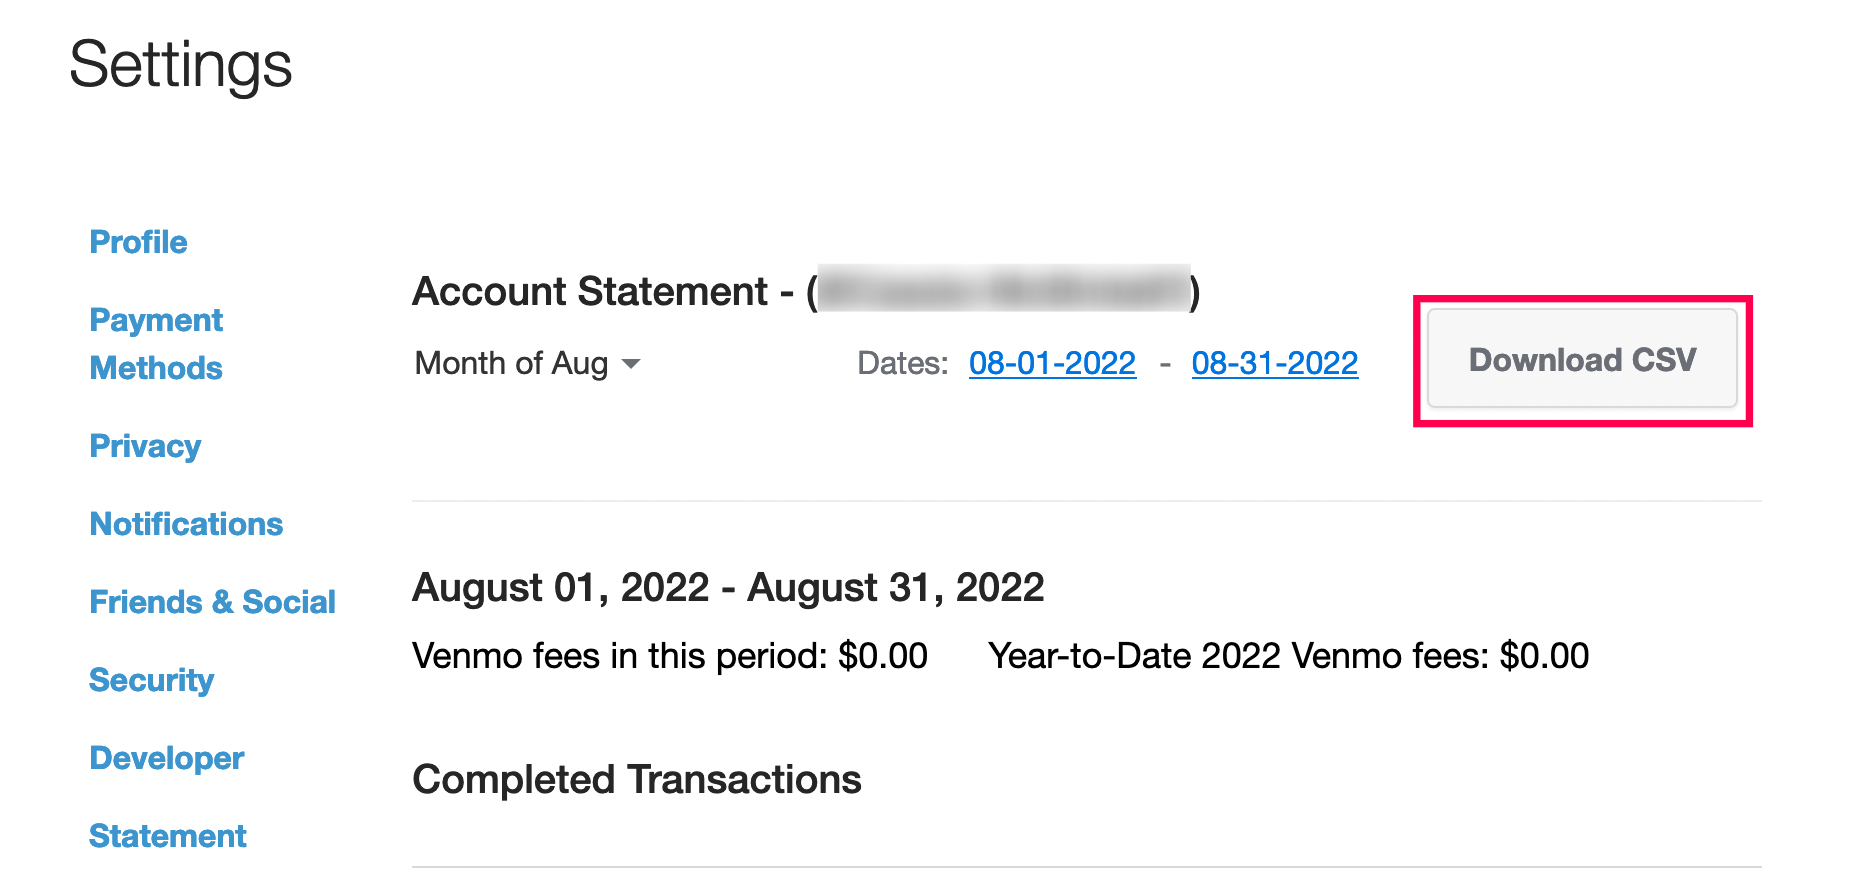
Now, you can save the file to Excel, Pages, or whichever spreadsheet platform you prefer.
Venmo Sends Statement Reminders
Depending on how active you are on Venmo, the app itself sends you an email every once in a while to remind you to check your transaction history.
In this email, you will find a link redirecting you to your transaction history. Each active month on Venmo will automatically initiate one of these emails. Being active means having made a purchase, having received a payment, having done a bank transfer, or simply having received refunds/credits.

If you aren’t too active on Venmo, you’ll receive this email quarterly, at the very minimum. This is one of the most common ways for users to check their transaction history. All you need to do is go to the email account you set Venmo up with, type “Venmo” in the clients’ search bar, and scroll until one of these emails appears.
You cannot unsubscribe from these emails because the federal financial regulations require Venmo to send out these notices. This is good because it means that Venmo has to pay special attention to your transaction and purchase history.

Viewing Your Purchase History
Purchase history is a bit different. First of all, it is accessible from your phone/tablet app. Purchase history is available only to you unless you share it per purchase.
If you’d like to access this history using the Venmo App, follow these steps:
- Open the Venmo app on your mobile device.
- Tap on the “Me” in the right-hand corner
- Tap “Transactions”

If you need proof of purchase, you can navigate to the Statement section and download the CSV transaction history file. An easier method may be taking a screenshot of your purchase and adding a timestamp.
Setting the History to Private
Essentially, the reason why your transactions are likely public at the moment is that it is Venmo’s default setting. Fortunately, you can set your transactions (future and past) to private.
Once you’ve entered the Venmo app, follow these steps:
- Tap “Settings.”
- Navigate to “Privacy. “
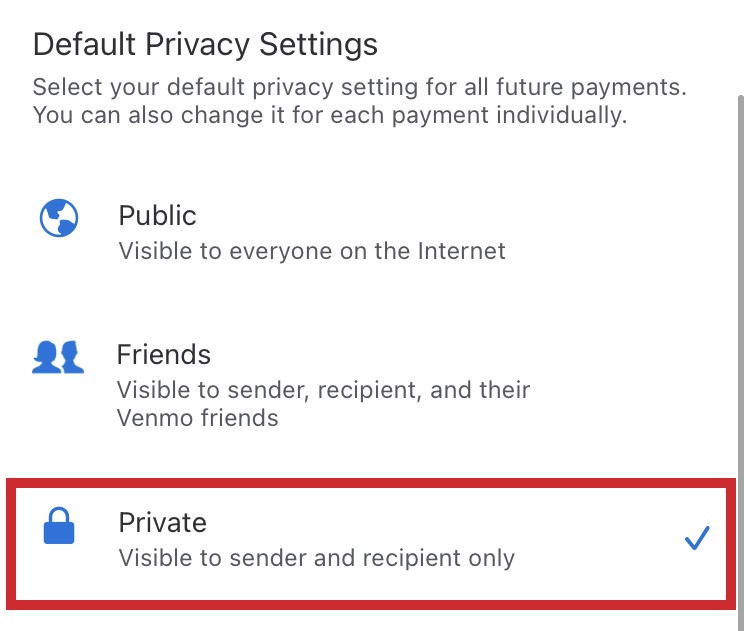
- You’ll see the “Default Privacy Settings” option, probably set to “Public.” Tap it and change it to “Private.”
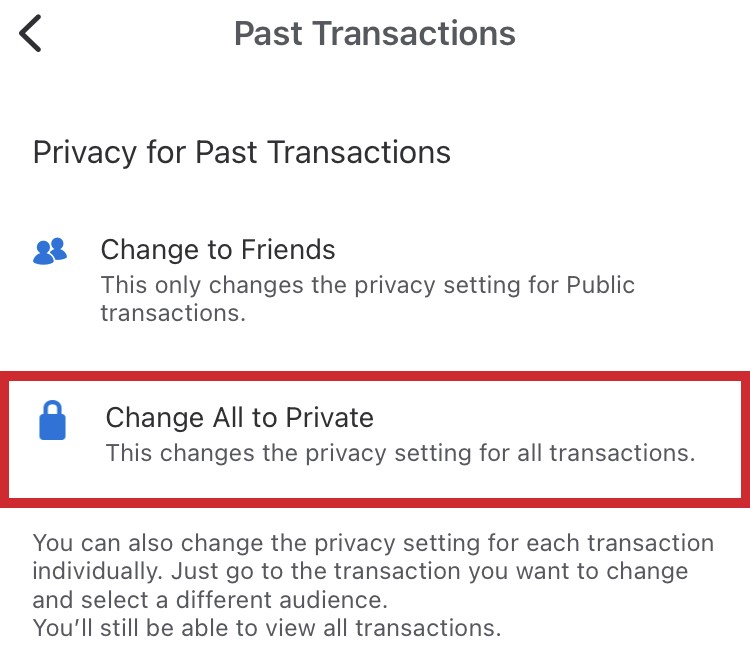
- To to “More” and click on “Past Transactions“
- Select “Change All to Private.”


Yes, it is as easy as that. There is no tech support back-and-forth required, no third-party apps, and no fancy tweaking with the settings involved.
Unusual and Suspicious Transactions in History
Whether you’ve just received a notification about a suspicious purchase made on your account or you have just seen an unusual transaction in your quarterly transaction history email, you should contact Venmo technical support with an email or a phone call.
It may turn out to be a simple mistake within the app, but you may also be a victim of fraud. It is easy to fall victim to the mastermind scammers of the world because Venmo’s transaction history settings are public by default.
Frequently Asked Questions
We’ve included this section to answer more questions you may have about Venmo.
Why are my transactions public?
Yes, it definitely seems strange that a PayPal-owned company would make everyone’s transaction history available to anyone out there by default. It definitely looks like more than an oversight. You see, this is a social networking app, just as it is a payment transaction tool.
Essentially, you get on Venmo to make quick transactions between friends, but also to see what they are up to, transaction and purchase-wise.
Why does Venmo want to make my transactions public?
Venmo, unlike other money transfer services, has a social media focus. Some users like the idea of sharing their recent purchases or how much money they make. Other users simply do not care who sees their transactions.
Sometimes transactions can be funny, other times they can prove a point (let’s say you paid someone back).
Regardless of the situation, Venmo is consistently growing in popularity. For those who don’t want to show off their transaction history, follow the steps above to keep this information private.
Viewing Your Venmo History
Viewing your transaction and purchase history is easy on Venmo, and you and your friends can do it. If you want to keep your transactions secret, change the settings to private. Simple as that.
Do you still use Venmo? Do you care about your transaction privacy? What do you think about the public transaction default privacy settings? Feel free to discuss this in the comments section below.


Disclaimer: Some pages on this site may include an affiliate link. This does not effect our editorial in any way.